Logging into CONNECT for the First Time
Note
The CONNECT Administration Guide assumes the initial account setup has already been completed. For details regarding the initial account setup, refer to the Initial Account Setup section of this guide.
Adding a New User
Note
If Single Sign On (SSO) is used, the steps below are not required. Please contact your local IT Administrator for SSO login instructions.
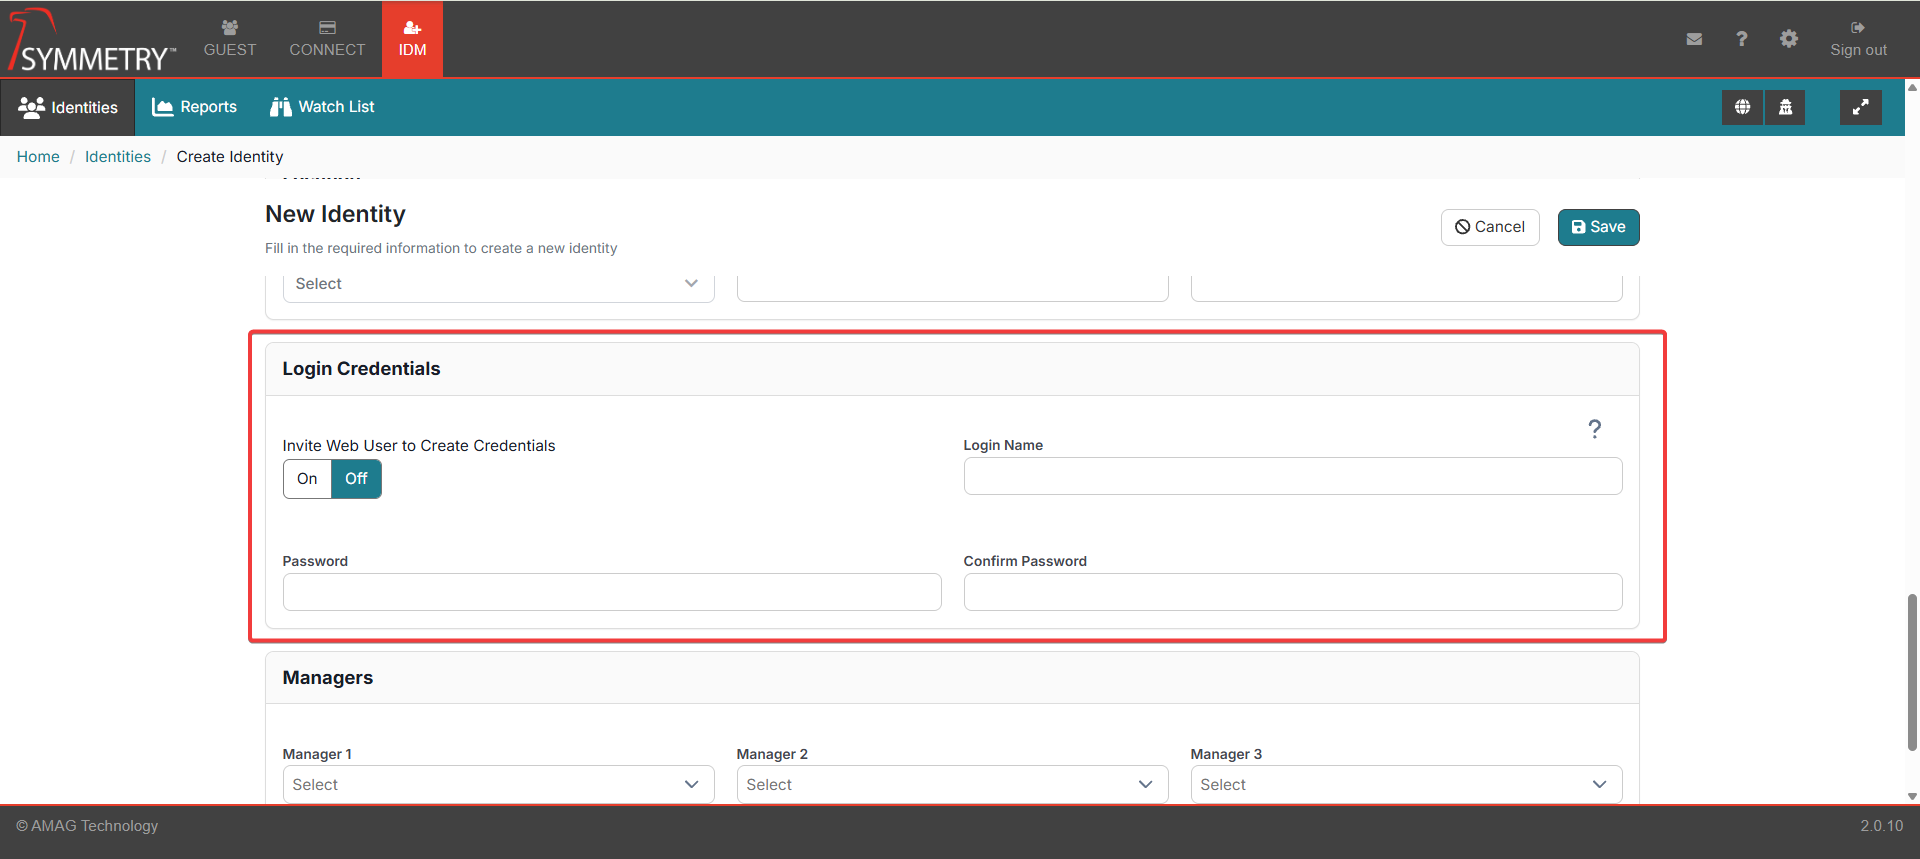
New users are added via the IDM tab. This process is covered in detail in the IDM Administration Guide (Adding Identities into IDM). As a brief overview of this process, a user name and password can be entered manually, or an email can be sent to the user allowing them to create their own user name and password.
A sample registration email can be seen below. The user can click the link within the email, which then allows the user to register an identity (create a user name and password).
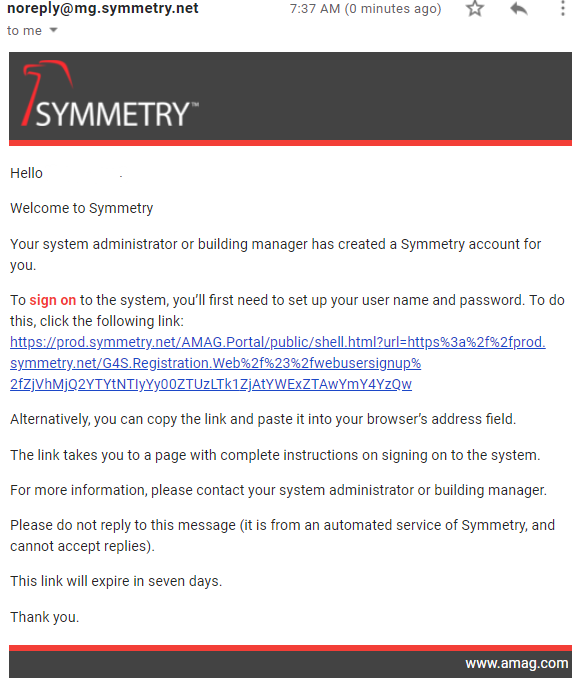
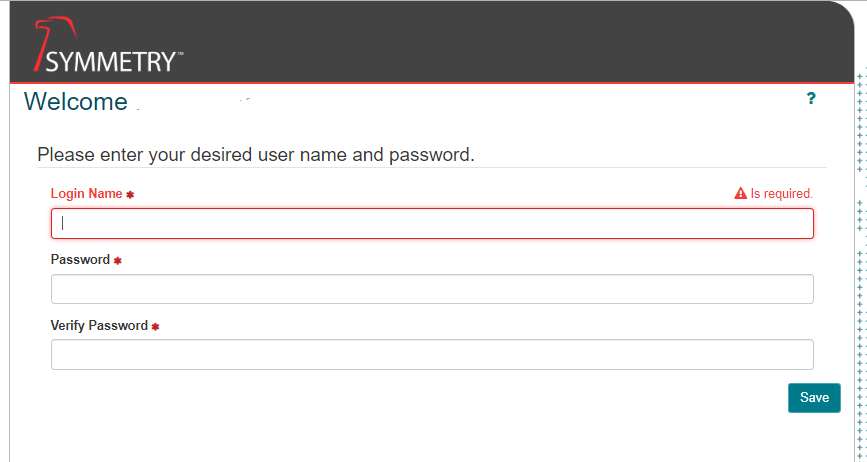
The user is able to register by clicking the link in the email. The user is then required to provide a Login Name and Password. Click the Save button to continue the registration.
CONNECT Login Page
To log into the Application, go to https://training.symmetry.net/ (replace “training” with your own specific sub-domain) and enter your username and password.
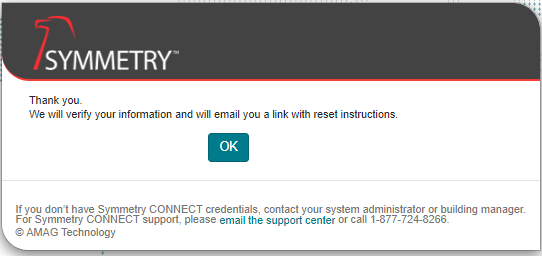
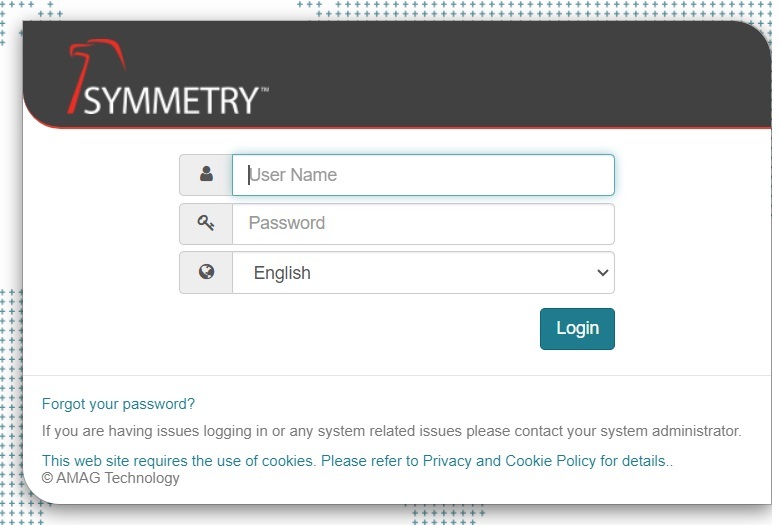
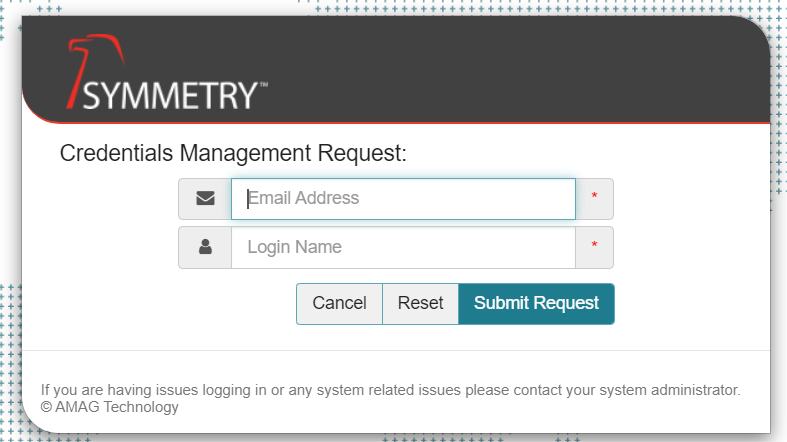
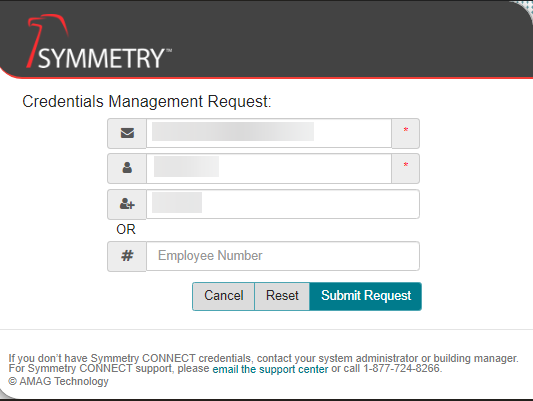
To reset your password, click the Forgot your password? link on the login page and enter the required information.
Note
The images above are dependent on whether or not your system has been configured to Use Email Address As User Name. Refer to the Settings (Group settings) for further information.
An email is sent to the user with a link that allows them to reset their password.

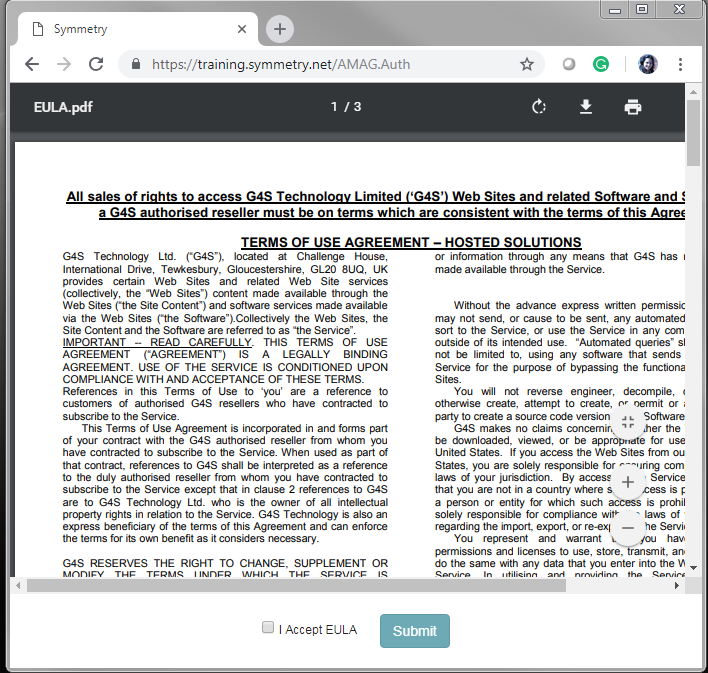
When a user logs in for the first time, they are required to read the terms and conditions of the EULA (End User License Agreement), and then select “I Accept EULA” and click the Submit button.
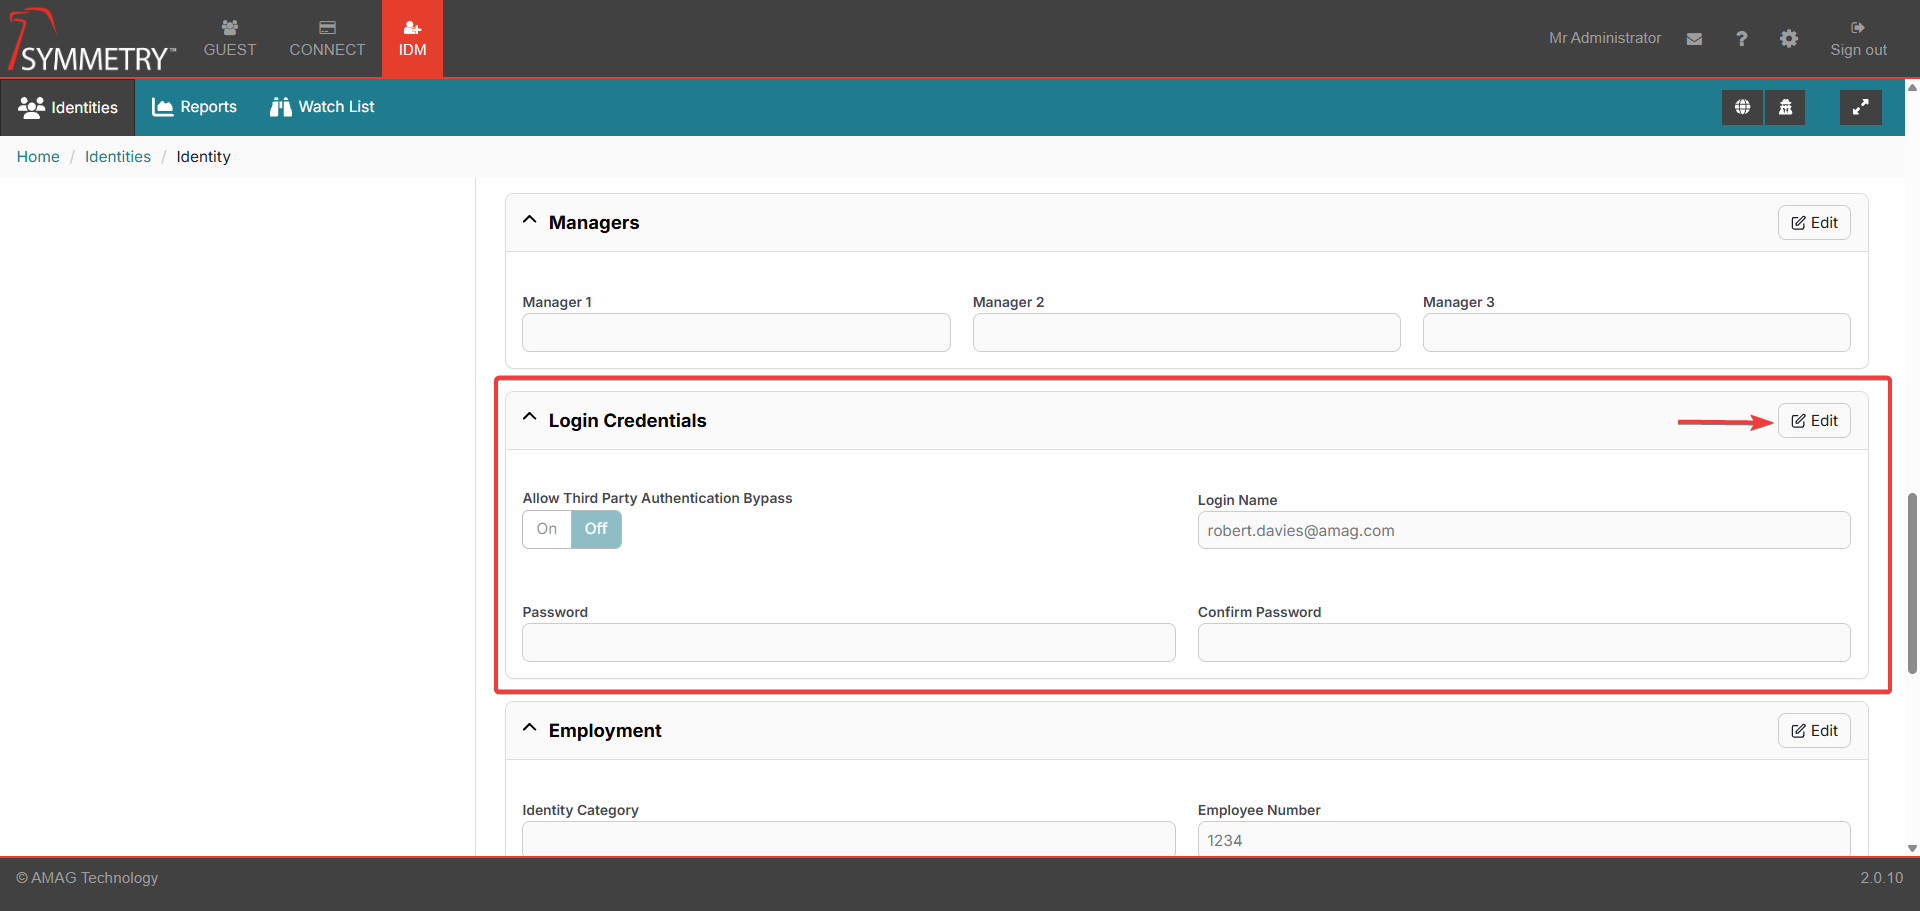
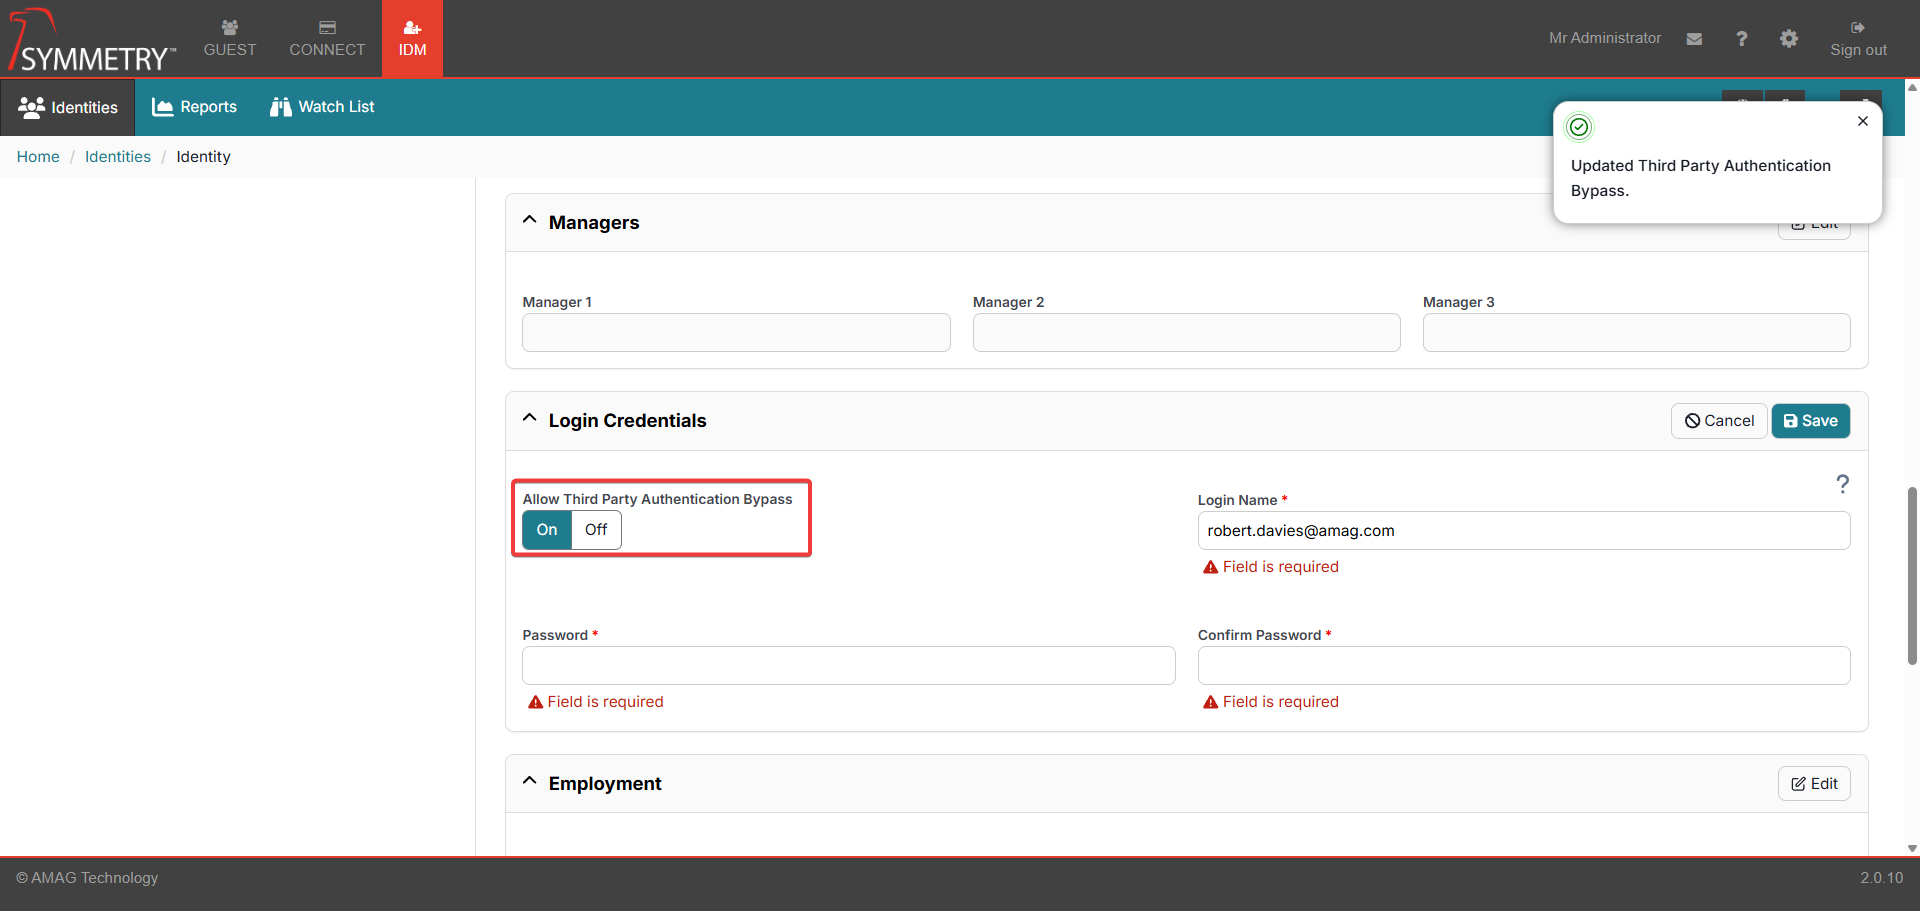
Warning
It is strongly recommended setting at least one account to Allow SSO Bypass while configuring SSO to prevent the risk of being locked out of your account. This can be done via the the IDM tab once SSO has been enabled by the following steps:
Select an identity in the Identities tab
Navigate to the Login Credentials section,
Ensure Allow Third Party Authentication Bypass is set to On
Main Menu
The default launch screen is displayed with the Home ribbon (Menu) bar. The main menu options are GUEST and/or CONNECT and IDM (Identity Management) depending on what services have been enabled during the initial set up by AMAG. The logged-in user is also displayed, along with the message indicator and sign out button, to allow the user to log out of the application.
Note
If GUEST or CONNECT is not enabled for this specific account the specific tab will not be visible.
Clicking on the user name will display the User Profile. The user can amend their preferred language and add / edit their manager delegate. Refer to IDM Identities section for further information.
Clicking on the messages icon will display any recent configuration changes.
Clicking on the ? icon will take the user to the SYMMETRY CONNECT / GUEST / IDM ONLINE HELP document.

Note
Menu options for each user are limited based on the user role assigned to them. Only a system administrator can see all the menus and submenus.
Menu | Description |
|---|---|
IDM | Submenus within the IDM tab enable a system administrator to add and manage users, as well as configure certain aspects of the application including adding Companies and Buildings to the system. Consult the IDM Administration Guide for more detail. |
Connect | Submenus on the CONNECT tab allow for access/credential requests, approval and assignment. The ability to conduct audits and run reports is also supported. Extensive configuration of all facets of the system are available under the Connect Settings submenu in the Configuration section. |
Guest (If the user has GUEST as part of the system package) | Submenus on the GUEST tab include visitor registration, check-in and check-out. Extensive configuration of all facets of the visitor management life cycle are available under the Guest Settings submenu in the Configuration section. |
CONNECT Ribbon Sub-Menus

Menu | Description |
|---|---|
Dashboard | The dashboard is configurable, displaying different data based on the user role of the user that is currently logged in. The dashboard typically provides summarized information of interest to the user, such as the status of current audits, upcoming access and credential expirations, access groups that need to be assigned to an approver/rule etc. |
My Audits | Provided Audit is activated in Configuration, Access Control Representative (ACR) Users are able to complete their scheduled area audits on the My Audits page of the solution. |
Uploads | Allows User to upload a csv file of multiple credential assignments. |
My Groups | ACR users are able to view the Access Groups assigned to them on the My Groups page, allowing the ACR to see a list of all Identities assigned to each group, along with the number of readers and managers for the group. |
Reports | Users with reporting privileges are able to run various reports related to different aspects of the system. |
ACRM | Users with the correct rights can access the ACRM tab (Access Control and Rights Management) to manage the ACRM function. |
Requests | Access and Credentials are requested and approved under the Requests sub-menu. |
 | Translate Icon (only visible to administrators) is used for language translations. Note: English is the only language currently available within the solution. This icon currently has no functionality. |
 | ACRM Proxy button (only available to CONNECT Admins, ACR Admins and ACRMs) is used in the following scenarios to impersonate ACRMs or ACRs for the purposes of completing their tasks if they are unavailable:
Click on the icon and start typing the name of the identity you wish to impersonate. You should be able to select from any ACRM or ACR - subject to 'Company Partitioning By Data' rules - that is not already proxy to another Identity. NoteAll actions taken while impersonating another user are clearly visible in the relevant reports. |
 | Toggle to full-screen mode. Press the same button to exit the full-screen mode. |
Note
CONNECT menu options are only available to user accounts that have the relevant user role associated with them.