Requesting Access
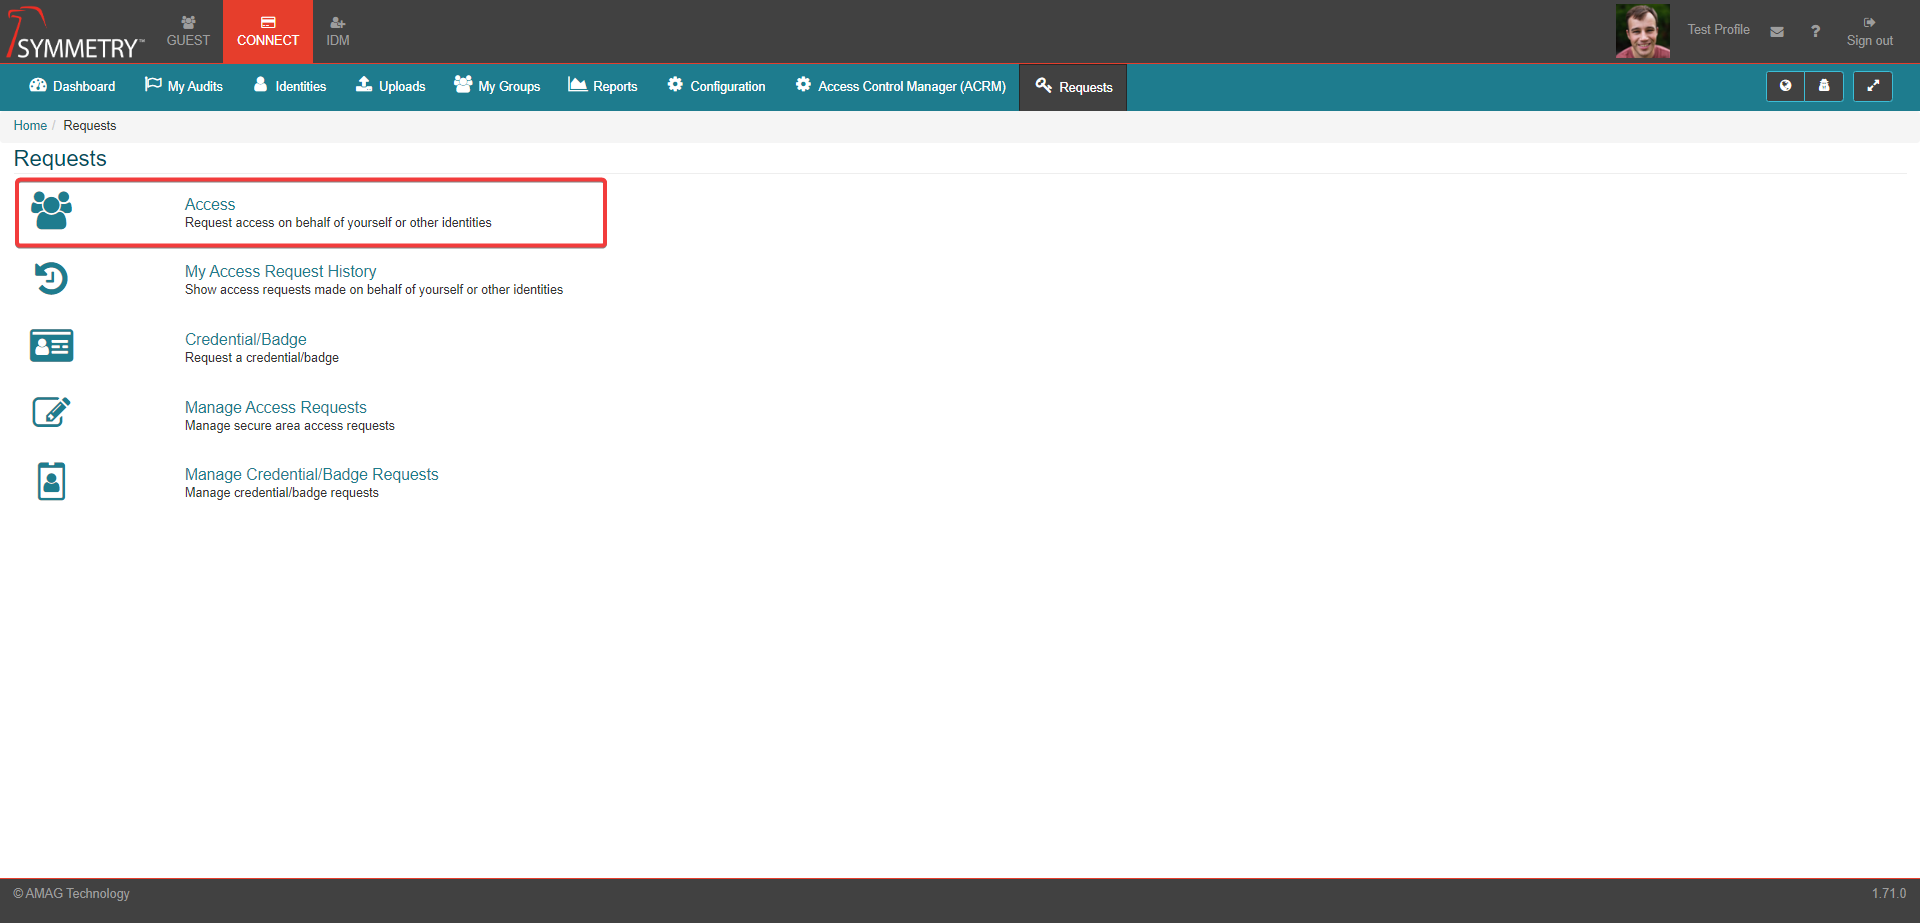
Requesting access can be done by any identity that can access the system. The Access request options are available via the CONNECT > Requests tab.
Requesting Access for Yourself
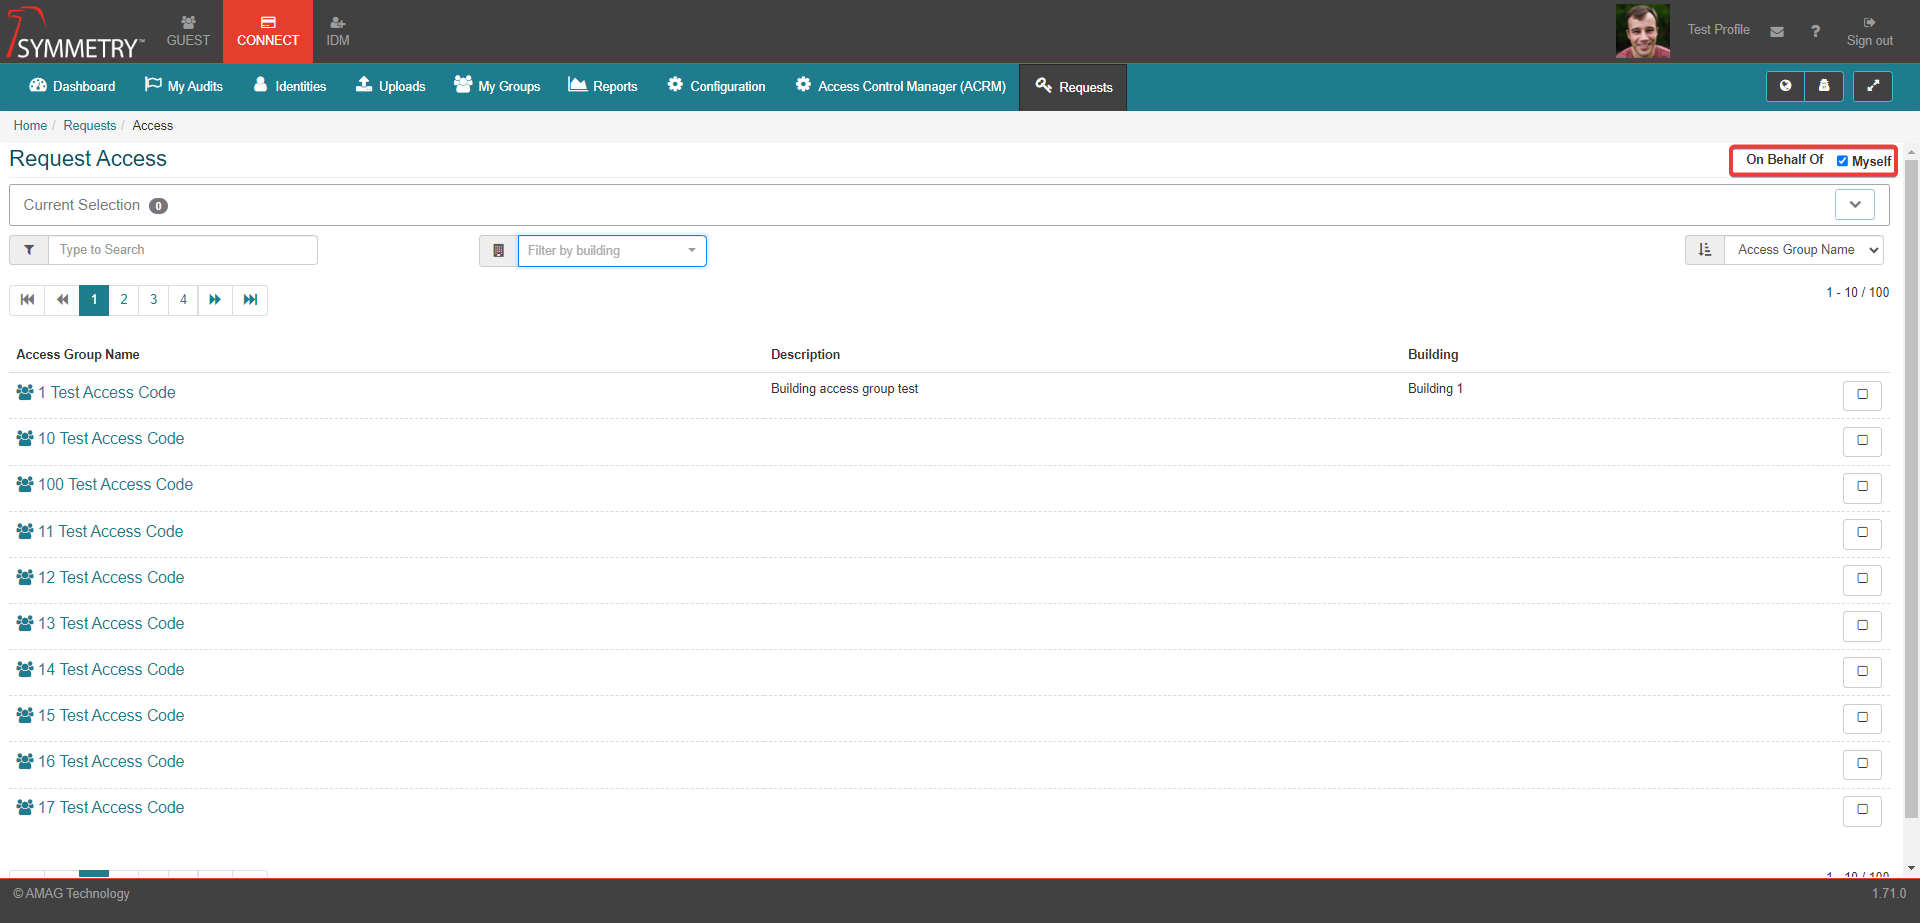
Confirmation of the requesting access for yourself will be confirmed by the On Behalf Of Myself tick box being selected as shown in the image below.
To Request access:
Click on the CONNECT tab.
Select the Requests tab.
Note
If a identity does not have a defined role in CONNECT, then the Requests tab will be the only tab that is visible.

From the Requests menu, select the Access tab.
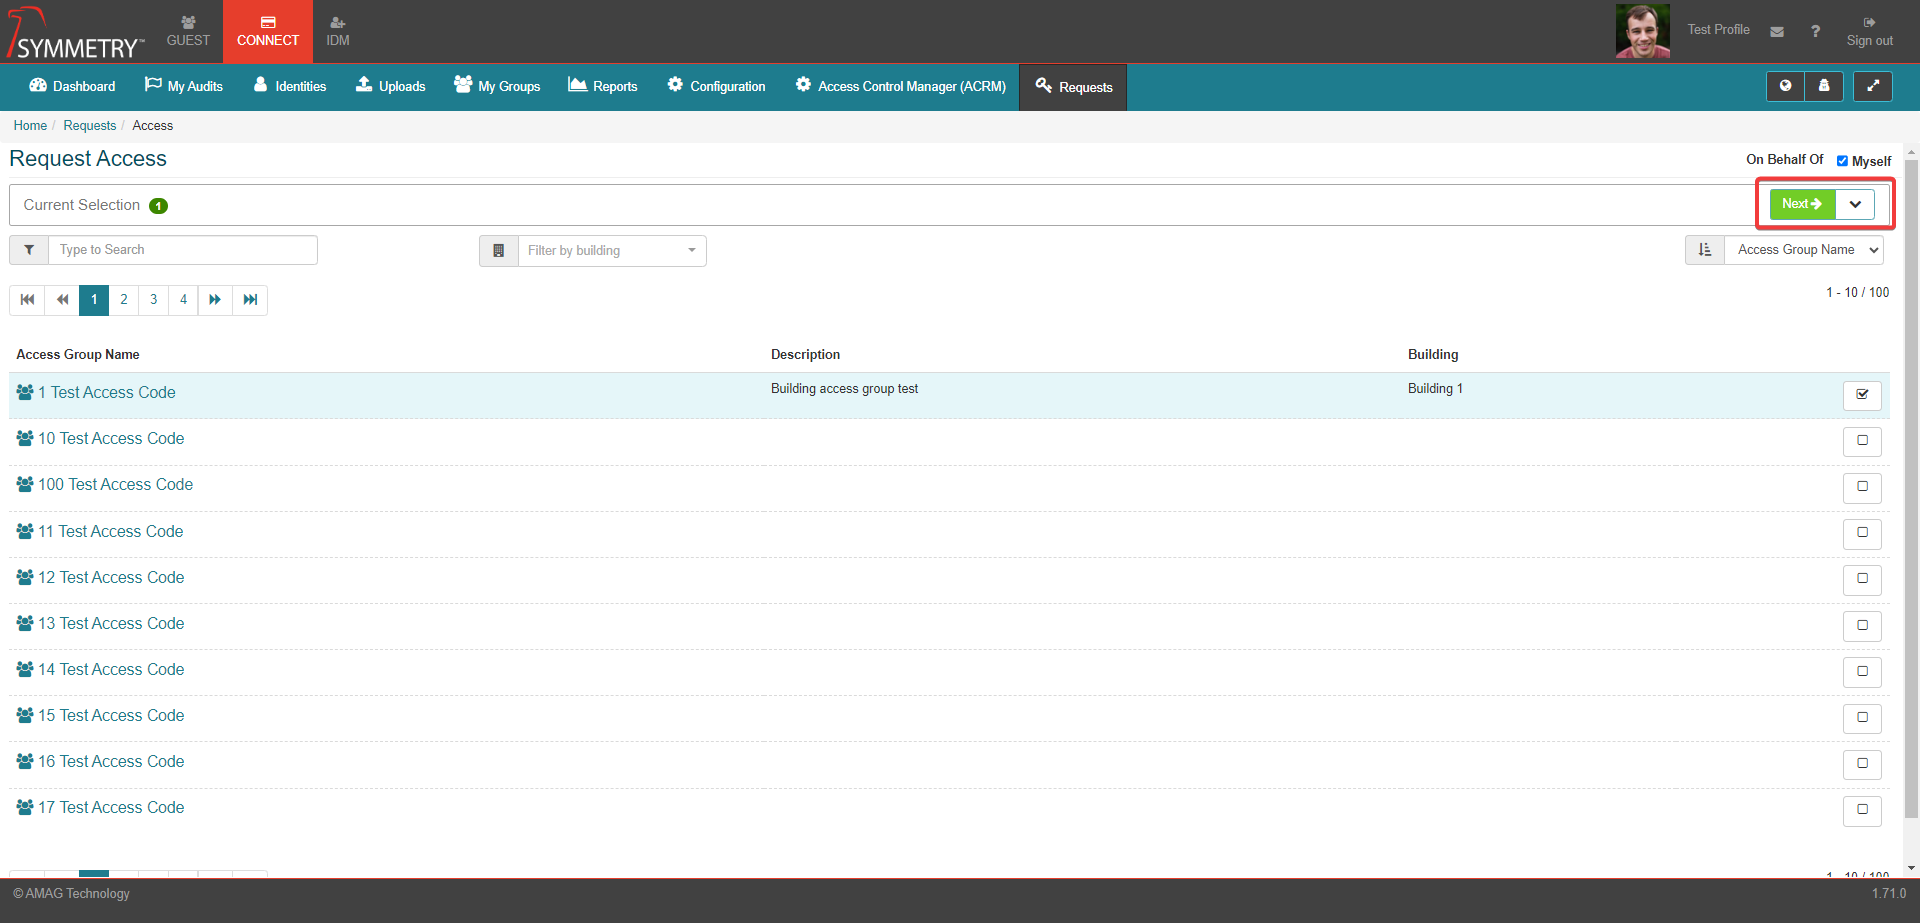
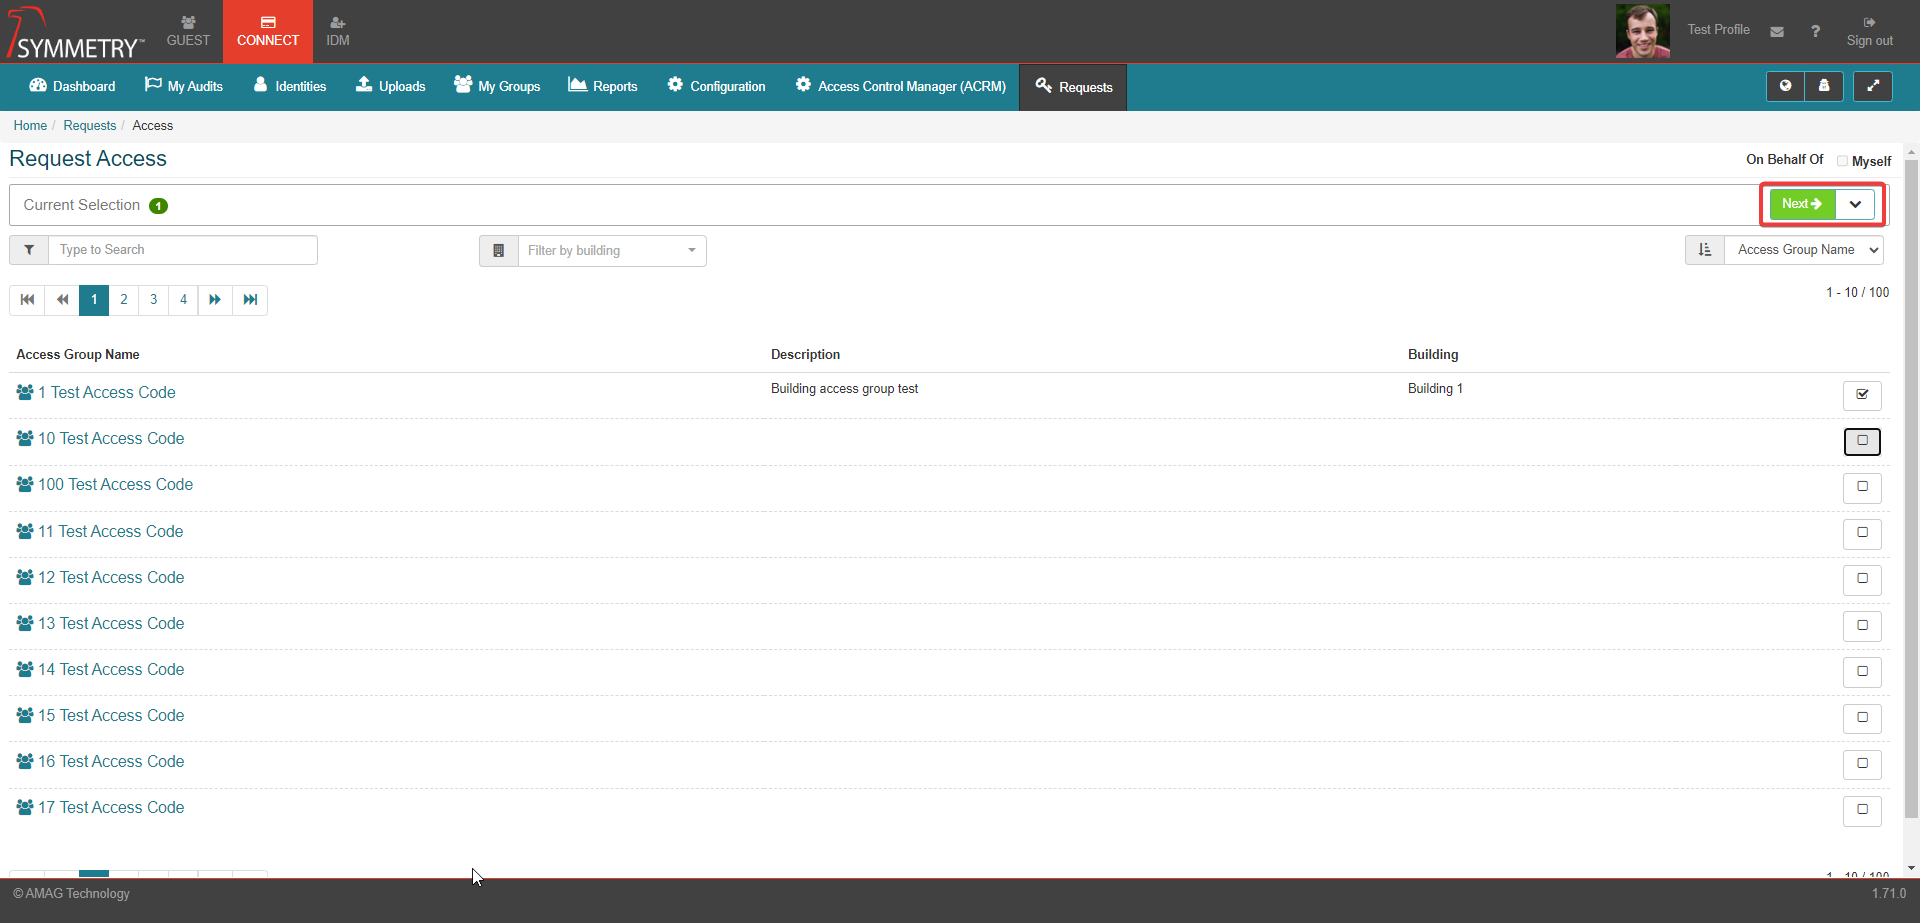
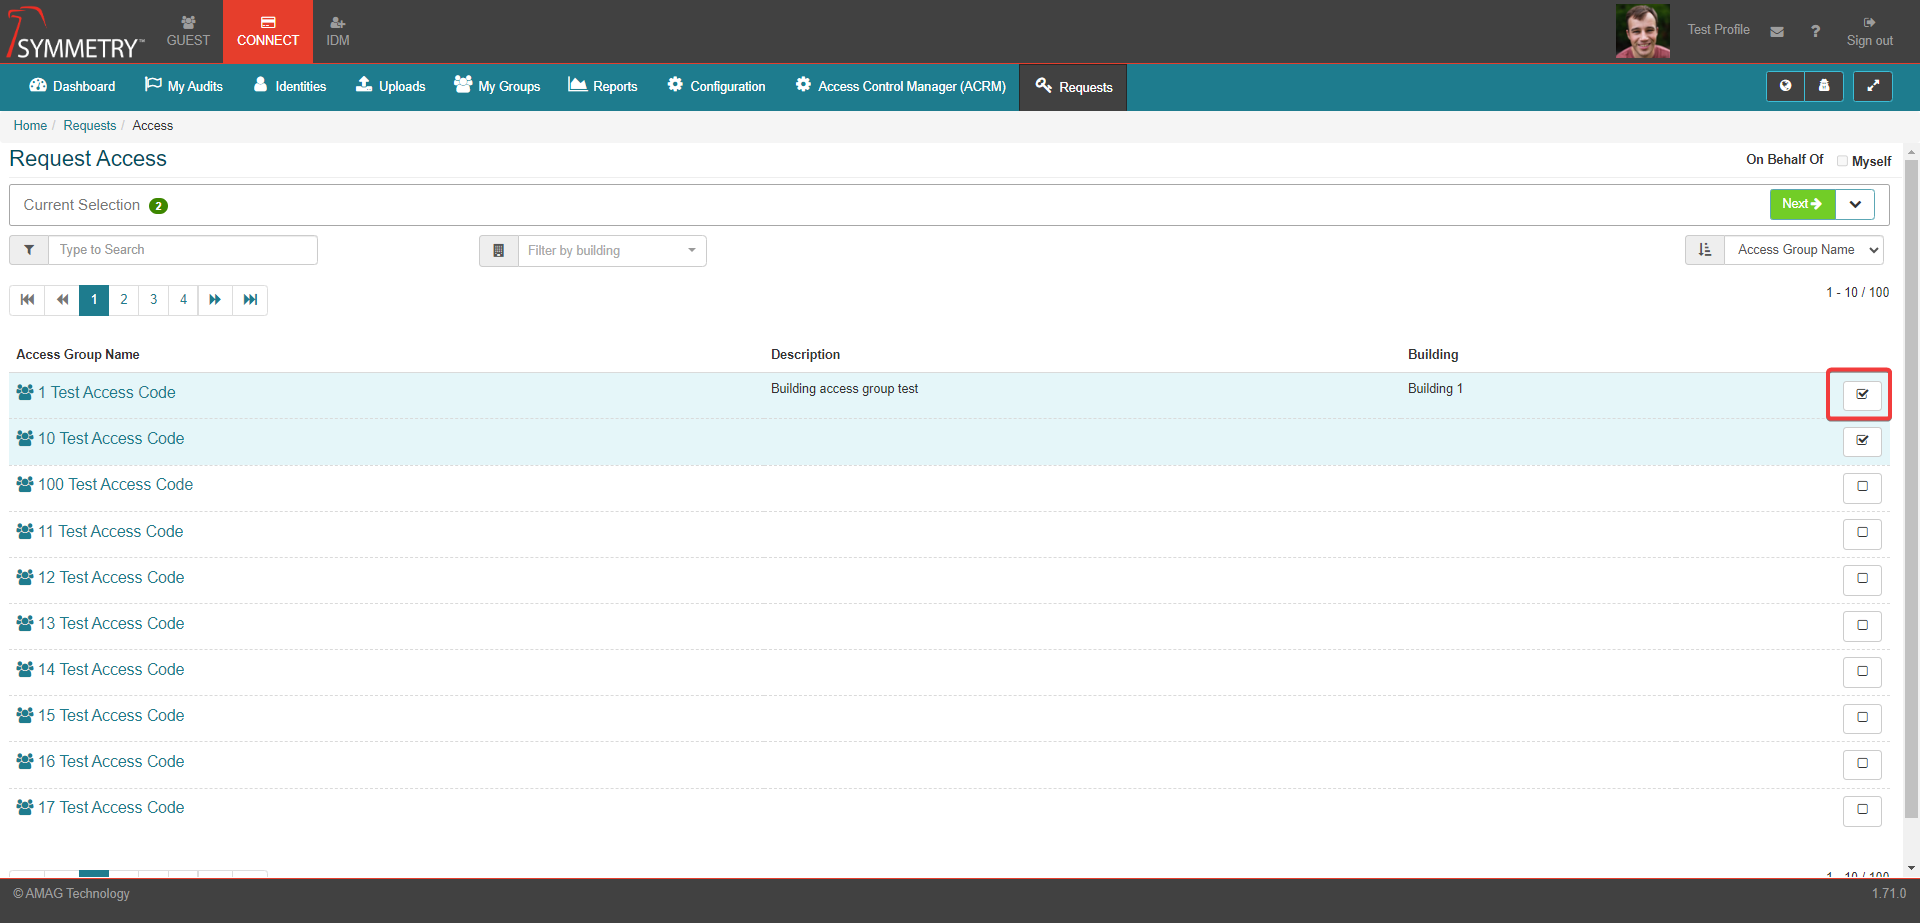
On the Request Access page, select the Access Groups you want to request using the check boxes on the right side.
Note
Multiple selections can be made within this field if required.
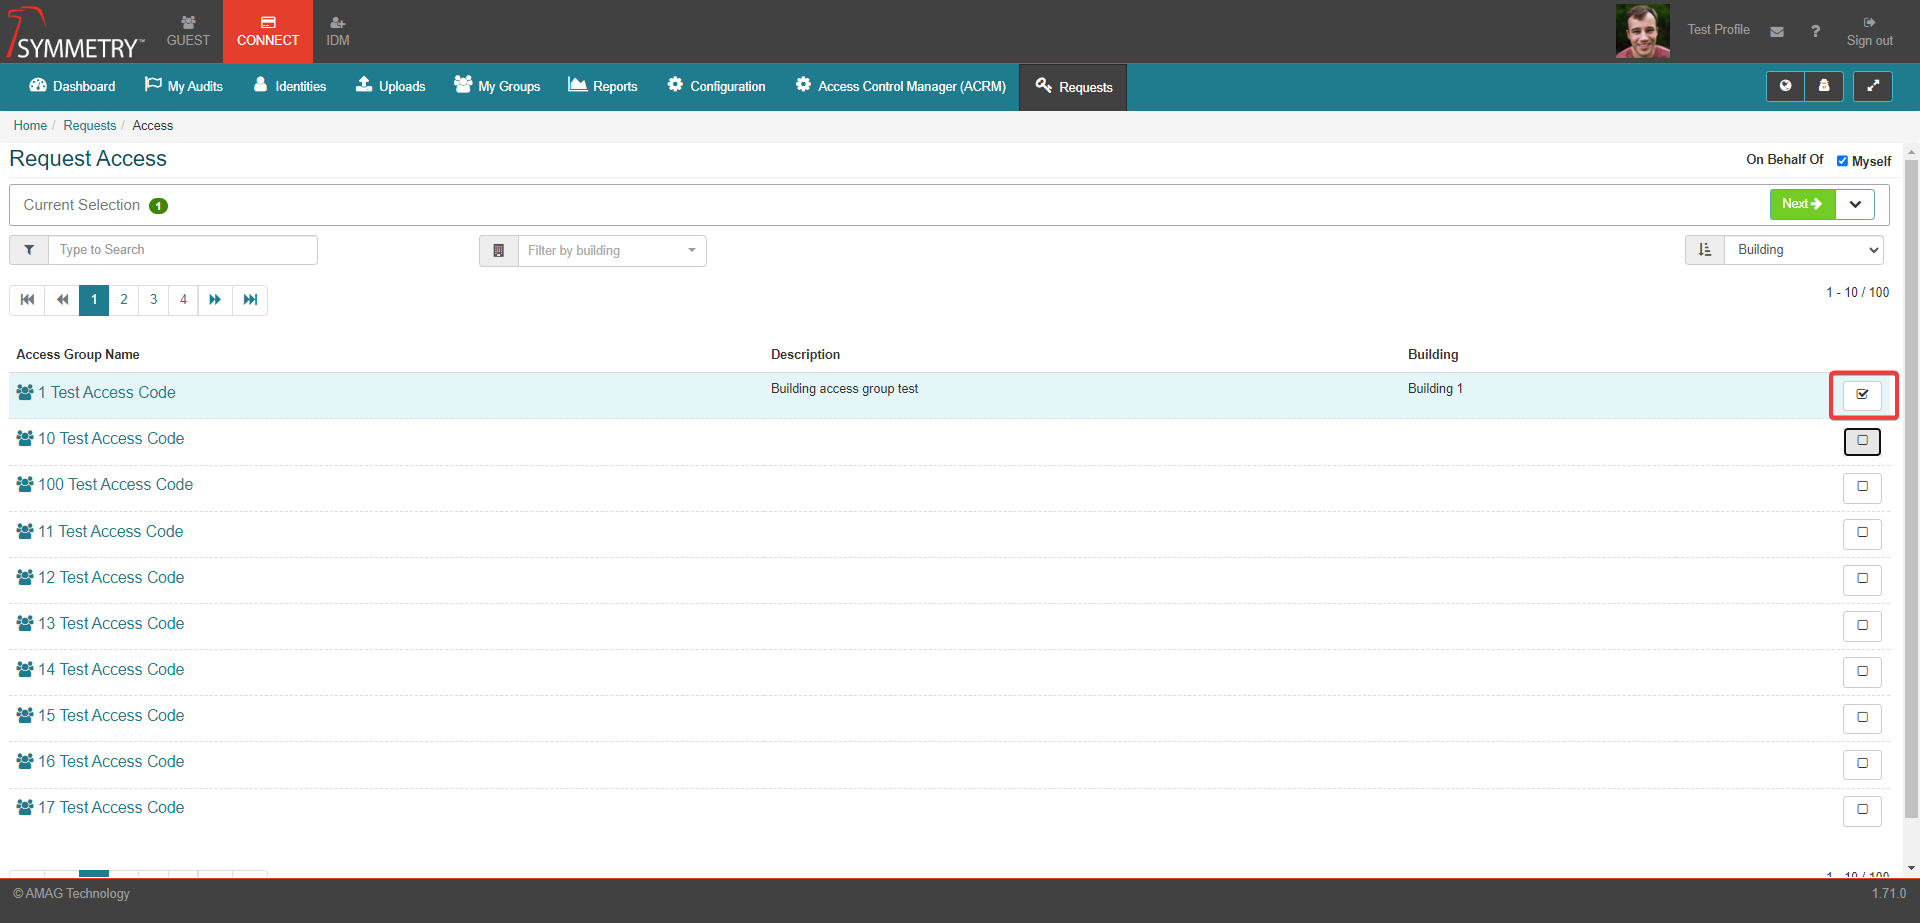
Click the Next button to proceed.
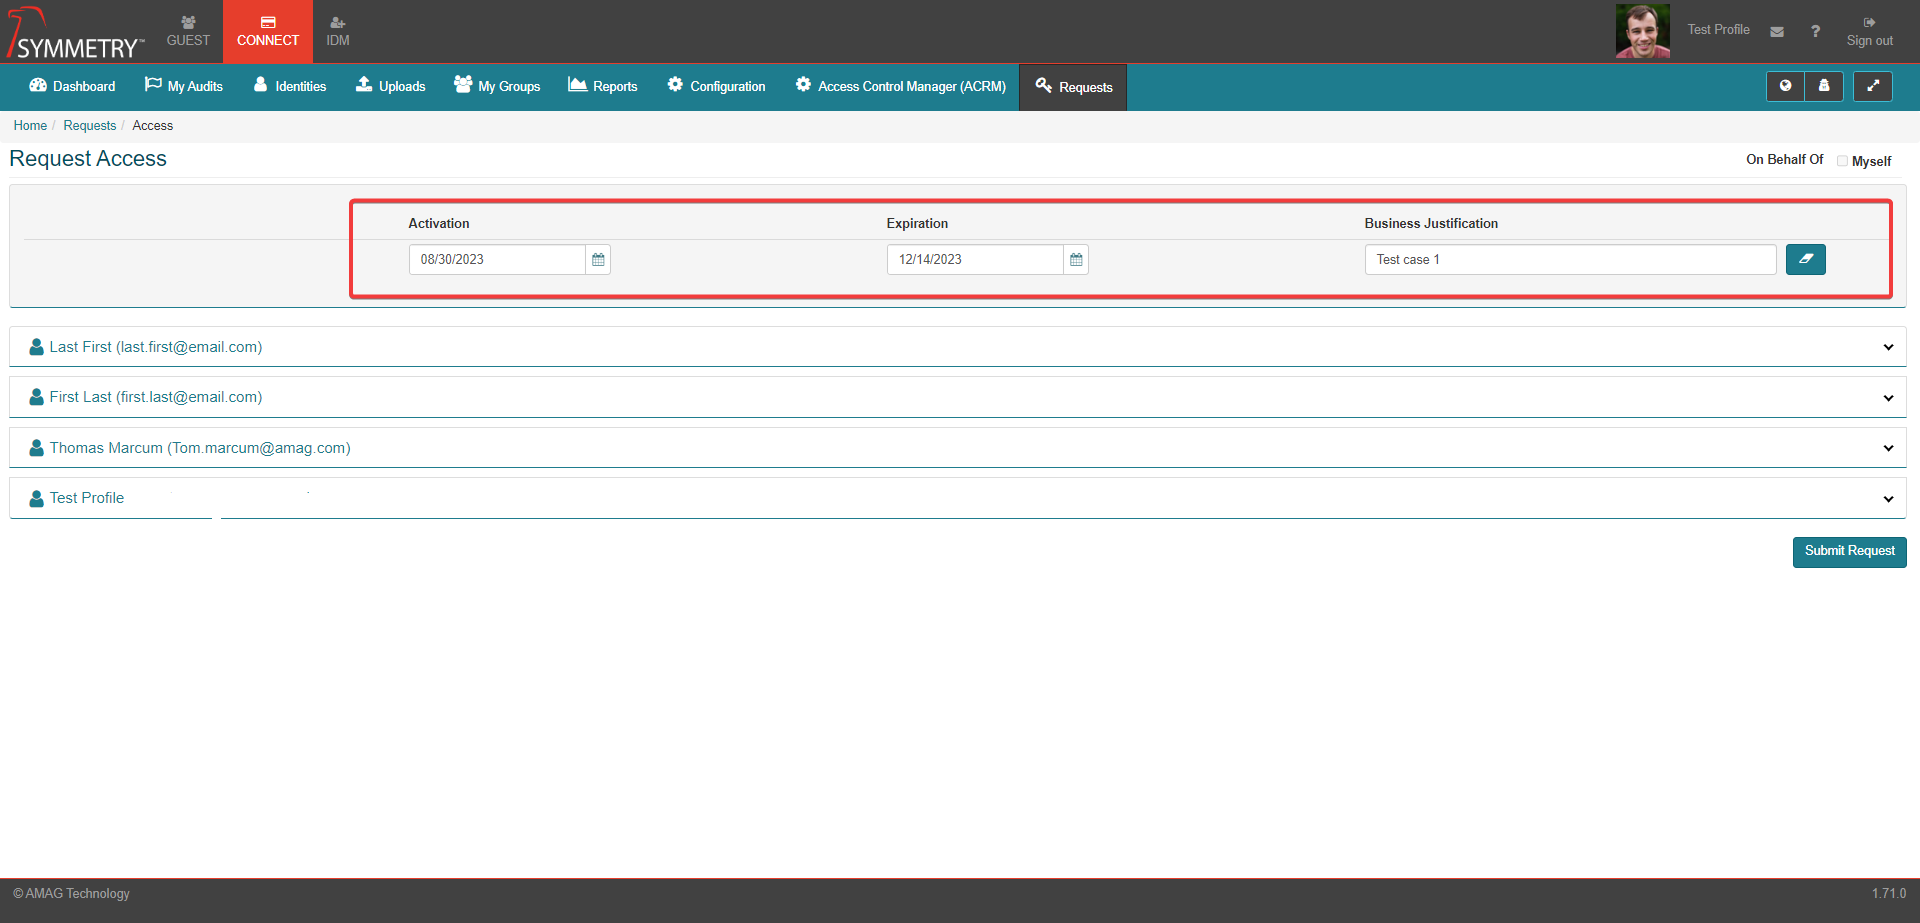
Then enter the following information:
Activation Date: This is the date the activation will become active
Expiration Date: The date the access is needed until
Business Justification: The reason that the access is needed
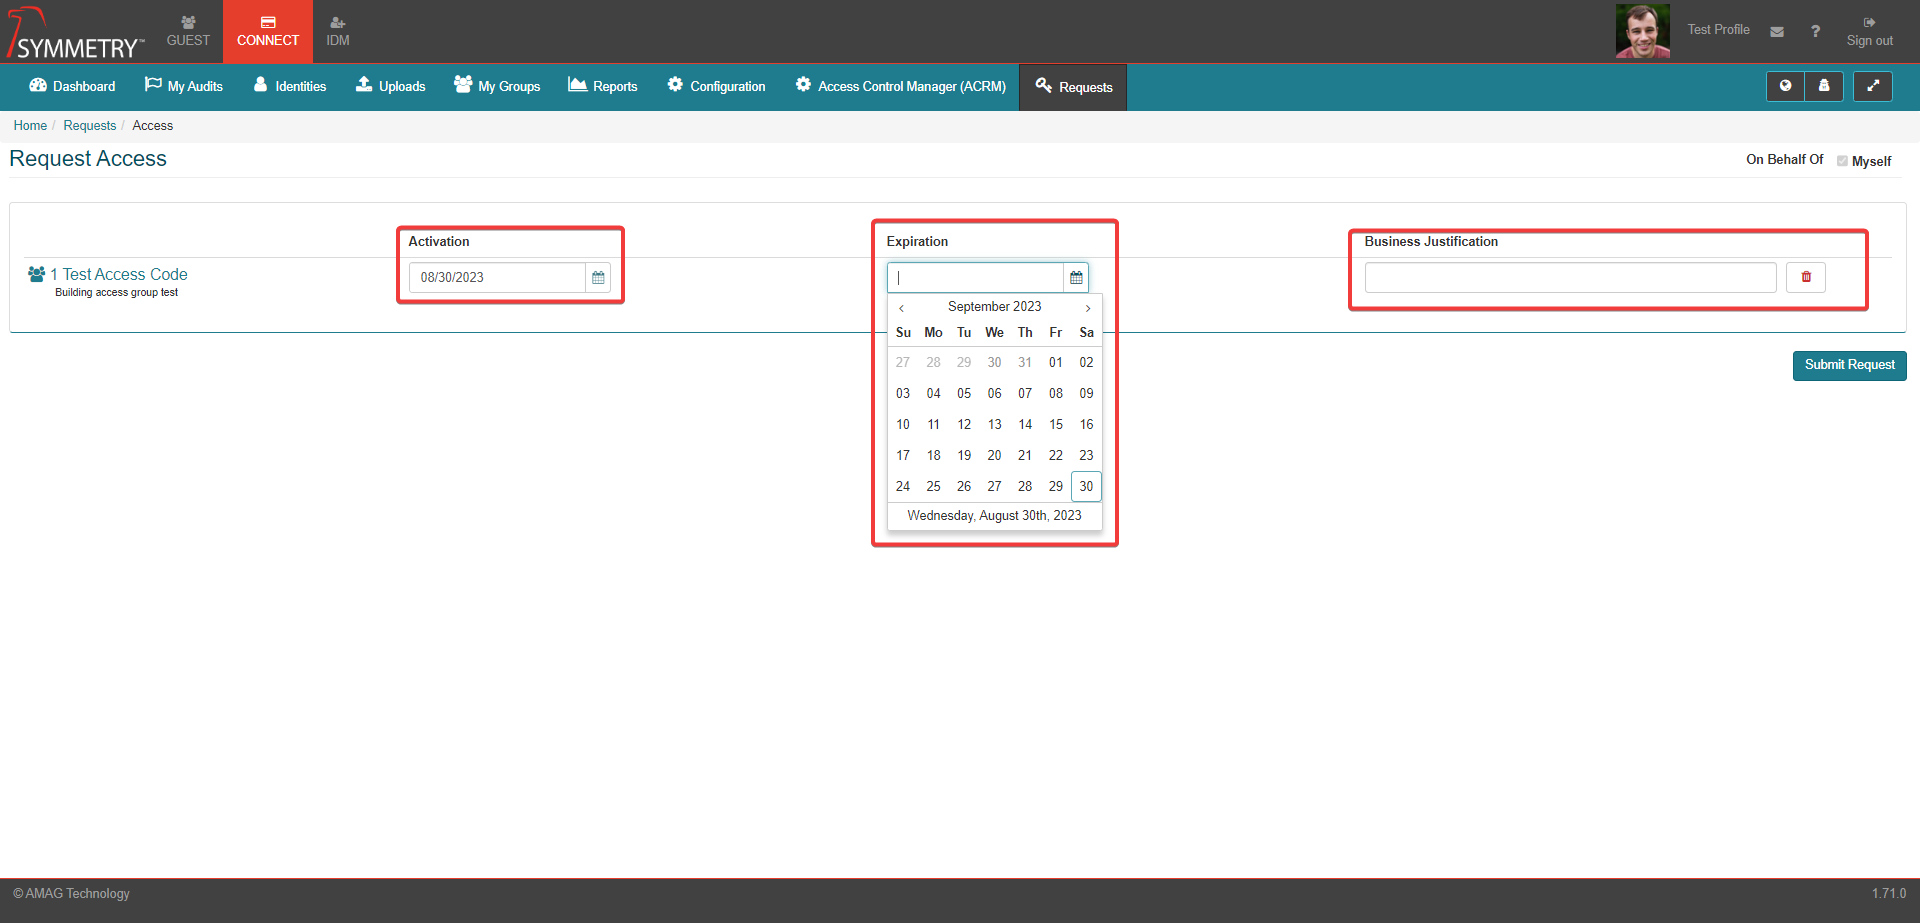
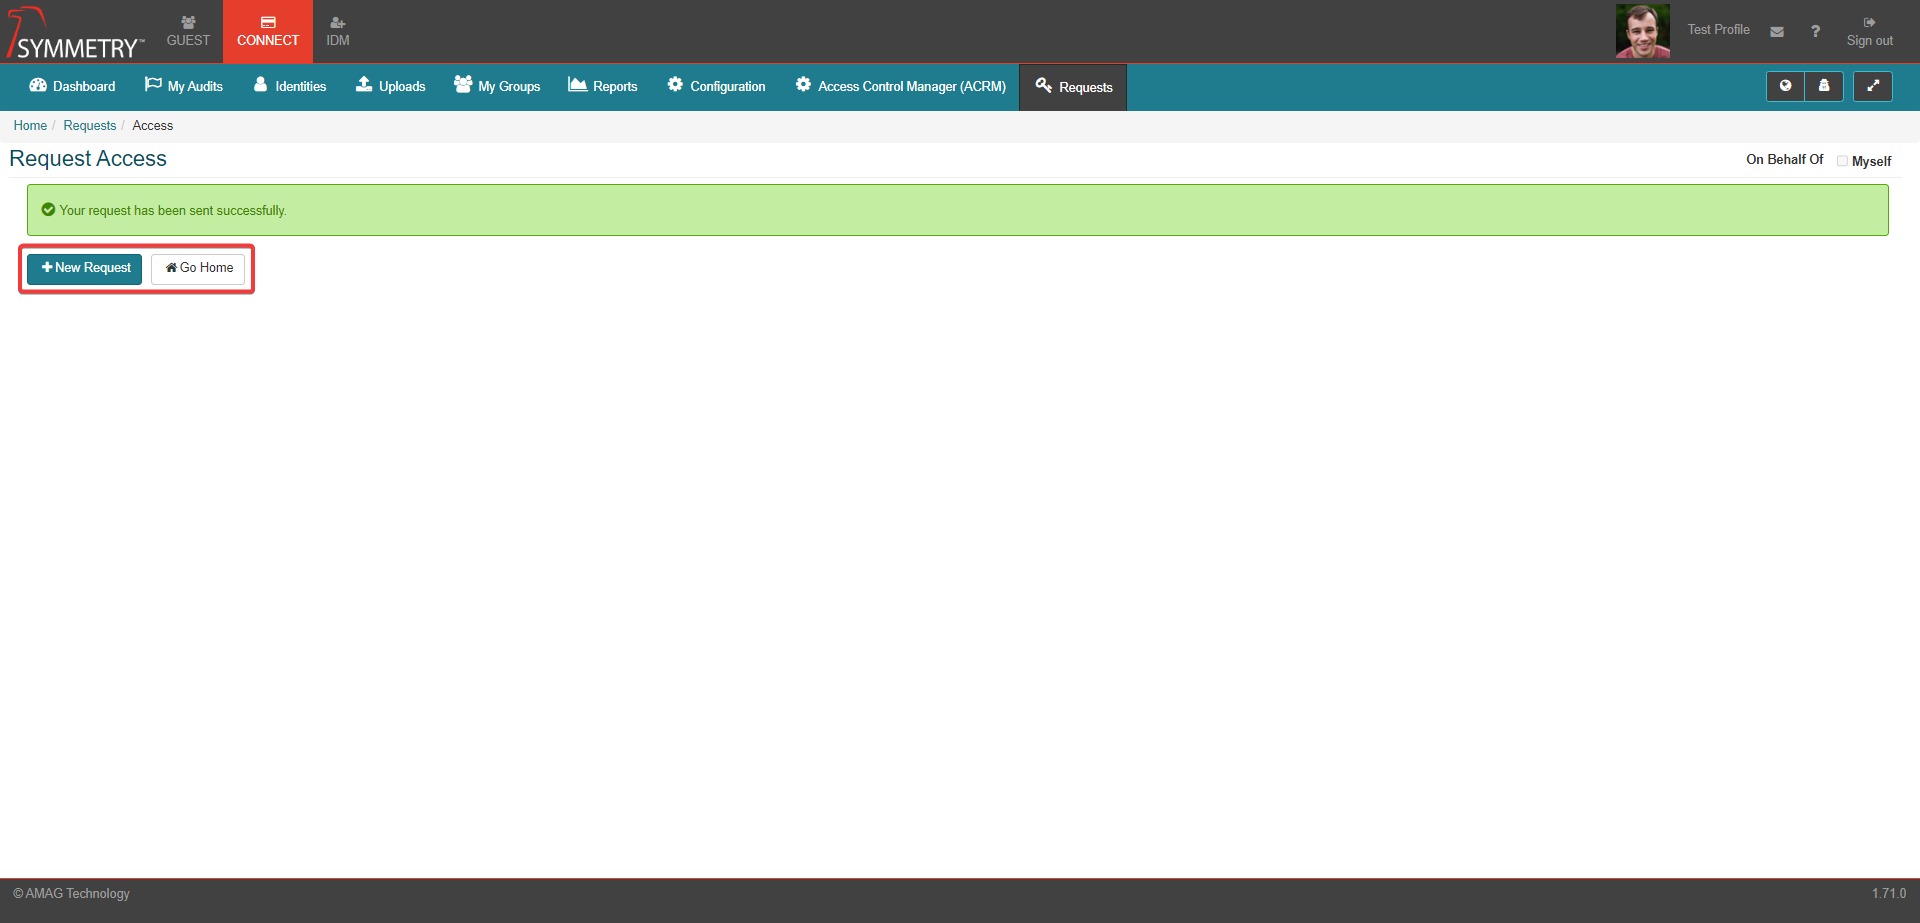
Click the Submit Request when complete.

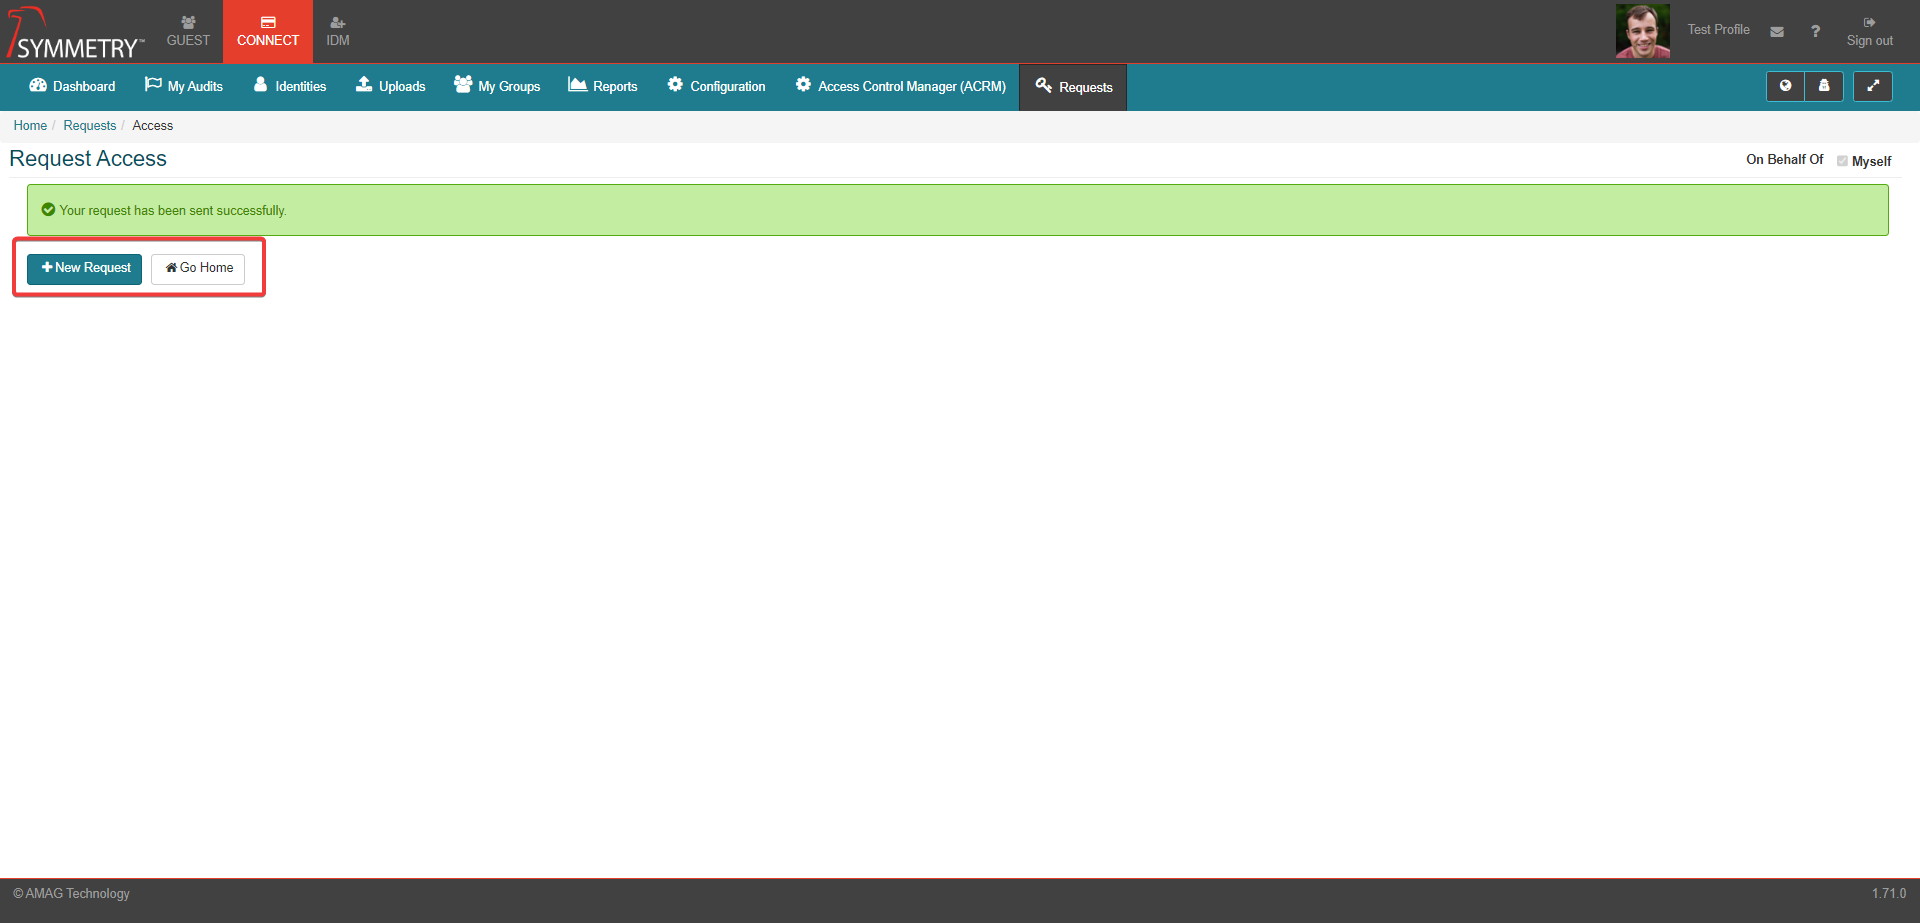
The user then has the option to either create a New Request or Go Home by clicking the appropriate button.
Requesting Access On Behalf Of Others
To Request access on behalf of others:
Click on the CONNECT tab.
Click the Requests tab.
On the Requests page, make sure the On Behalf Of Myself tick box is unchecked.
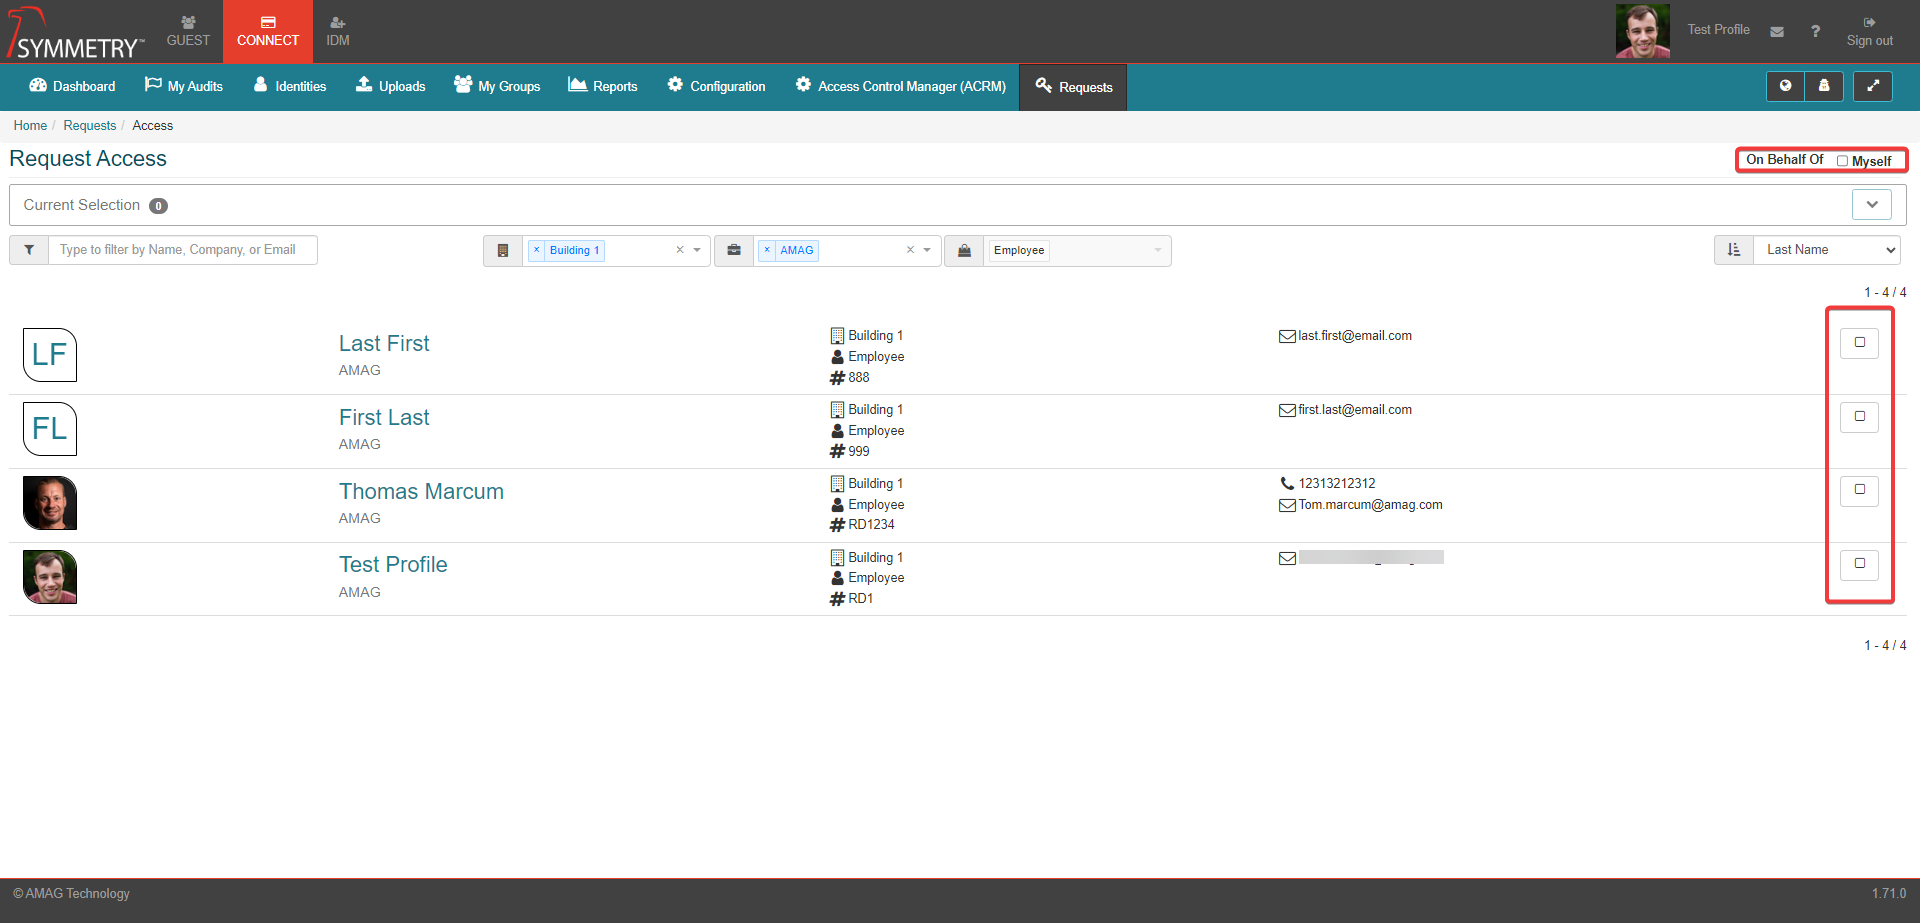
On the Request Access page, select the one or more identities that you would like to request access for select selecting the checkbox on the right of the screen.
Note
Multiple selections can be made within this field if required.
Once all identities are selected, click the Next button.
Next select the Access Groups you want to request using the check boxes on the right side.
Note
Multiple selections can be made within this field if required.
Click the Next button to proceed.
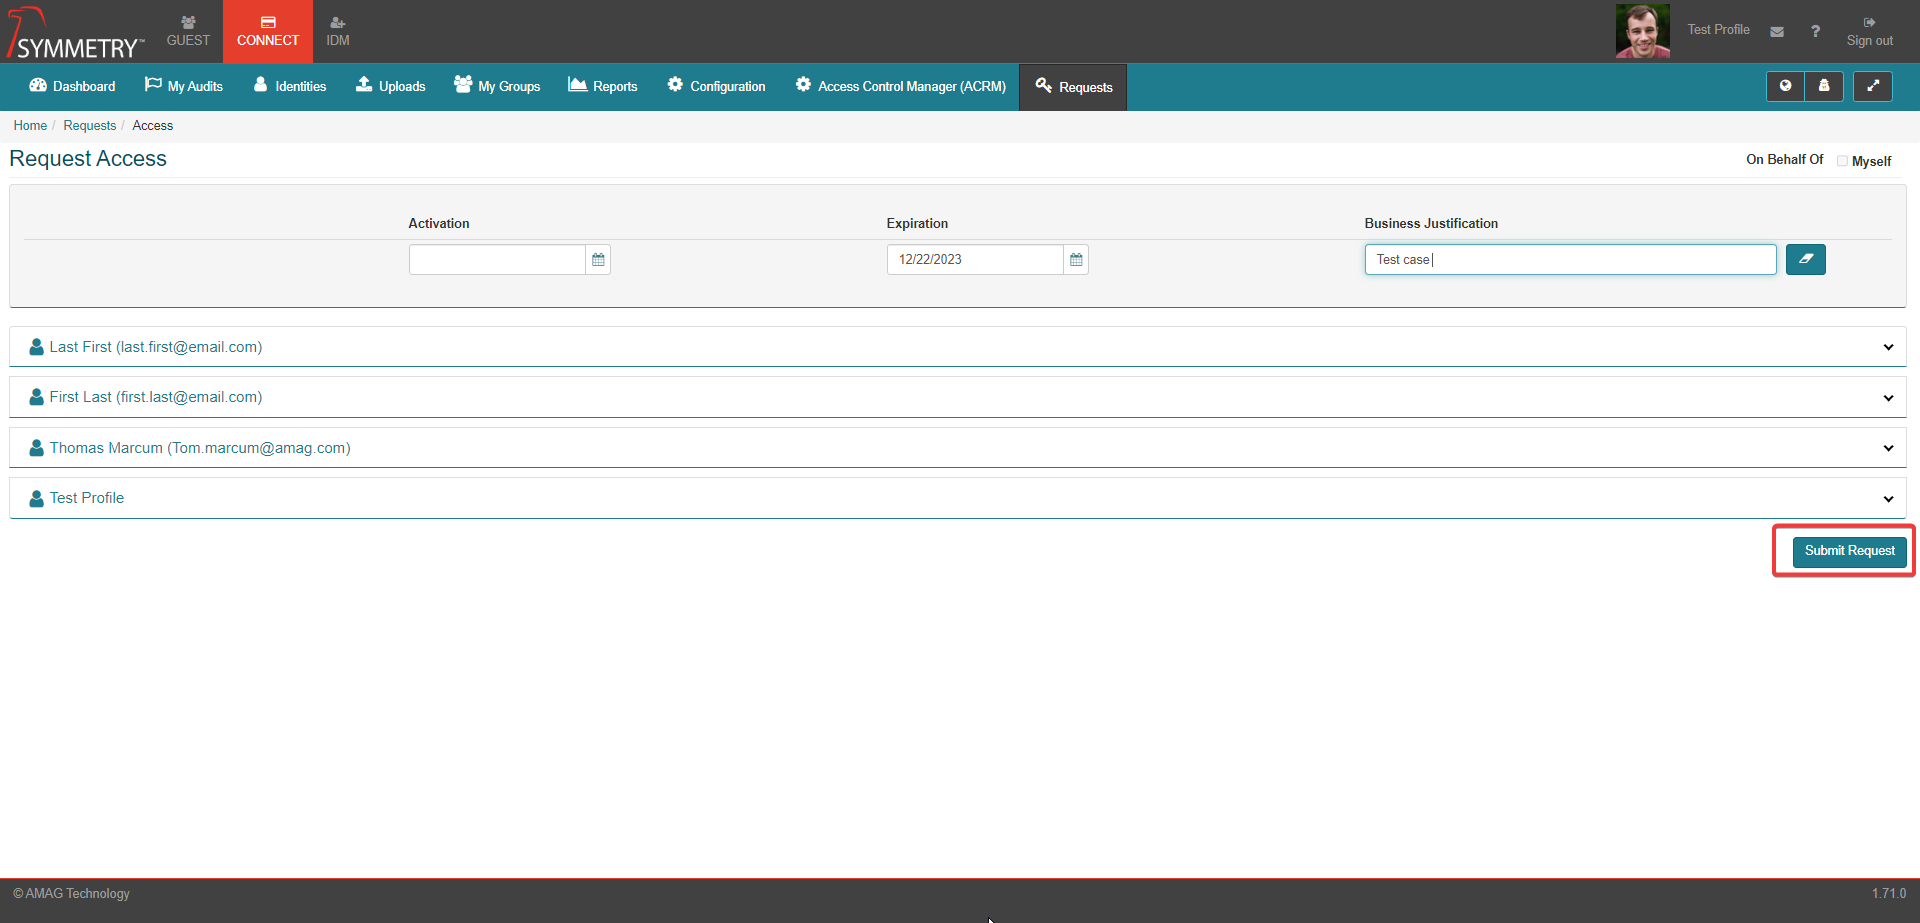
If all the selected identities require the same activation date, expiration date and business justification. Then enter the following information in the fields as shown in the image below. This information will be copied to all identities selected.
Activation Date: This is the date the activation will become active.
Expiration Date: The date the access is needed until.
Business Justification: The reason that the access is needed.
If the selected identities require different activation date, expiration date and business justification. Then each identity can be expanded and the information can be submitted against each single identity. As shown in the image below. Enter the following information for each identity.
Activation Date: This is the date the activation will become active.
Expiration Date: The date the access is needed until.
Business Justification: The reason that the access is needed.
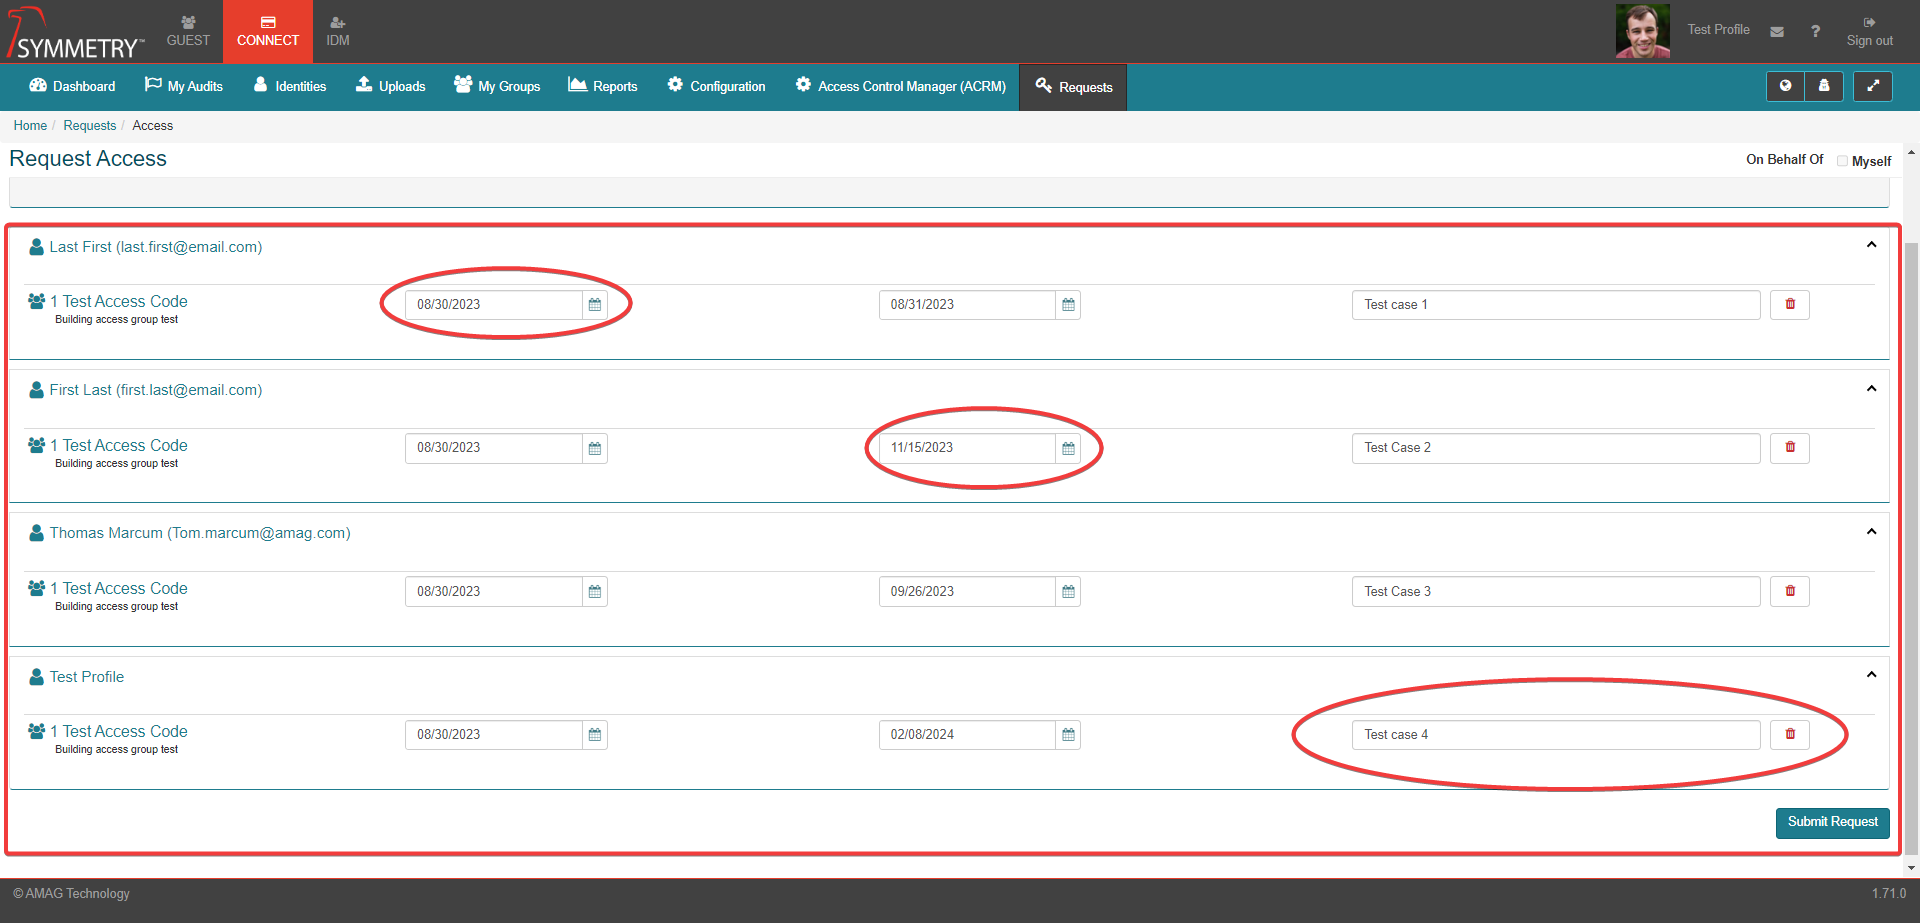
Click the Submit Request button when complete.
The user then has the option to either create a New Request or Go Home by clicking the appropriate button.