New Visit

Note
Visit Type is configurable via the GUEST > Configuration > Visit Type Configuration page (refer to the Visit Type Configuration section for more information). New Visit tab is only displayed if Show New Visit tab ticked in Configuration > System. New Visit can also be accessed via My Visits and Reception tabs.
Note
All screenshots throughout this New Visit section are for a GUEST Admin user who also holds the Reception and Host / Host Delegate roles.
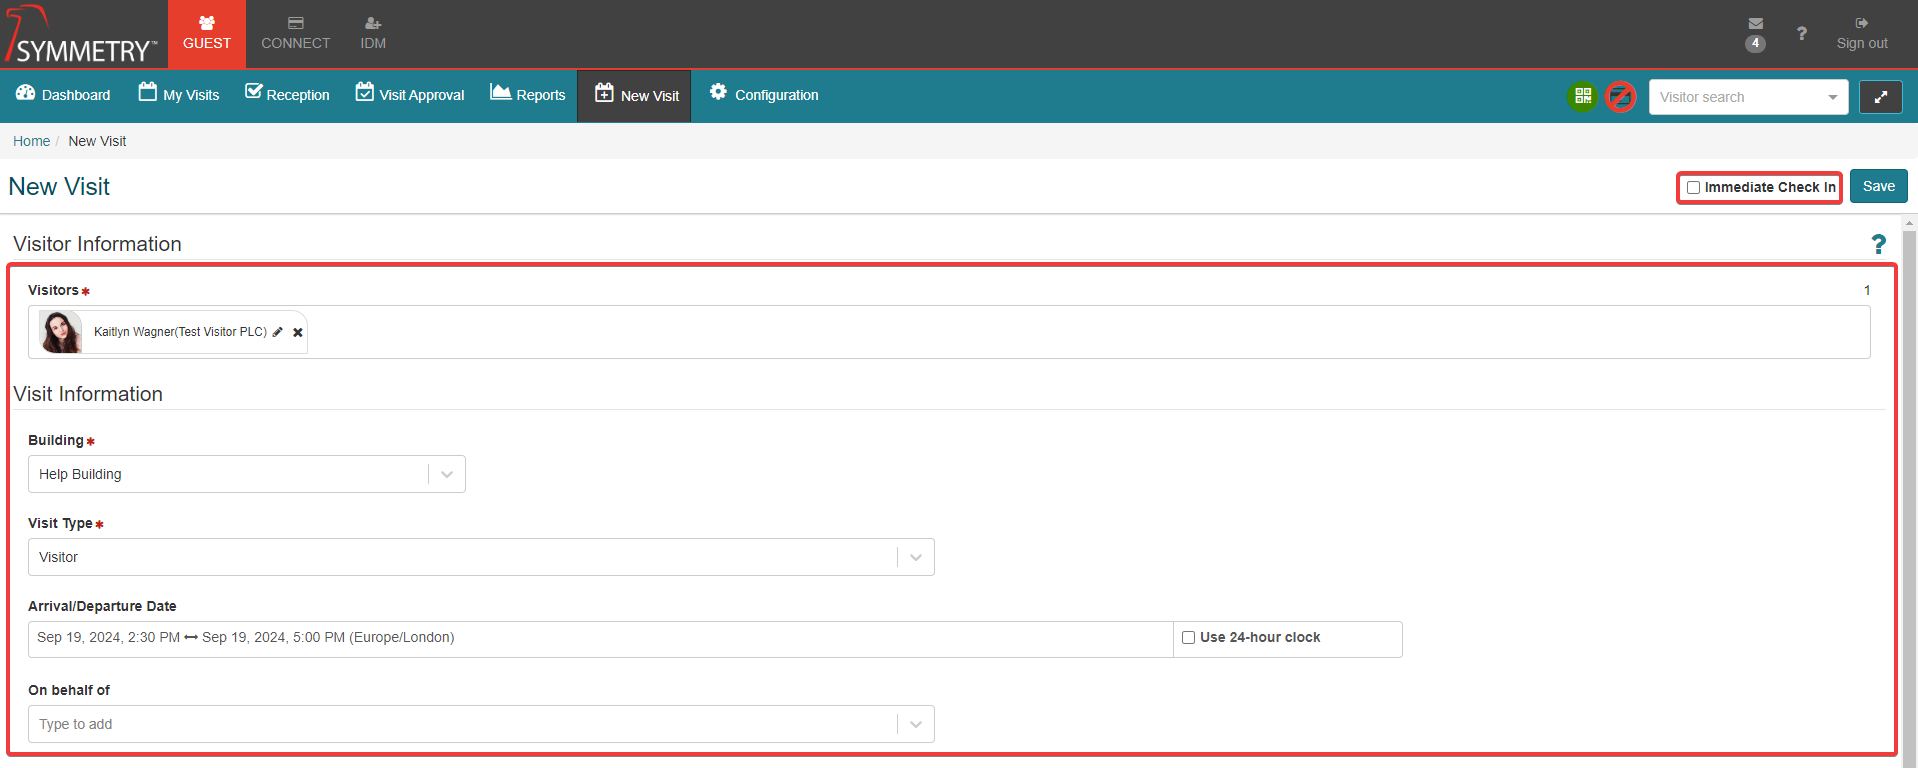
The New Visit page allows a user that holds the receptionist, host or host delegate roles to pre-register a new visit.
The fields that are displayed also as required are configured via the GUEST > Configuration > Screen Configuration page (refer to the Screen Configuration section for more information) and are customizable by building and visit type.
As a minimum, the following fields are always displayed and required:
Arrival Date & Time: The day and time that the visitor is expected to arrive
Departure Date & Time: The day and time that the visitor is expected to depart
Building: The building the visit will take place in
Note
If a Building has been made Inactive it will not be visible and cannot be selected. Refer to Building Management for further information.
Visit Type: The type of visit
Visitors: One or multiple visitors
In addition to these, role specific fields include:
Immediate Check In: Displayed next to the Save button for Reception users only. When checked this will immediately start the check-in process after the visit is registered. To be used to process a Walk-up visitor scenario. This will avoid the need to enter multiple screens or tabs.
On behalf of: Is displayed for users that have the host delegate role. This field will indicate the name of the Host that the Delegate is scheduling the visit on behalf of.
In addition to these, users that hold the Admin role can configure the following fields to either:
Hide: Not Shown
Show: Shown but not required
Required: Shown and required
These fields include:
Title: Title of the visit.
Description: Description of the visit.
Location: Location where the visit takes place.
Floor: Floor where visit will take place.
Visitor Escort: Name of Visitor Escort.
All Day Event: When checked, visit will be scheduled for the entire day so Arrival and Departure Time will be removed and will be un-editable whilst All Day Event remains ticked.
Include Calendar Entry: When checked, a .ics file can be downloaded after the visit is registered. This file can be used to add the visit to the host's calendar. Alternatively, this can be achieved by clicking the link in the email notification that the host will receive.
Visitor Uploads: Allows user to download a sample template and then upload a csv file based on that template containing First name, Last name, Company name, whether Email notification to be enabled, Email address and Citizenships for Visitors to be registered.
Badge Template: The Template for the Badge that will be provided to the Visitor.
Citizenship: The citizenship of the visitor.
Vehicle Information: Make, Model and Plate Number of vehicle that Visitor has arrived in.
Card Number: Number of visitor card that is to be used by the Visitor.
Visit Justification: Justification for the visit. Where the Visit is subject to approval, this helps the approver come to a decision.
User Defined Fields: Allows for fields configured via GUEST > User Defined Fields to be displayed. These allow for any custom information needed to be captured.
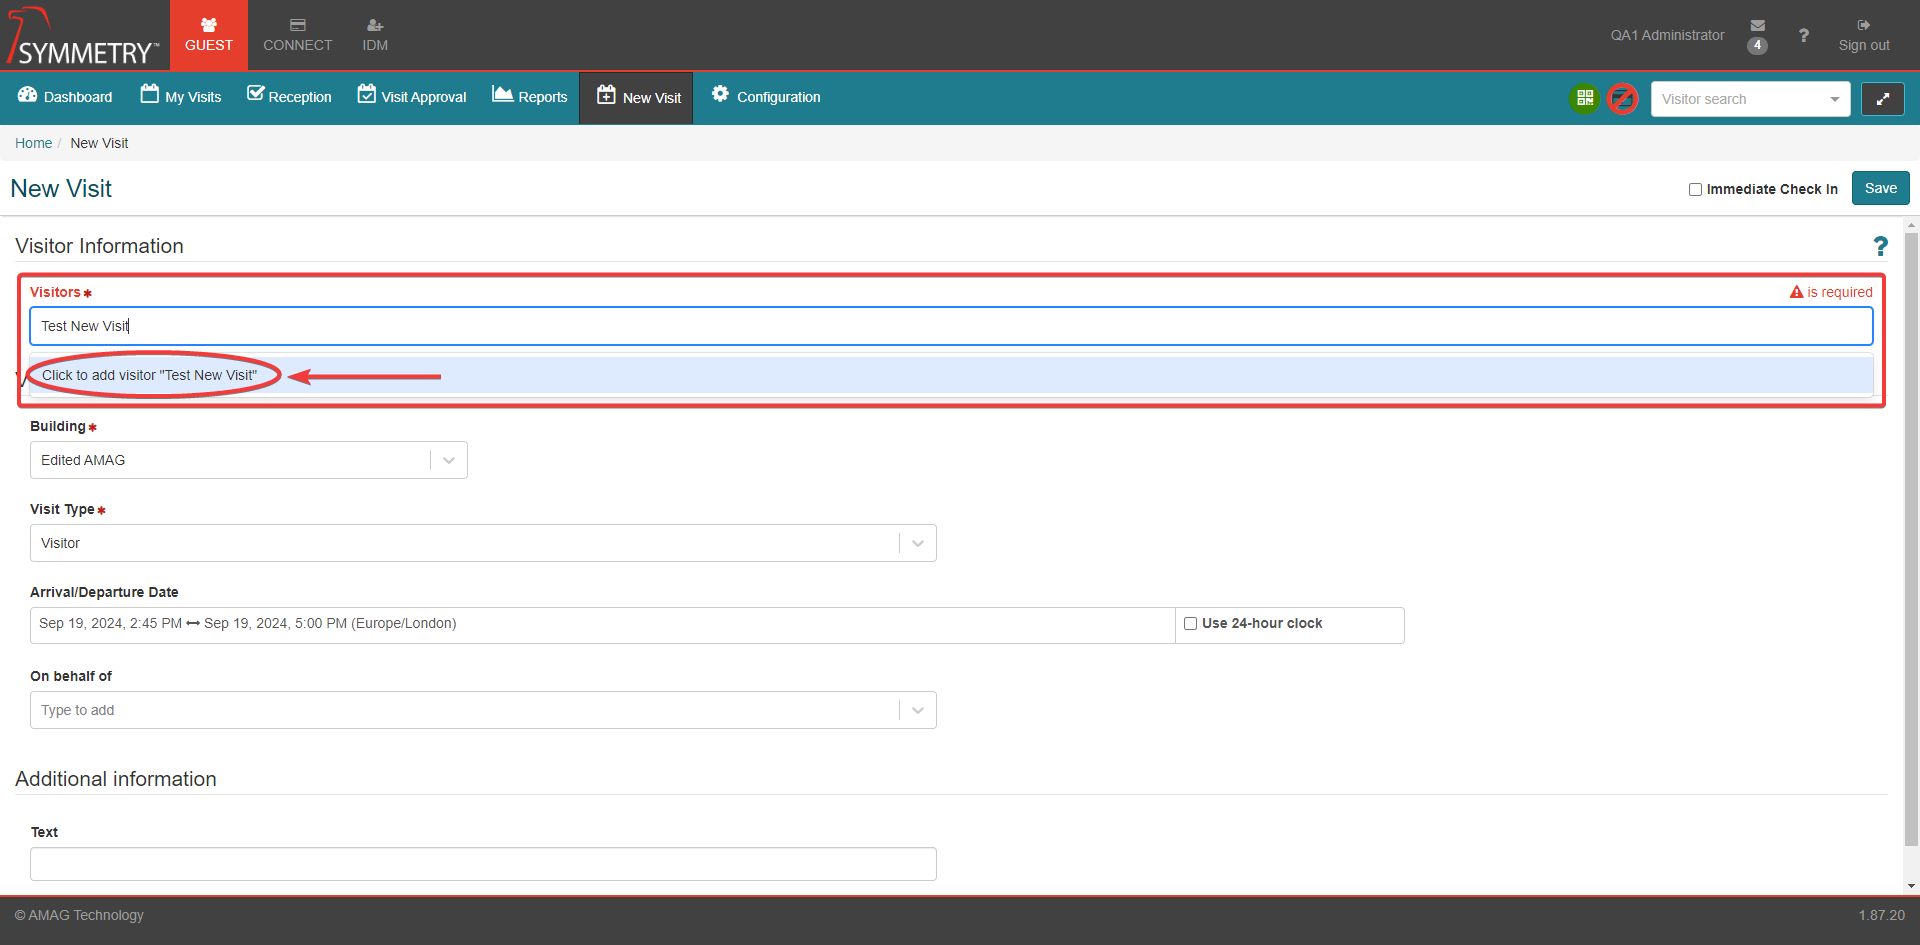
Create New Visitors
Visitors can be entered into the New Visit screen by starting to type in their name. If they are already in the system then they will appear in a dropdown list and should be selected to add them to the Visit. If, however, they are not already on the system then, once the complete Visitor Name has been added, the user should select the Click to Add Visitor option that will appear on the dropdown list. This will open the Create Visitor tab to the right of the screen. Once the new visitor information has been provided. Then, click the Save button to save the Visit.
Note
If notifications are disabled or no email address is entered then notifications will not be sent.
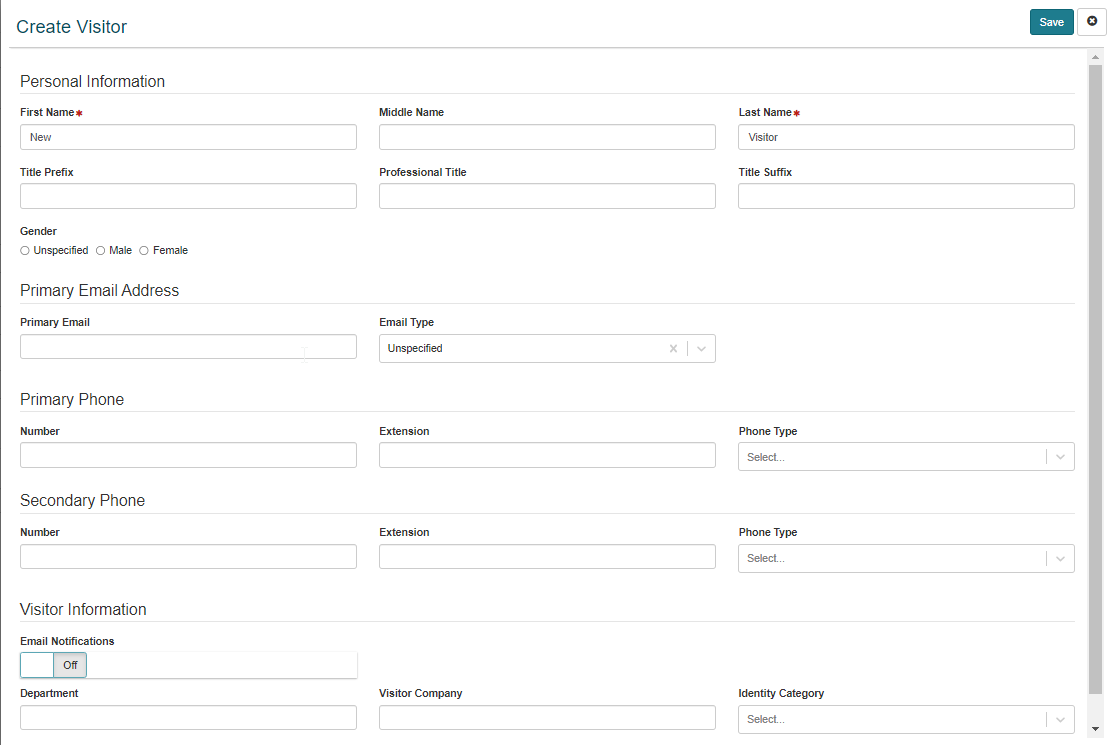
The Create Visitor fields displayed below are configured via the GUEST > Configuration > Screen Configuration page (refer to the Screen Configuration section for more information) and are customizable. They include:
First Name: (Required) - This is pre-populated with the information from the previous screen.
Last Name: (Required) - This is pre-populated with the information from the previous screen.
Primary Email: (Email address and and Email Type) The email address that notifications will be sent to.
Visitor Information: (Toggle Email Notifications On/Off, Department, Visitor Company and Identity category) can be enabled or disabled.