IDM Identities
Note
This is the process for managing Employees and Non-Employees in the system. To manage Visitors, refer to Visitors section in IDM Account Set Up.
The Identities tab displays all Identities in the system. From here you can:
View identities
Add a new identity (manually or via upload)
Update an existing identity.
Assign roles
Add or remove WEB access.
Terminate an identity
Suspend an identity
Delete an identity
Print Badge
Note
If company partitioning is enabled, the user will only be able to see and edit the identities that belong to the companies they have access to.
View Identities
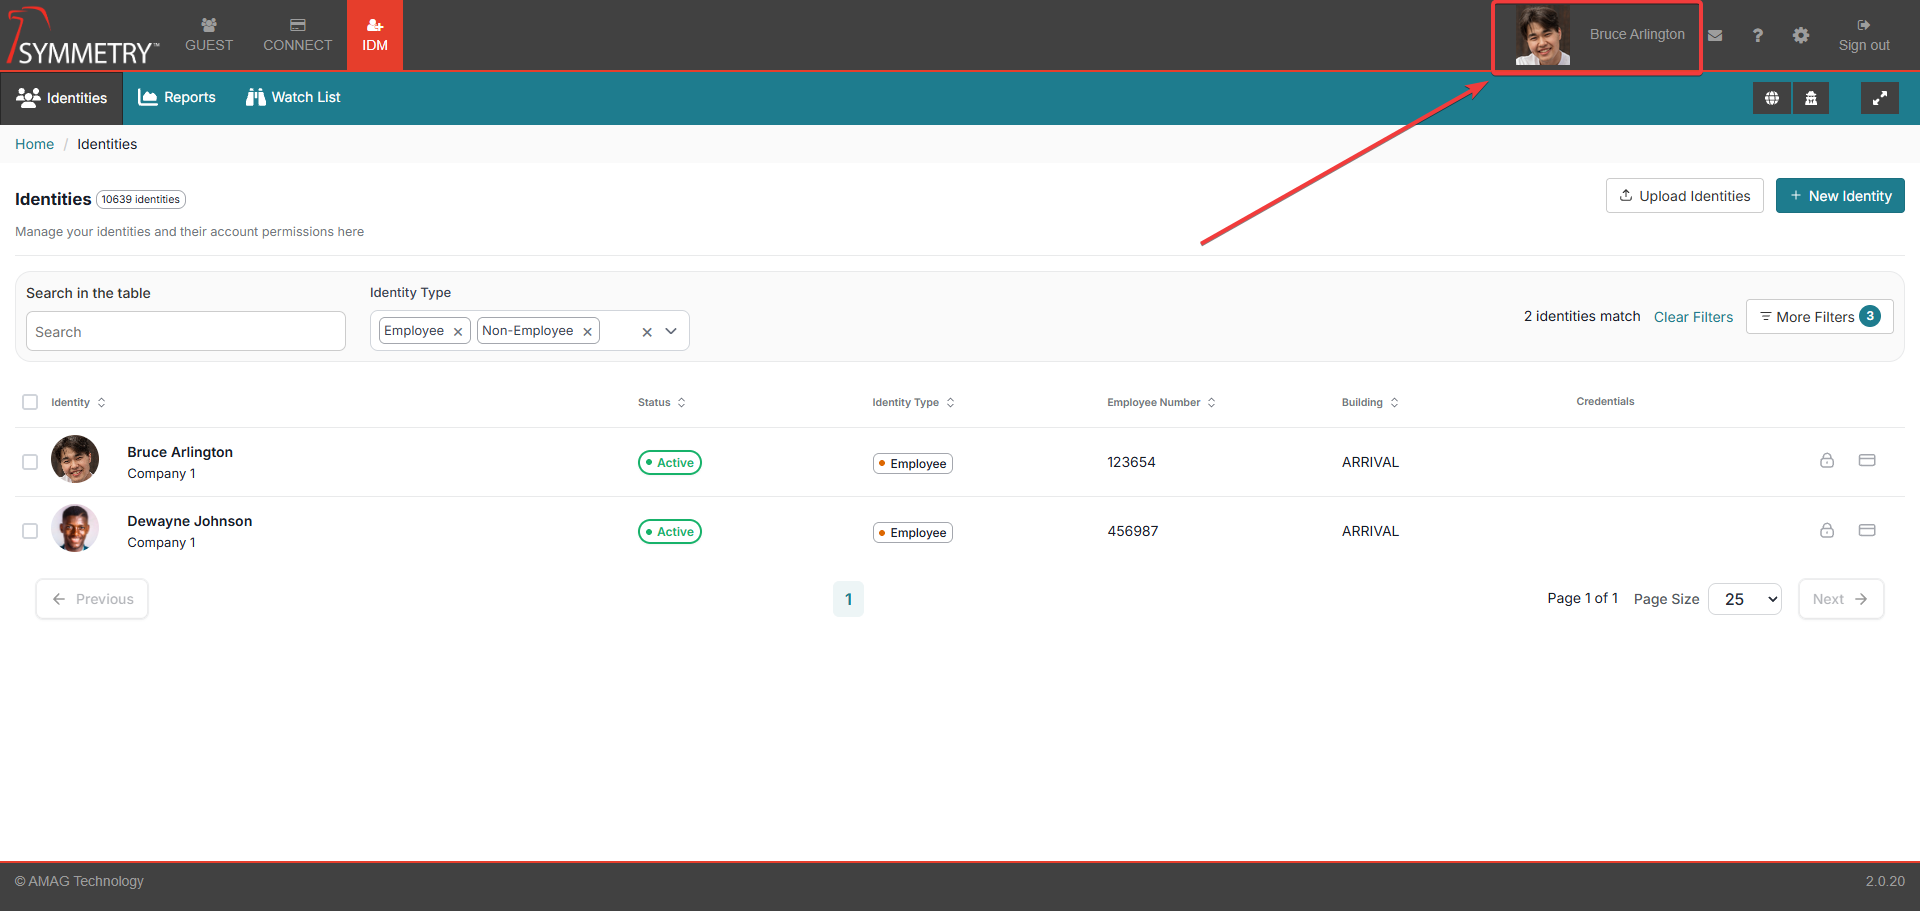
The default view of the Identities page is a list view of the identities. This view displays one identity per row. Each row displays the following information:
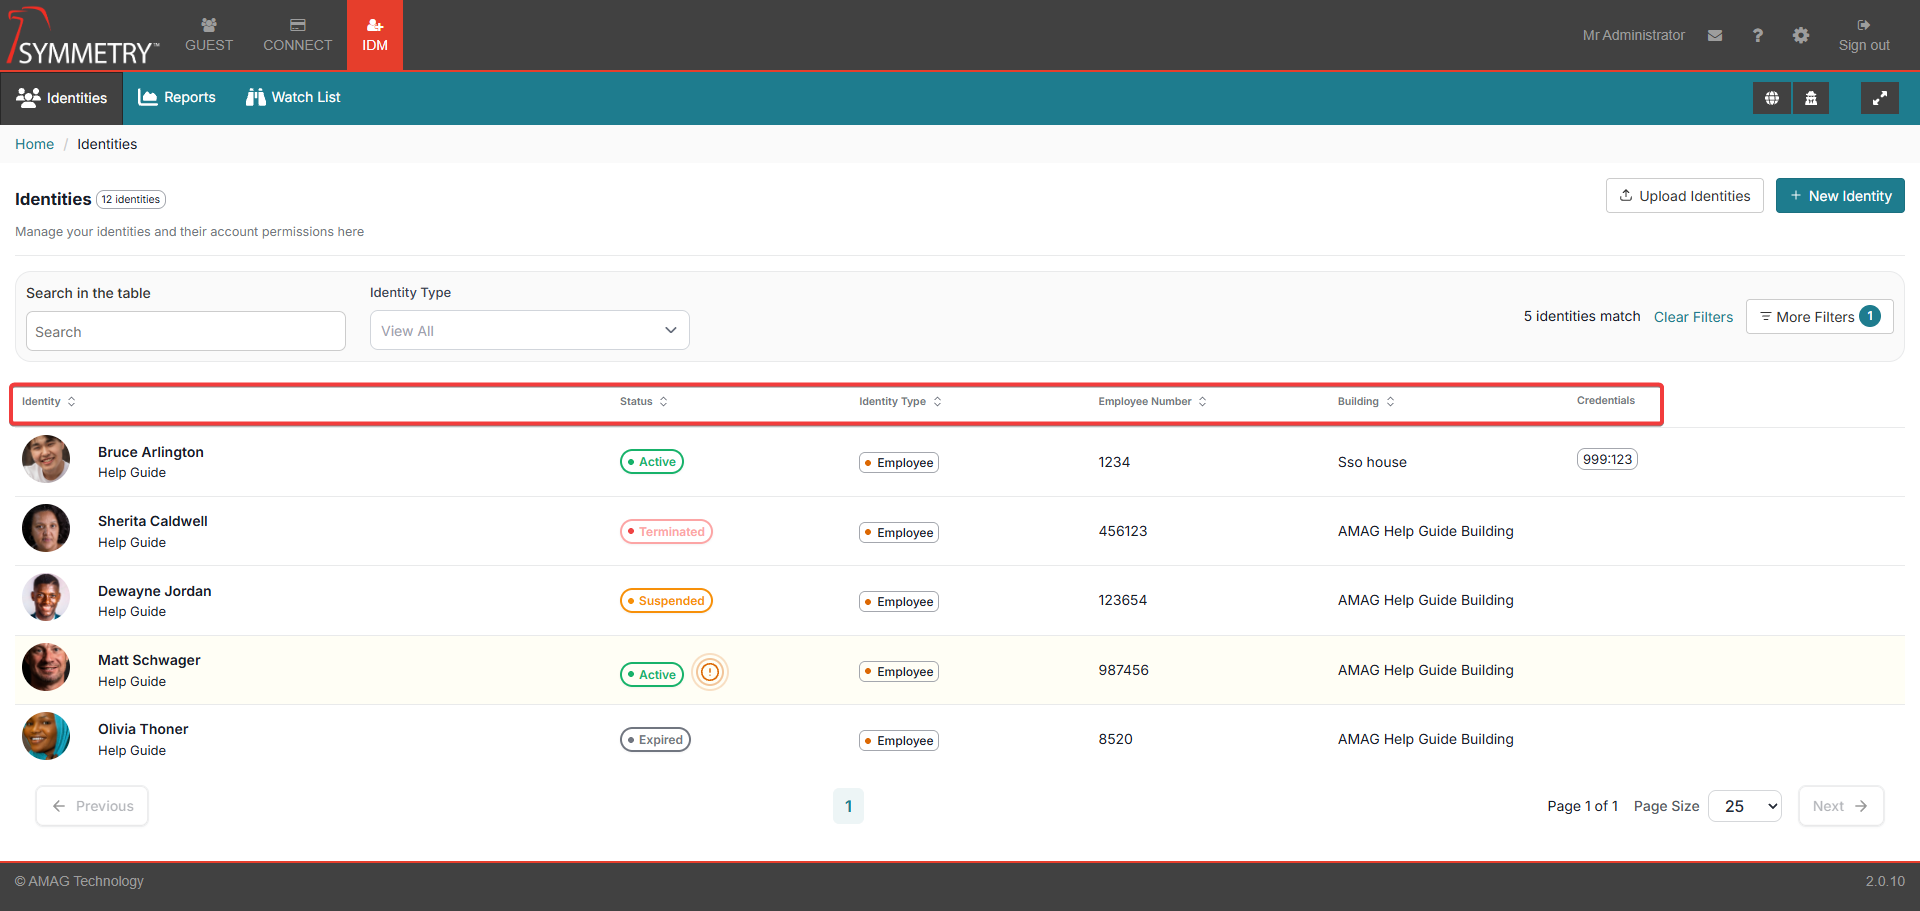
Identity Image or initials when an image is not available
Identity Name
Company Name (underneath the identity's name)
Status (Displays a colour-coded status if the identity is Active, Expired, Terminated, Suspended or Expiring within 30 days)
Identity Type (employee or non-employee)
Employee Number
Building an identity is associated with
Credentials
Note
Provided the user has sufficient authority, Identities list will also display: Grant Access icon (which takes you to Grant Access screens) and Add Credentials icon (that opens Add Credentials modal).
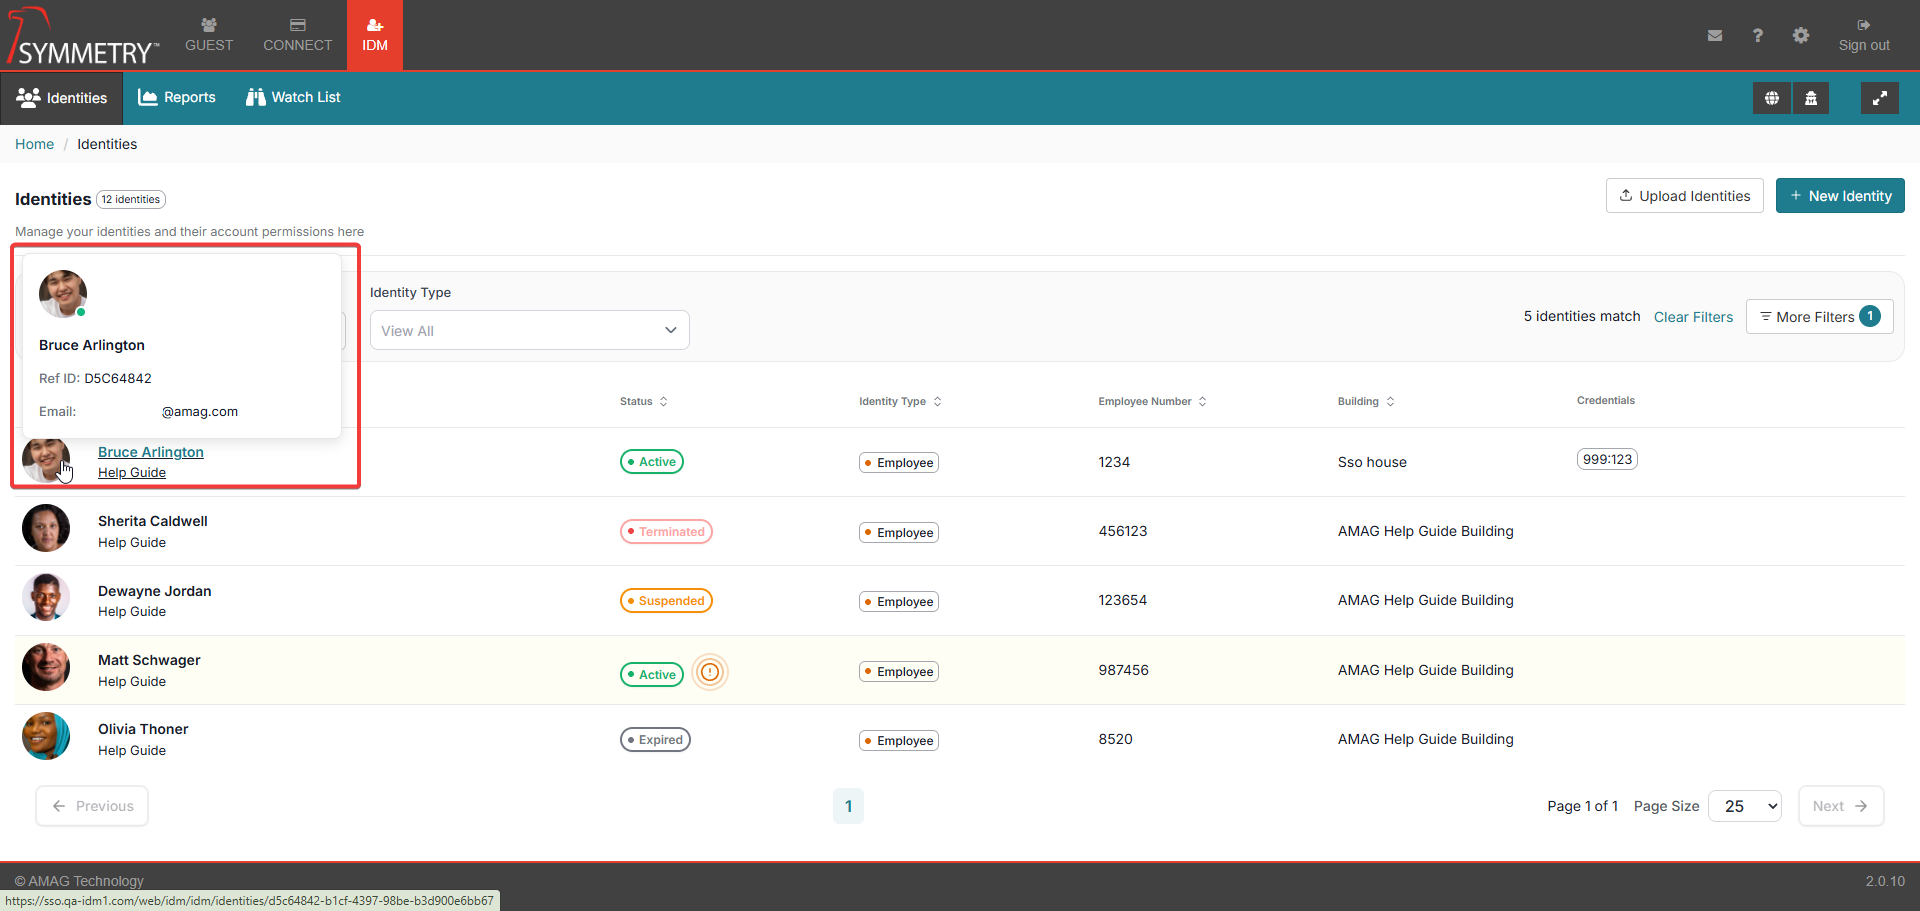
Hovering over the identity's name or image will also provide the user with additional information (if available). For example:
Ref ID
Identity's email address
Phone number
Users can filter and sort data by the following fields:
Note
The list of identities can be displayed in groups of 10,25,50 or 100 entries per page. And can be navigated by selecting the page number or selecting next page, previous page, start or end of list.
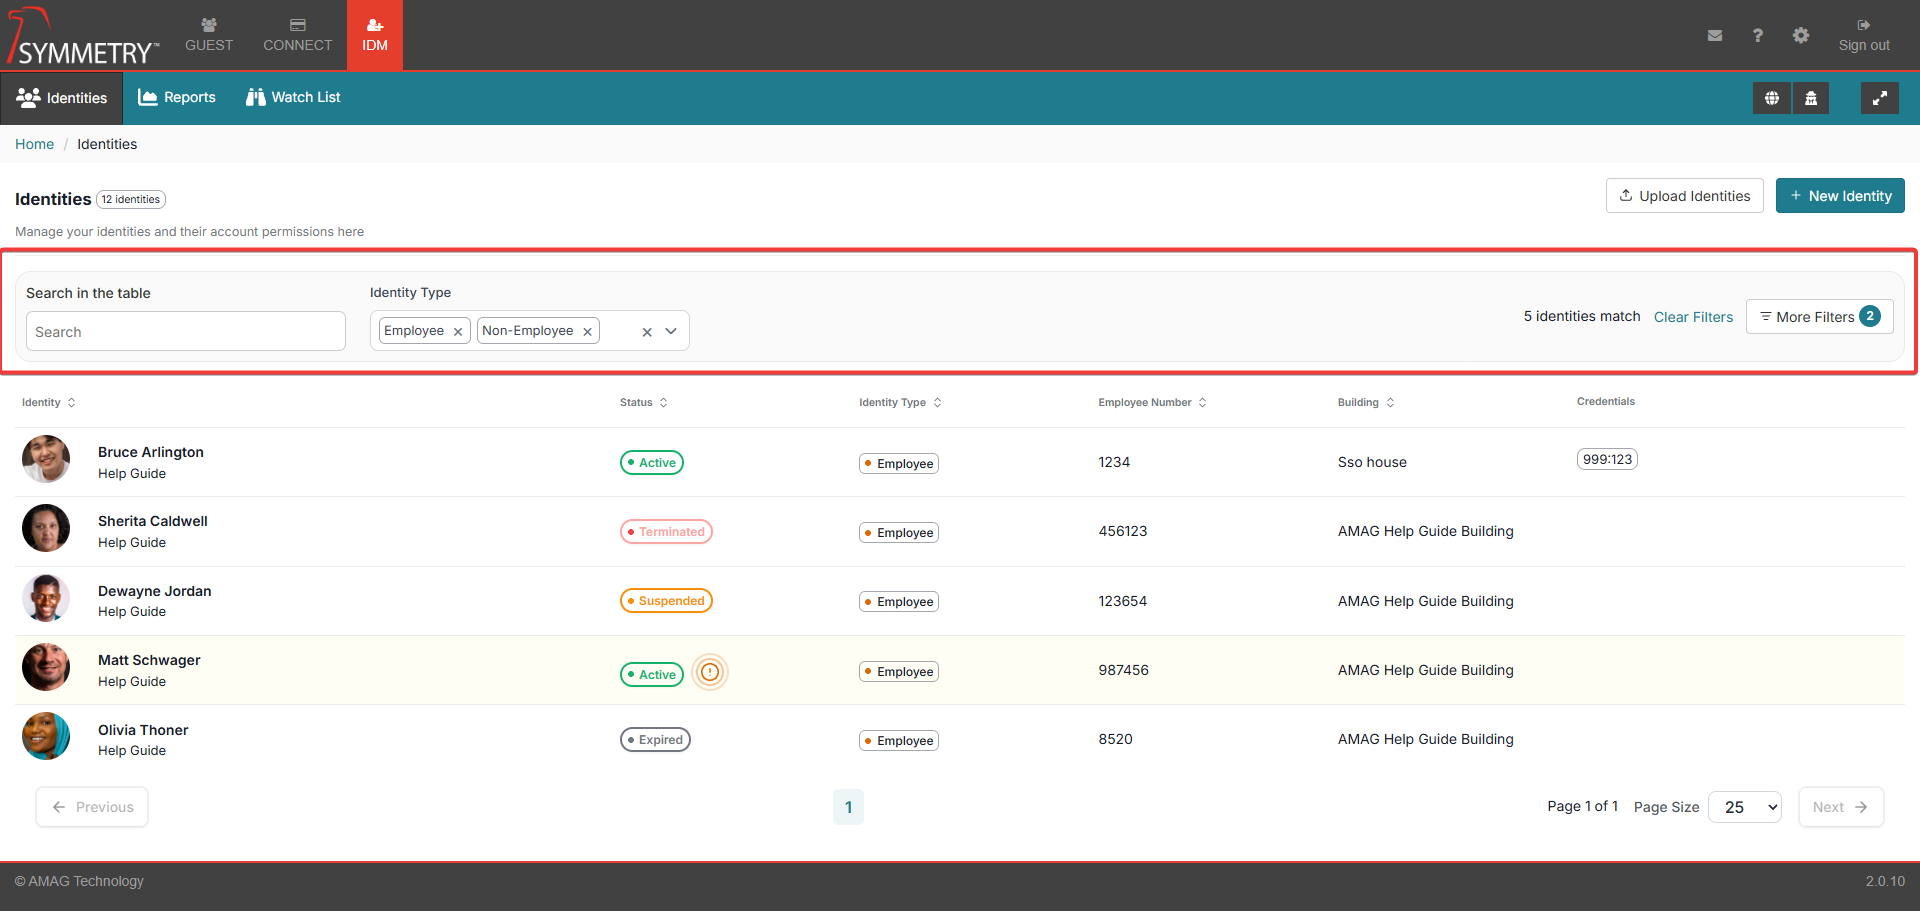
Search in the table: This is a free-text filter that will search against:
Department
Email Address
Employee Category
Employee Number
First Name
Last Name
Middle Name
Primary Email
Primary Phone
Title
User Defined Fields
Identity Type:
Employee
Non Employee
More Filters:

Company: Registered companies within the system
Status: Active, Suspended, Expired or Terminated
Buildings: Registered buildings within the system
Identity Type: Employee or Non-Employee
Note
All filters can be removed by clicking on the Clear Filters button. Either from the main Identities screen or within the More filters section.
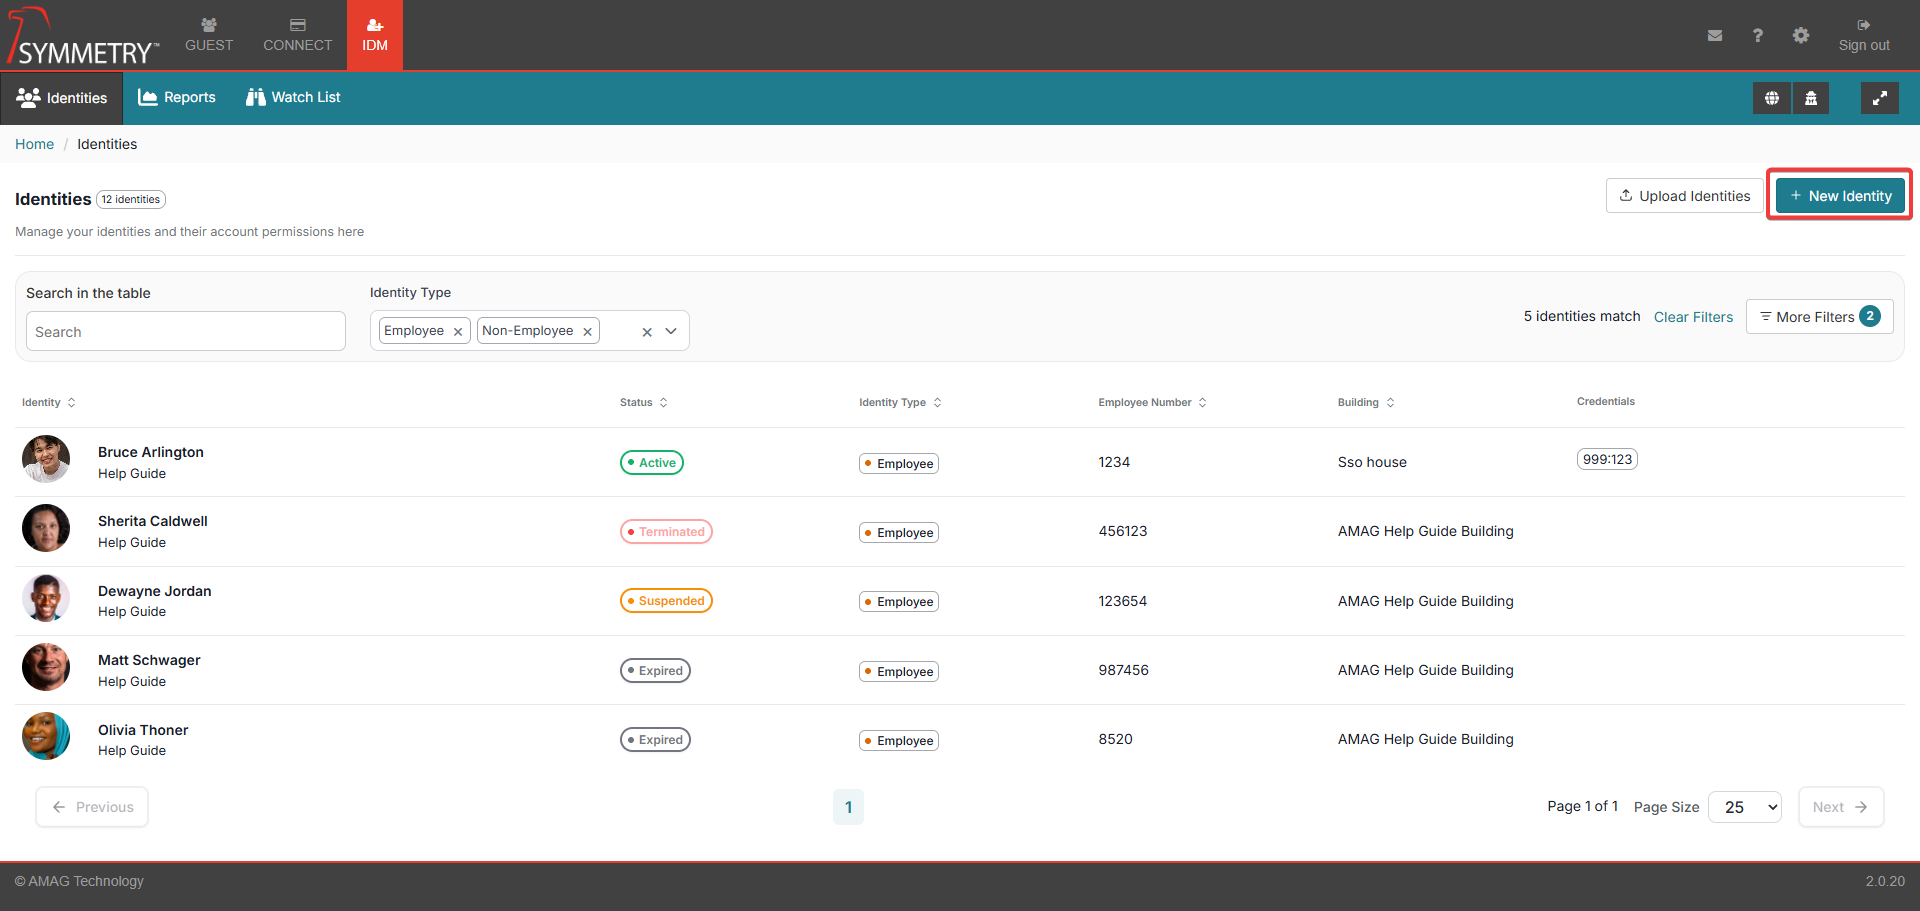
Add a New Identity
When the user clicks the New button in the upper right corner of the screen, the user will be able to enter a new identity manually. For further information, refer to Adding Identities into IDM section.
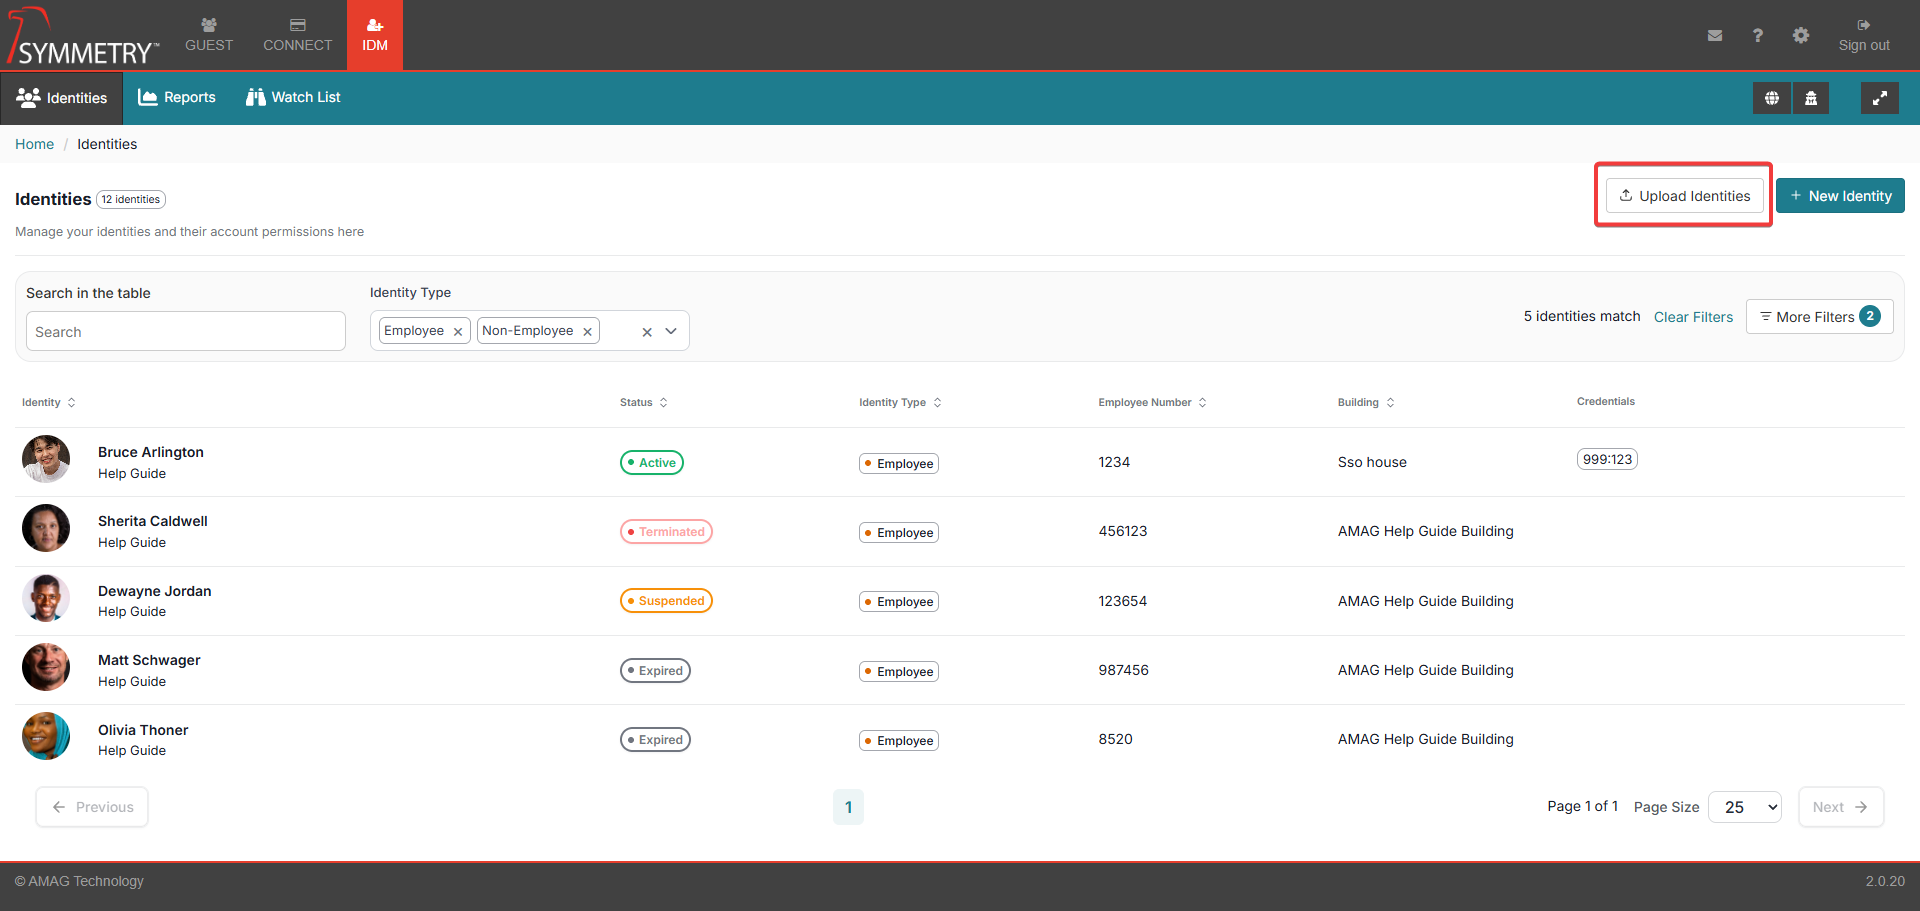
Adding Identities via Spreadsheet Upload
Spreadsheet uploads provide great flexibility and ease of use without complex integration, making this an effective way to manage users. Spreadsheet Uploads can be used to add new Identities or update existing Identities in the system. For further information, refer to Adding Identities via Spreadsheet Upload section.
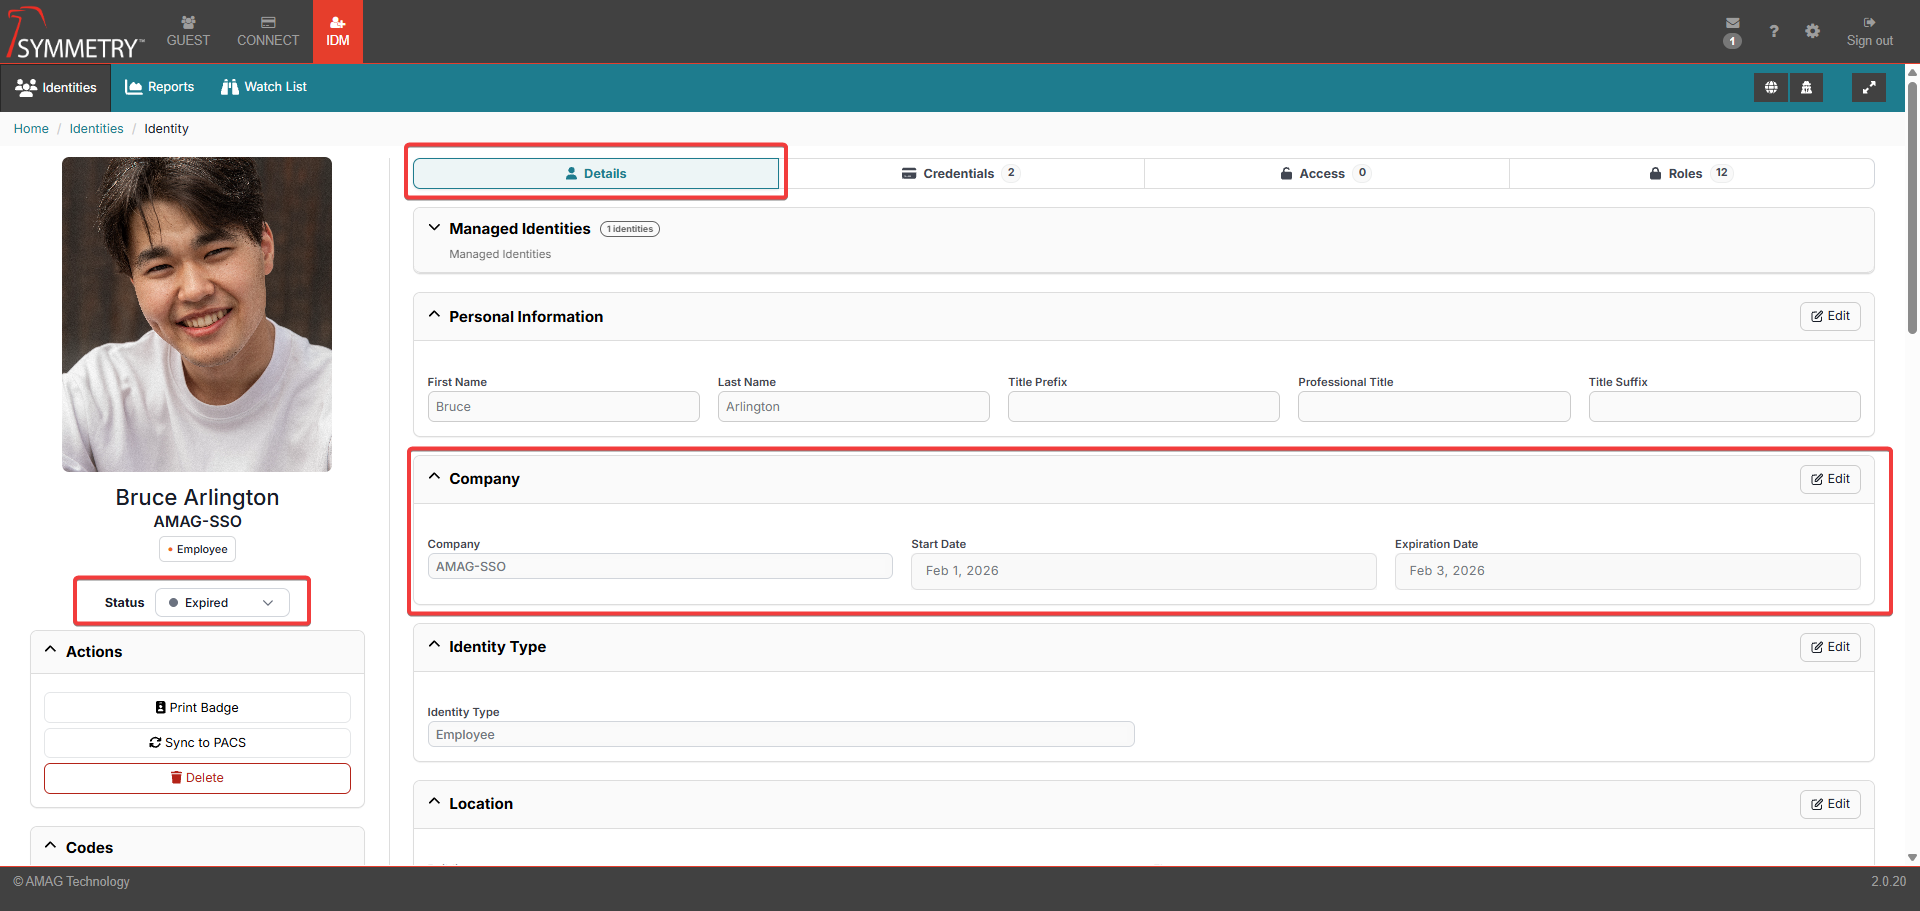
Details
Selecting an identity from the list will automatically open the Identity section. By default, the Details tab is displayed. In this section, the user can access the details provided during the addition of an identity into the system. For further information, refer to Adding Identities into IDM section.
Note
Click on the Edit button to make updates to any section.
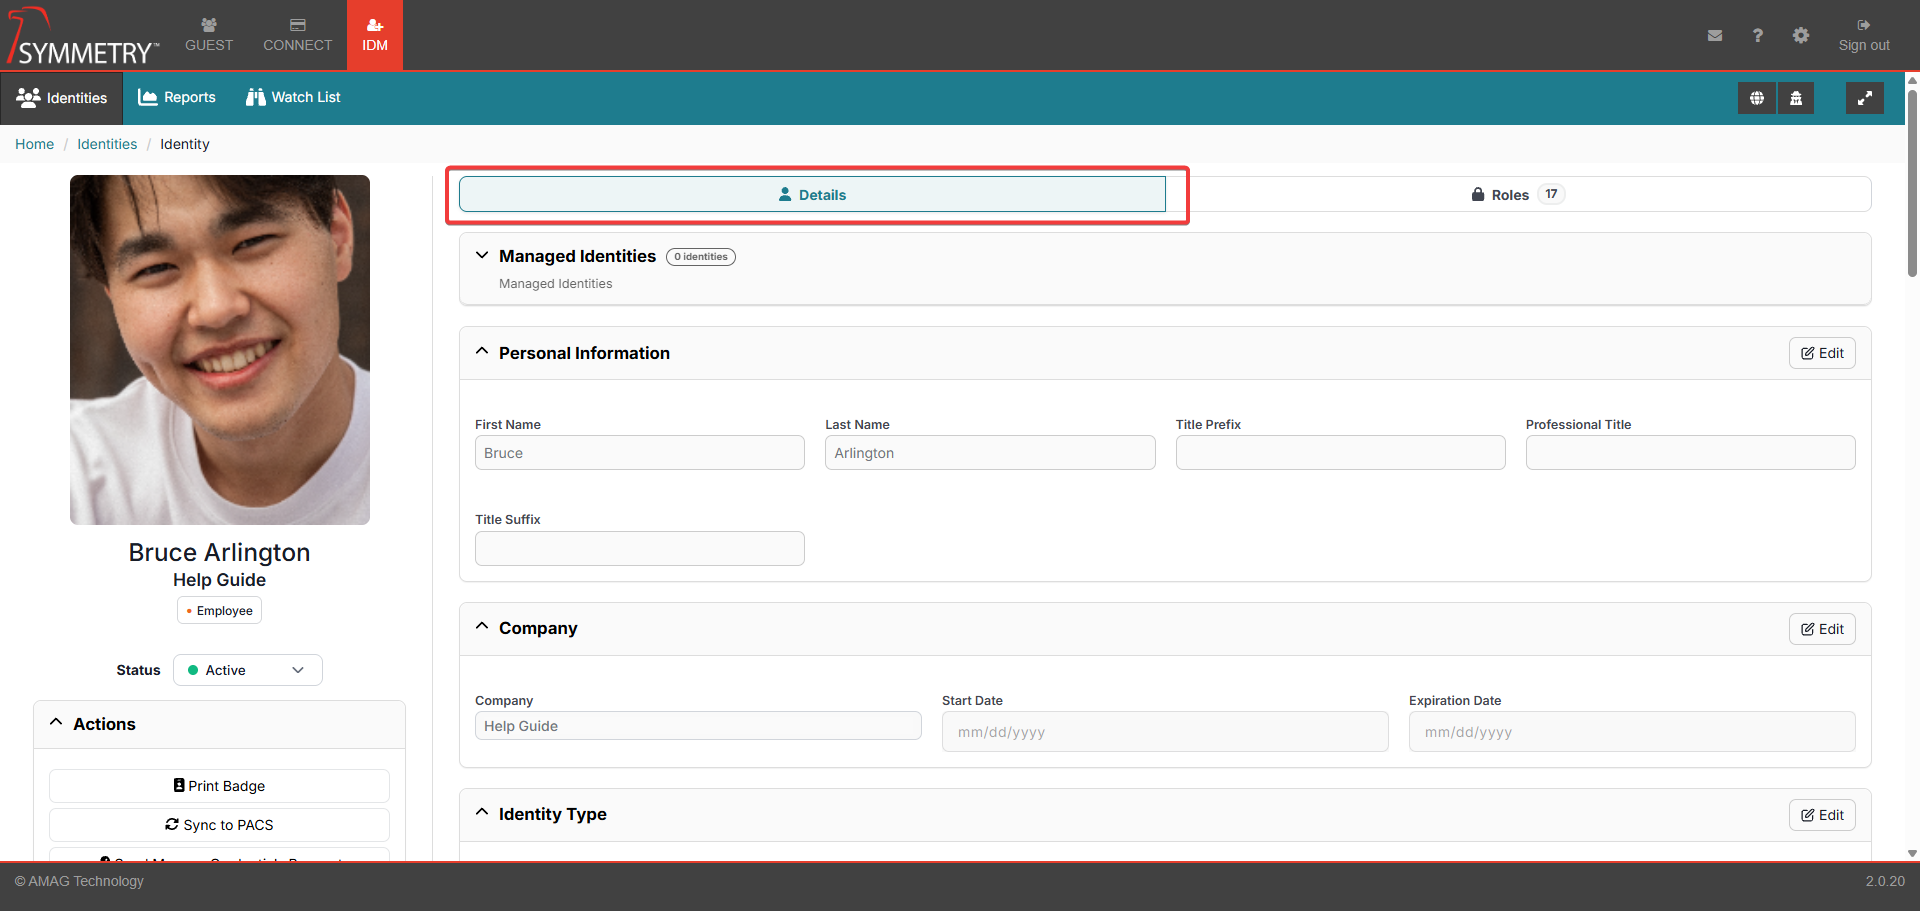
Managed Identities: Displays the number of identities that are managed by the identity. And the following information is associated with the managed identity:
Name
Title
Building Name
Identity Type
Email
Phone
Employee Number

Personal Information: Personal information assigned to the identity.
First Name
Last Name
Title prefix
Professional Title
Title Suffix
Company: Associated company information.
Company (name)
Start Date
Expiration Date
Identity Type:
Employee/Non-employee/Visitor
Location: The location the identity is associated with.
Building
Location
Floor
Email Address: All email addresses associated with the identity.
Primary Email Type
Primary Email Address
Secondary Email Type
Secondary Email Address
Phone Information: All phone numbers associated with the identity.
Primary Phone
Primary Phone Extension
Primary Phone Type
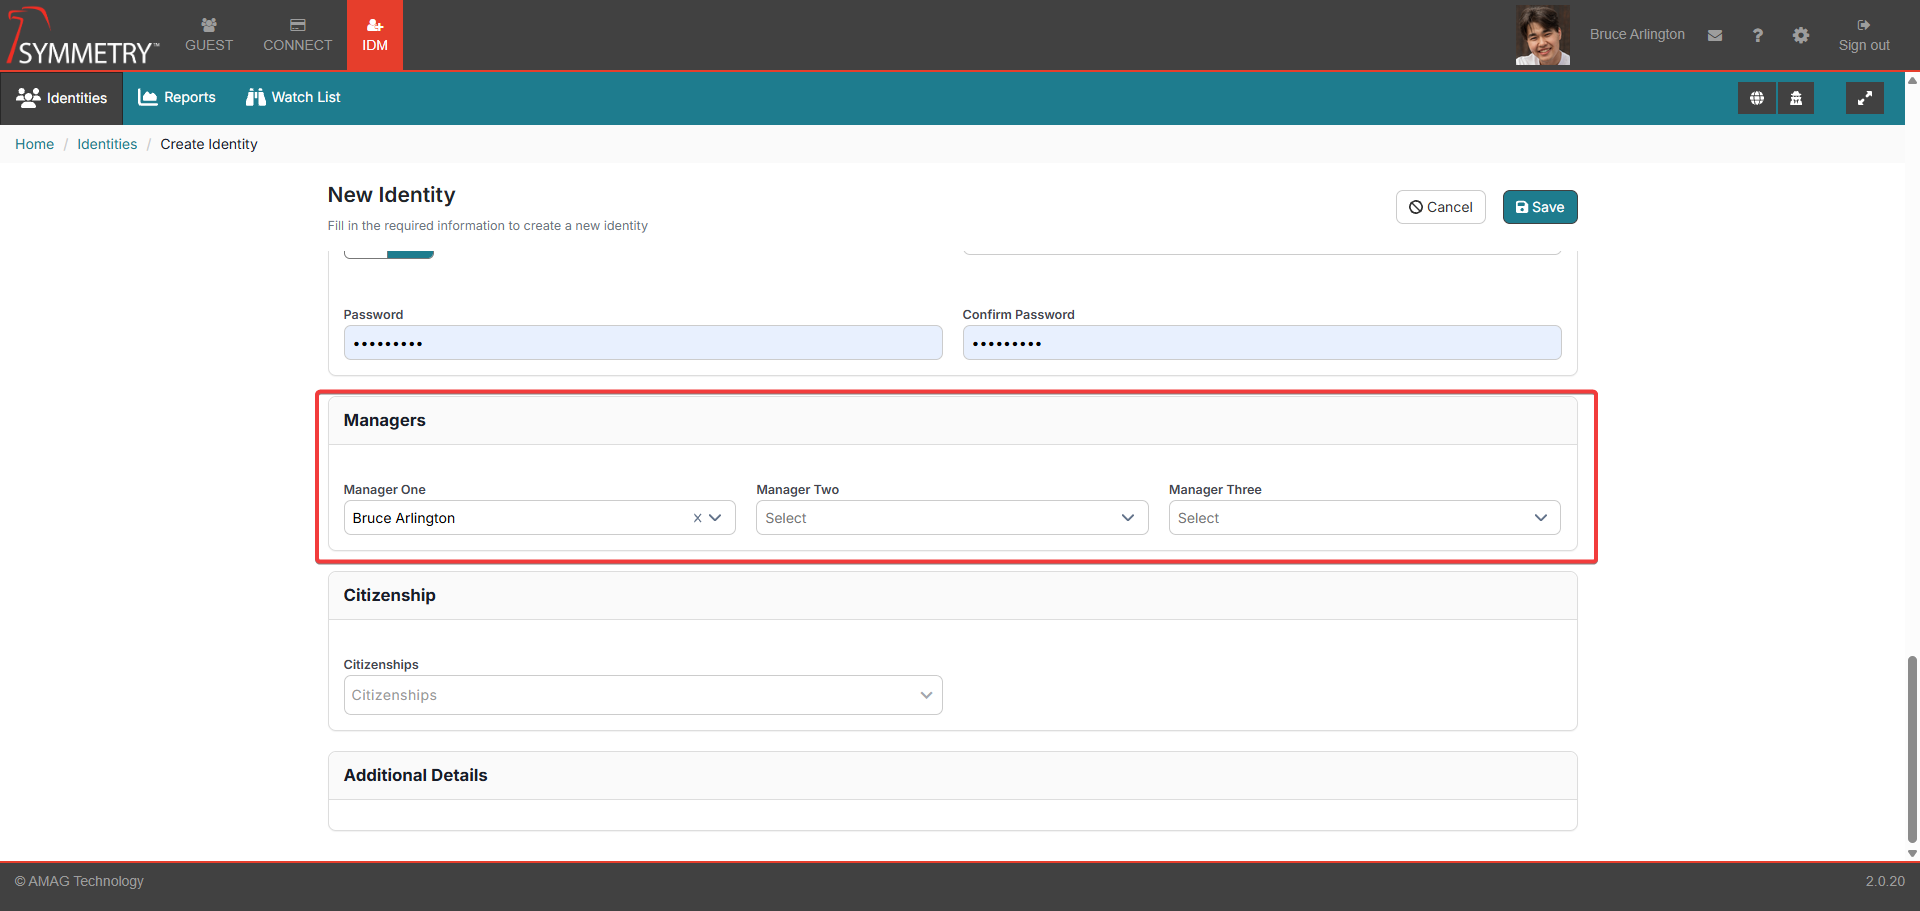
Managers: Any managers associated with the identity.
Manager 1
Manager 2
Manager 3
Login Credentials: Identity's Login credentials.
Login Name
Password
Confirm Password
Employment: Details associated with the identity's employment,
Identity Category
Employee Number
Department
Additional Information: (Any UDFs that have been configured will be displayed here)
Note
The options above are an example of the identity details available. These options can be configured in the IDM Settings > Screen Configuration section.
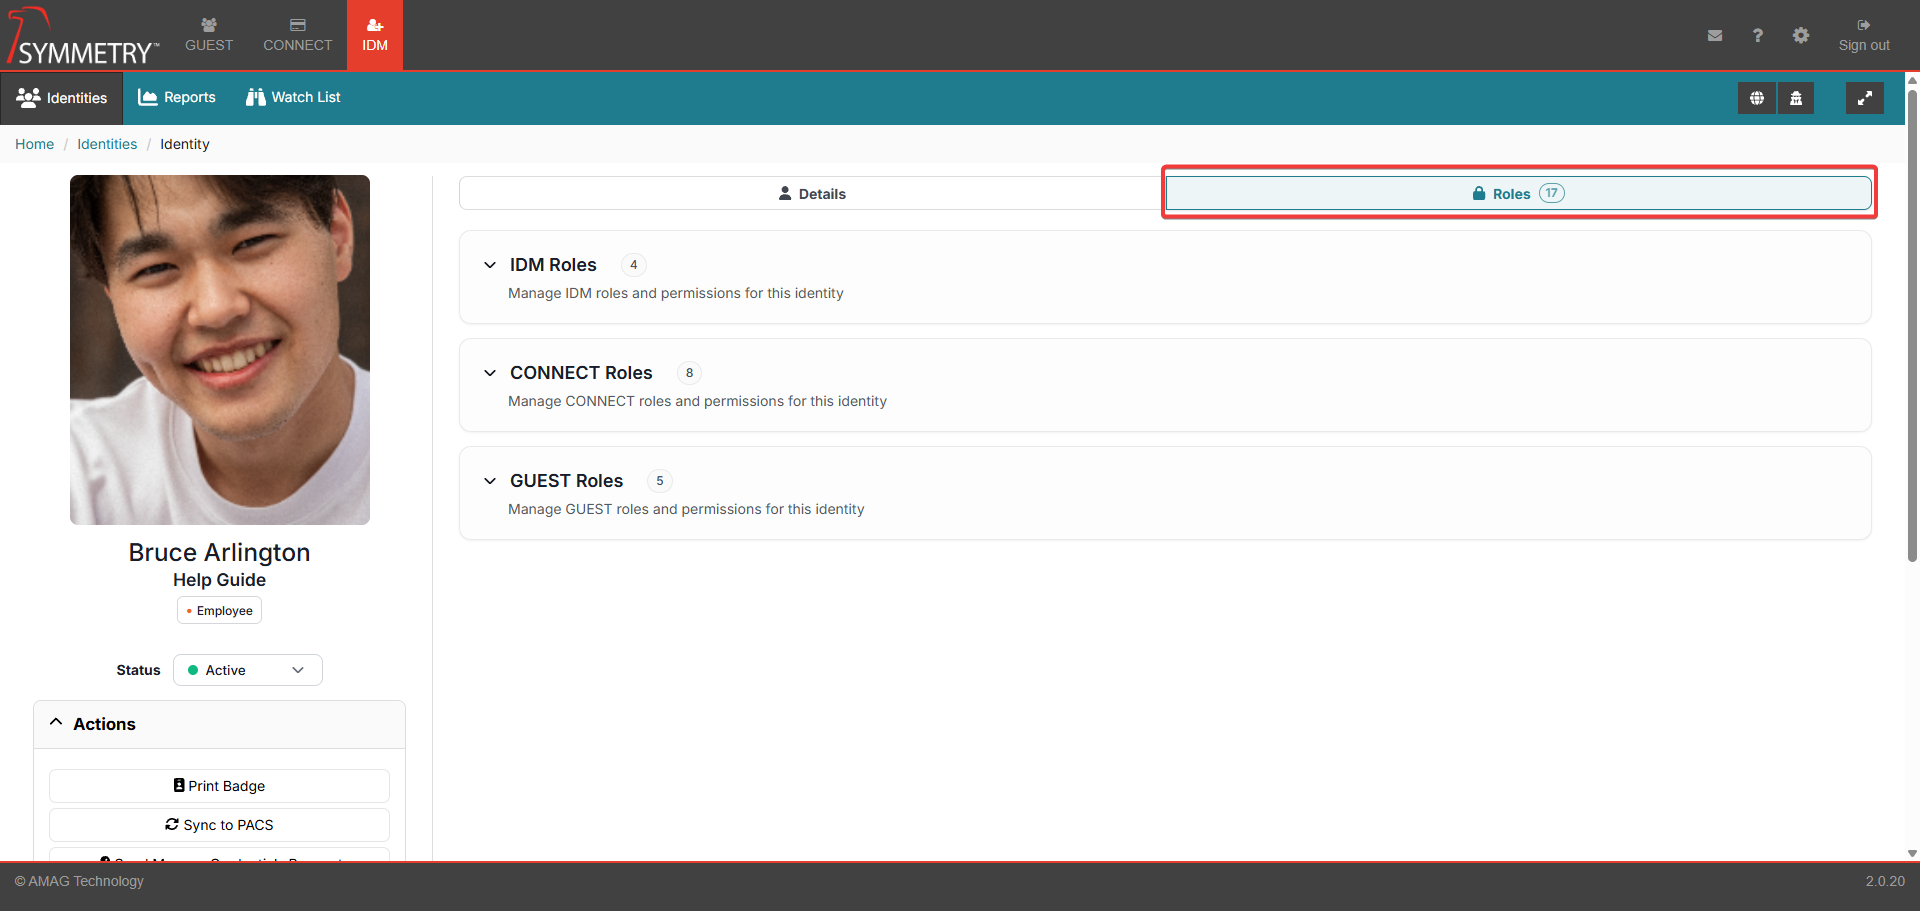
Roles
Click on the Roles tab. This will open up the roles section. Dependent on their role(s) the user can now apply IDM, CONNECT and Guest roles to the selected user/identity. Roles correlate to actions that the user will be able to take in the application. By default, a new identity will not have any roles.
Note
If a Building has been made Inactive it will not be visible and therefore unable to be selected in any of the following sections. Refer to Building Management for further information.
IDM Roles

Toggle the switch to the Grant position. This will grant the user/identity that specific role. The available options are available in the IDM role section:
System Administrator: This role provides full access to all aspects of the IDM tab, including all items under the IDM Settings and System Settings menus.
Building Manager: .Building Managers are able to view and manage users that are assigned to specific Buildings in IDM. Building Managers are also able to edit the Buildings assigned to them under IDM Configuration Building Management. The Building Manager can also assign the Tenant Manager Role to identities, but only under the following conditions:
The Building Manager can only assign the Tenant Manager from an identity they have access to.
The Building Manager can only grant identity access to buildings they have access to themselves.
The Building Manager can only assign a tenant manager identity to a tenant with whom they have access.
Security Manager: Security Managers are able to manage the Watchlist Identities in the buildings to which the Security Manager is assigned. Security Managers also receive an email if a visitor matches an identity on the Watchlist in their assigned Buildings (this function requires configuration in GUEST).
Report Viewer: Role holders are able to run one or multiple reports associated with one or multiple buildings.
Tenant Manager: Tenant Managers are limited to adding/managing users for specific Companies and Buildings only. A Tenant Manager can add new users, however they can only assign the new user to the Companies and Buildings to which the Tenant Manager has been assigned. Tenant Managers do not have any access to any IDM Configuration options.
CONNECT Roles
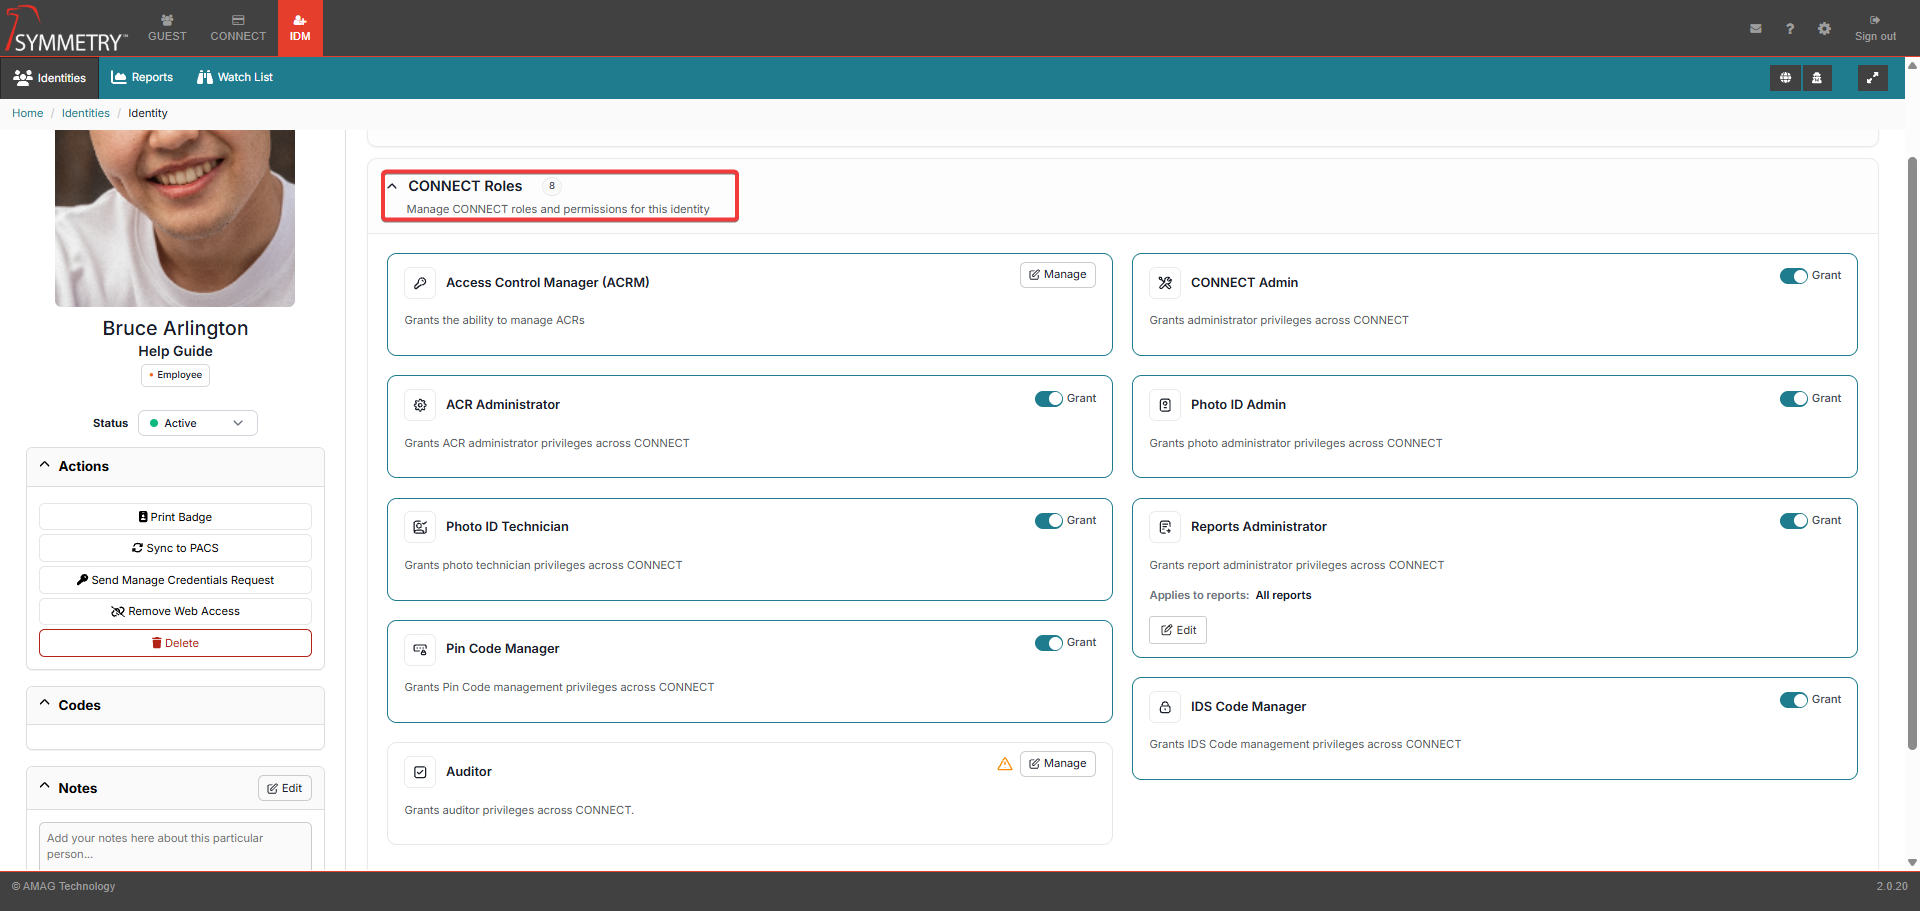
Toggle the switch to the Grant position. This will grant the user/identity that specific role. The available options are available in the CONNECT role section:
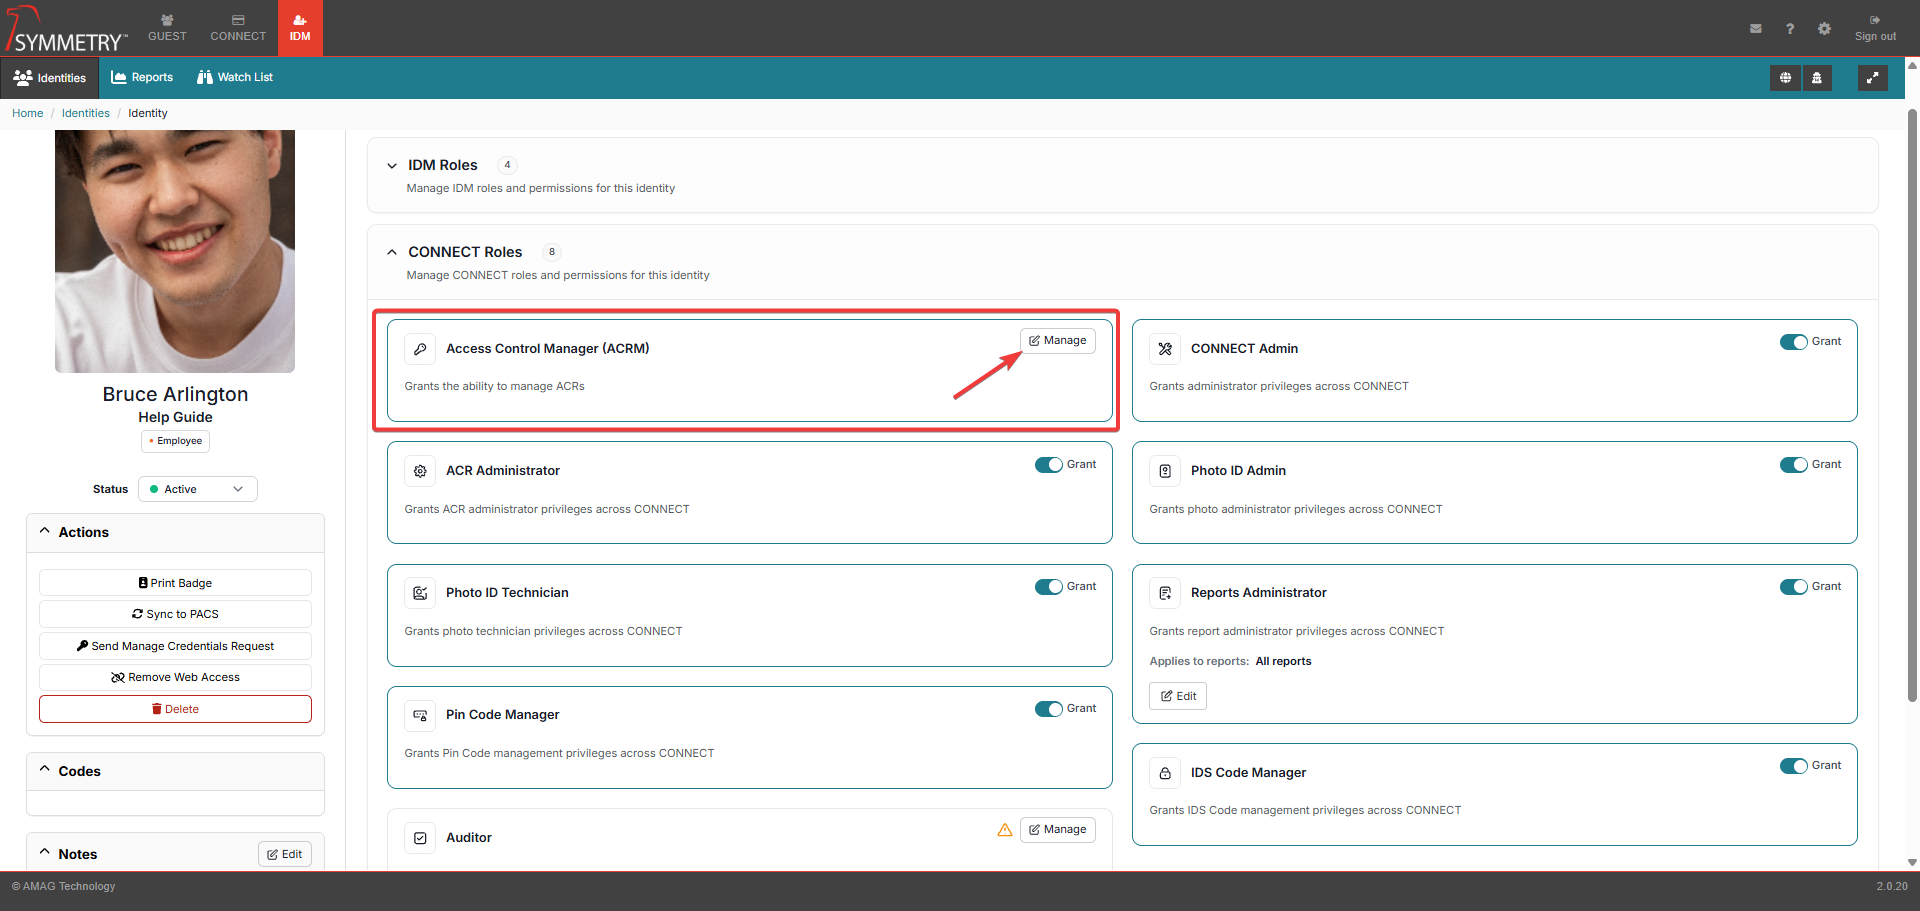
Access Control Manager (ACRM): An ACRM is a user that is responsible for managing one or more Access Control Representatives (ACR’s) and one or more Access Groups. Assigning a user the ACRM role will display a new page where ACRs and Access Groups can be assigned to the ACRM and managed. From this page, the user can:
Search and assign specific users as ACRs.
Search and assign Access Groups to the ACR’s.
Note
Any user can be assigned as an ACR, however an ACR can only be assigned to a single ACRM.
To change the role configuration for an existing ACRM, find the ACRM identity in the identity list. Enter the role manager section and click the Manage button.
Note
ACRMs are able to manage their assigned ACRs and Access Groups on the CONNECT Access Control Manager (ACRM) page. For more information, please review this section of the guide.
ACR Administrator: An ACR Administrator is able to manage ACRM User Roles and modify Access Group Rules (Settings/Configurations > Connect Settings > Rules).
Photo ID Technician: This user role provides the ability to manage/process credential requests, as well as manually add new credentials for Identities (on the IDM Identities page).
Pin Code Manager: When enabled via the Manage Pin and IDS Codes via a separate User Role section of the General Configuration page, this role grants pin code management privileges across CONNECT. For more information, refer to the Identity Credentials Pin section of this guide.
Auditor: When enabled via the Manage Audits via a separate user role section of the IDM General Configuration page, this role grants Access Code Audit management privileges across Connect. At the same time, ACRs and ACRMs will lose their ability to manage Audits unless they, too, are allocated the role of Auditor. For more information, refer to the Role Options or Auditor Role section of this guide.
CONNECT Admin: This role provides full access to all aspects of the CONNECT tab, including all items under the Connect settings menu.
Photo ID Admin: This user role provides the same access as a Photo ID Technician, and also provides limited access to Settings and Configurations > IDM Settings, including the ability to edit Badge Templates, Credential Ranges, configure Credential Requests and assign the Photo ID Technician User Role.
Reports Administrator: A Reports Administrator only has access to the Reports tab in CONNECT. Administrators can grant them access to all reports or to a subset of the available reports.
IDS Code Manager: When enabled via the Manage Pin and IDS Codes via a separate User Role section of the Settings and Configuration >IDM settings > General Configuration page, this role grants IDS Code management privileges across Connect. For more information, refer to the IDS Code section of this guide.
Guest Roles
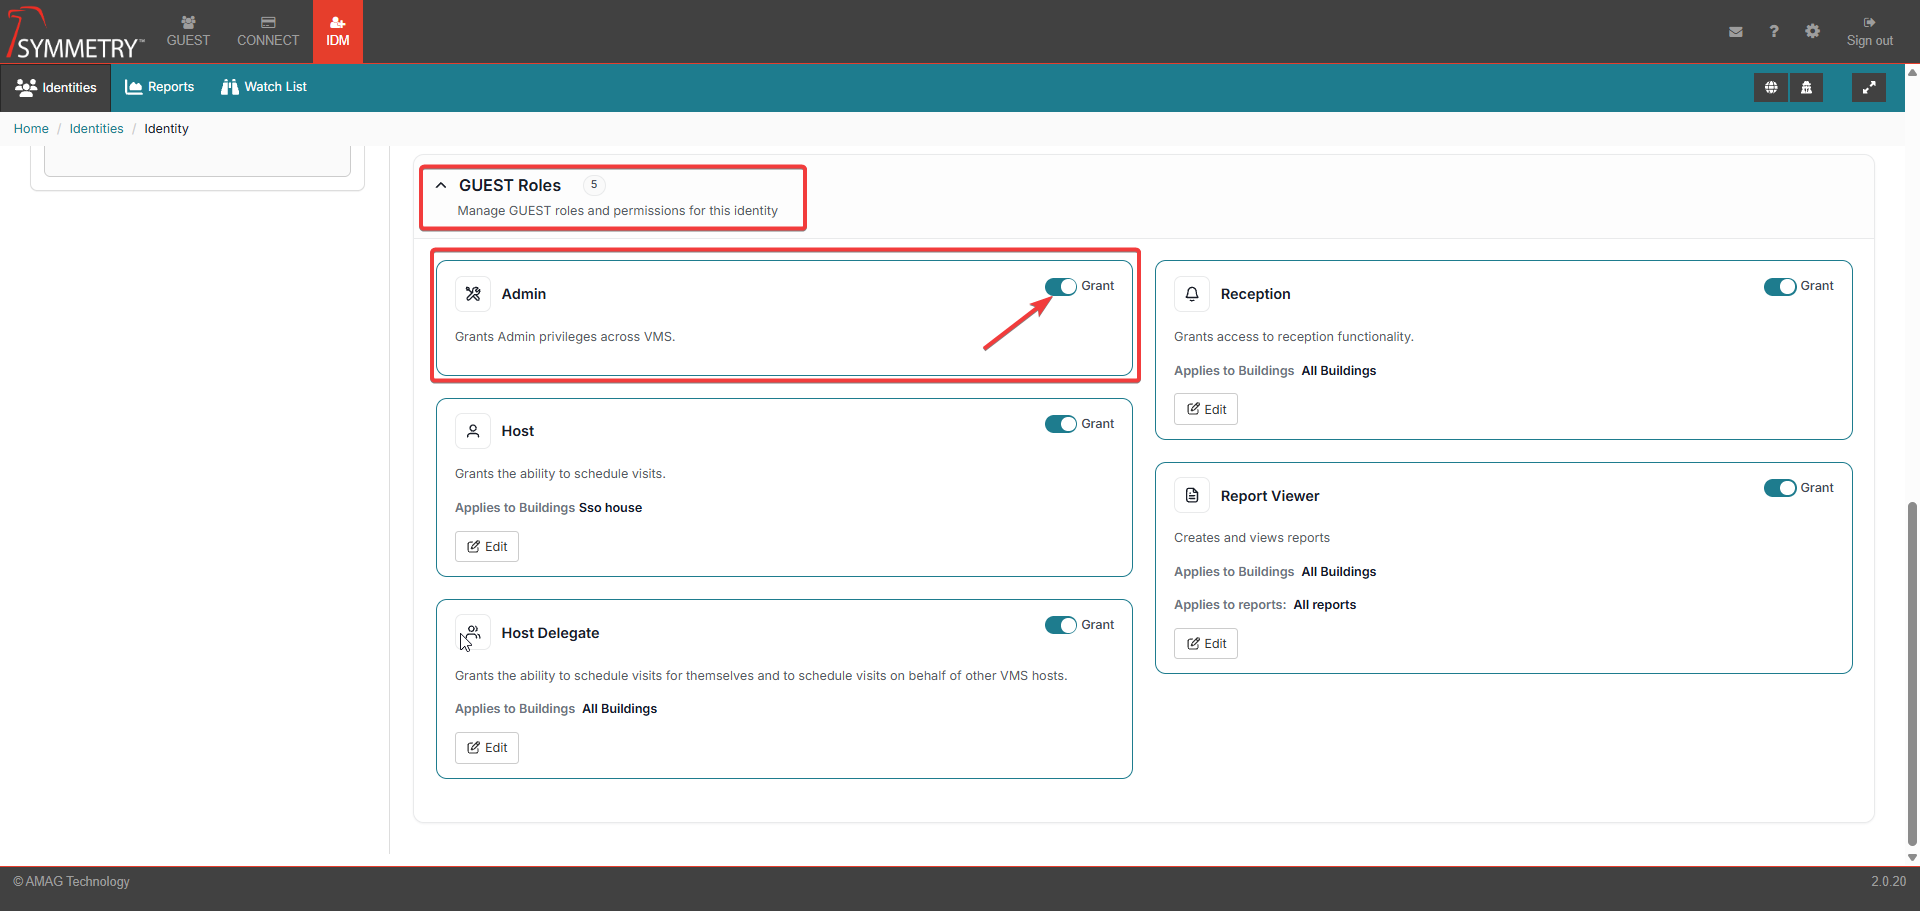
Toggle the switch to the Grant position. This will grant the user/identity that specific role. The available options are available in the GUEST role section:
Admin: The admin role provides full access to all aspects of the Reports and (if configured ) Visit Approval tabs, as well as the GUEST Settings section.
Host: A Host User is able to schedule visitors for themselves (requires one or more Buildings to be assigned to this role).
Host Delegate: A Host Delegate user is able to schedule visitors for themselves or on behalf of other Host users (requires one or more Buildings to be assigned to this role).
Reception: Assigned to users who are responsible for checking visitors in and out of specific Buildings (requires one or more Buildings to be assigned to this role).
Report Viewer: A Report Viewer user is able to view Reports available on the GUEST tab (requires one or more Buildings and Reports to be assigned to this role).
Assigning a User Role: Line Manager and Manager Delegate
Each Identity can have up to three Identity Managers. These are assigned by entering the name of the desired Identity Manager into a Manager field in Add / Edit Identity.
A Identity Manager can assign themselves a Delegate. A Manager Delegate does not have the same access rights as the Identity Manager but is authorized to approve requests on the Identity Manager's behalf such as approving Visits, Access Requests and Credential Requests.
Note
Within IDM this will only affect Identity Expiration Notifications.
To assign a Delegate, the Identity Manager signs in to the application and clicks on their own Profile in the top right of the screen. This will open the Profile Page.
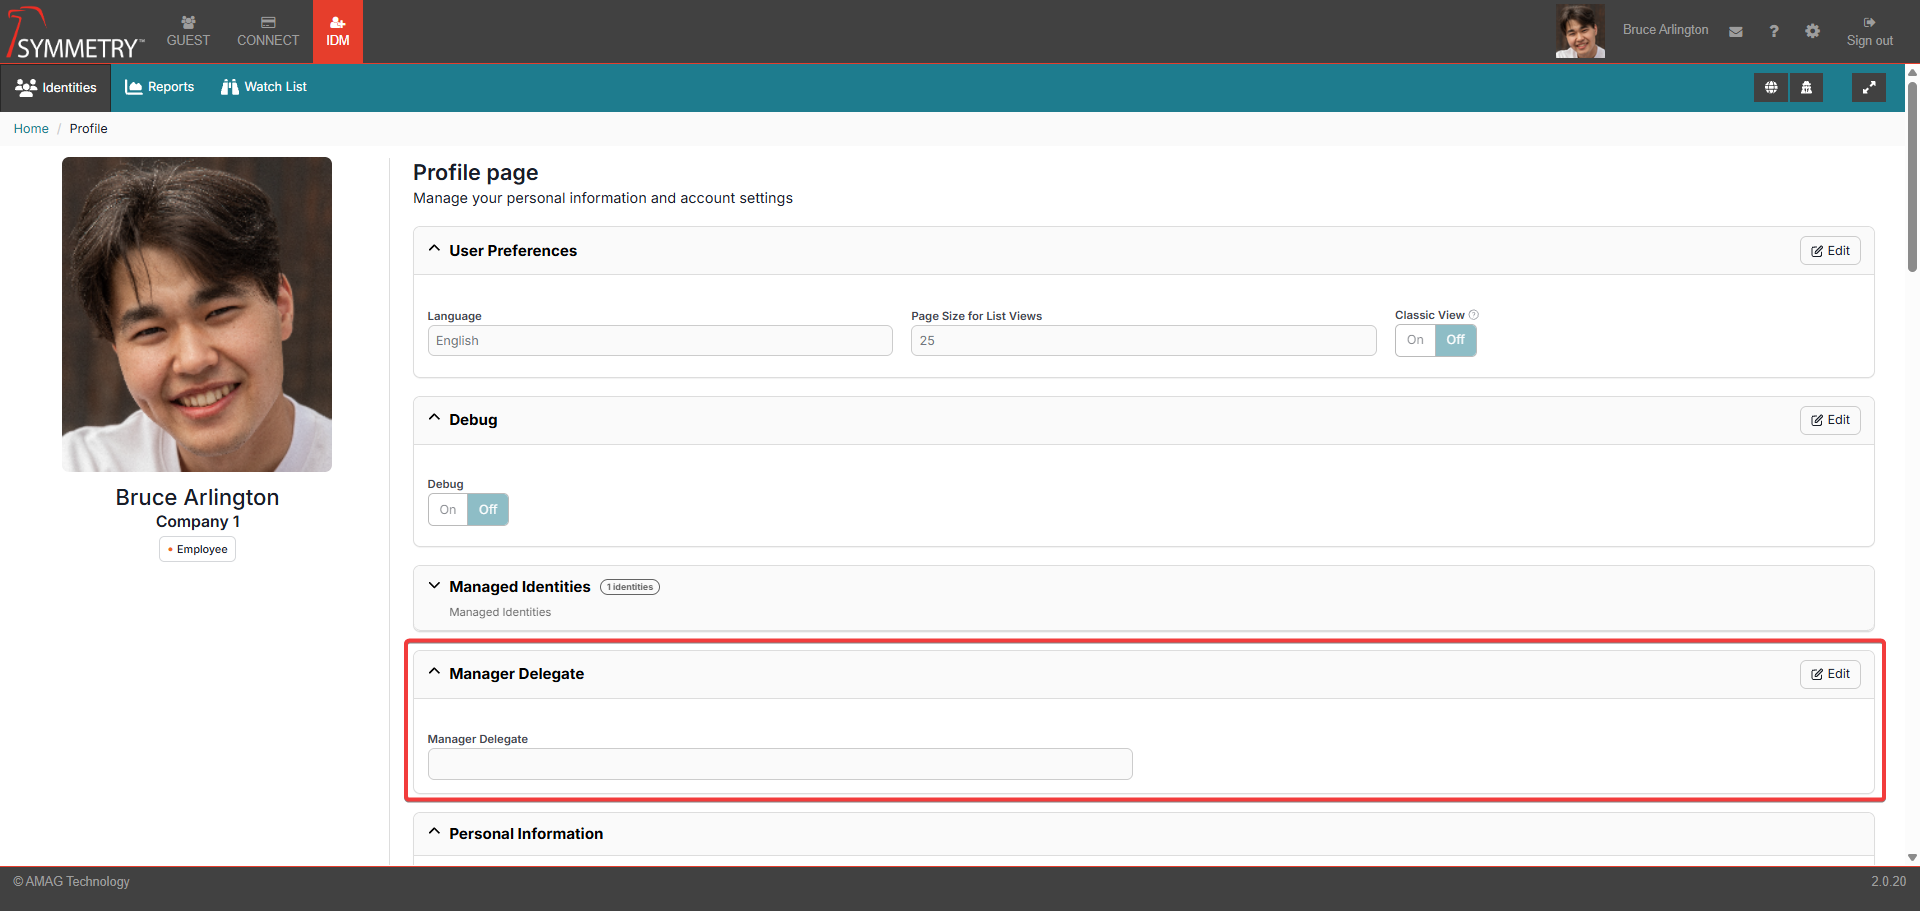
Navigate to the Manager Delegate section.

Click the Edit button.
Type in the name of the user you want to assign as a Delegate and click the Save button.

The Manager Delegate information/profile will be displayed in the Manager Delegate section.

Note
Nothing will appear on the Manager Delegate's profile to confirm they have been assigned the role. Only a Identity Manager can assign themselves a Manager Delegate and they can change or remove that Delegate in the same way. Active Manager Delegates are automatically added onto the mailing list for any Notifications assigned to the Identity Manager they are the delegate for.
Issuing Credentials
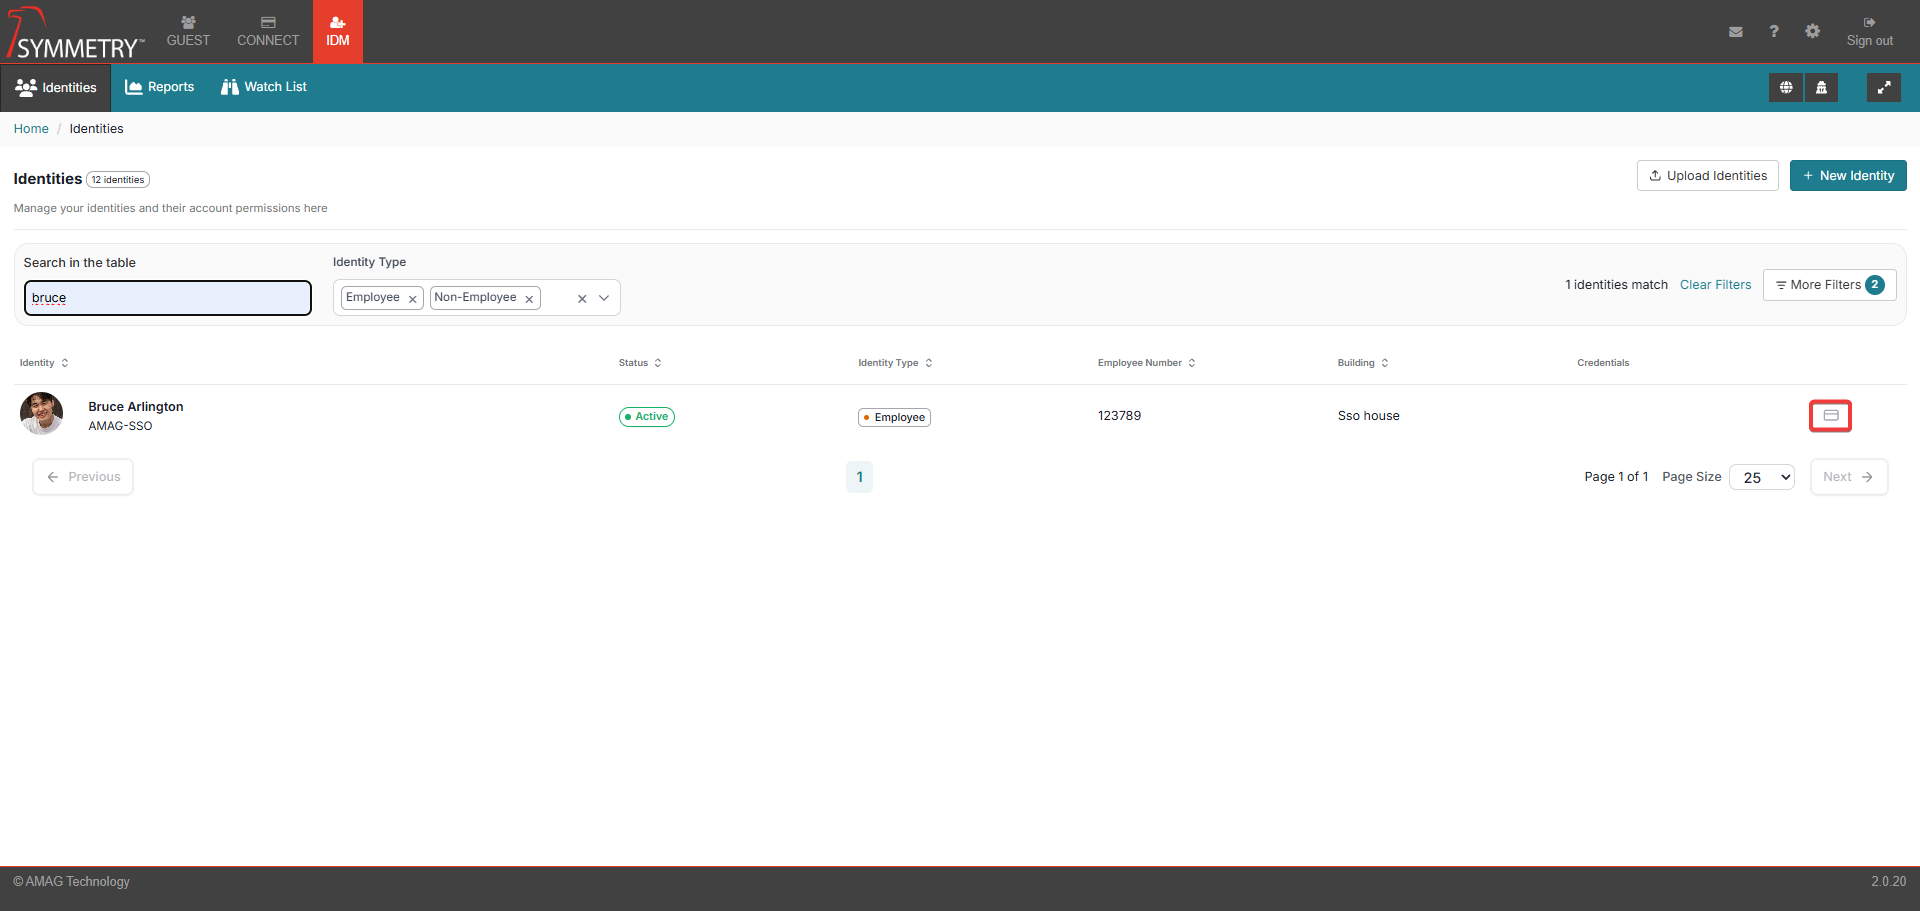
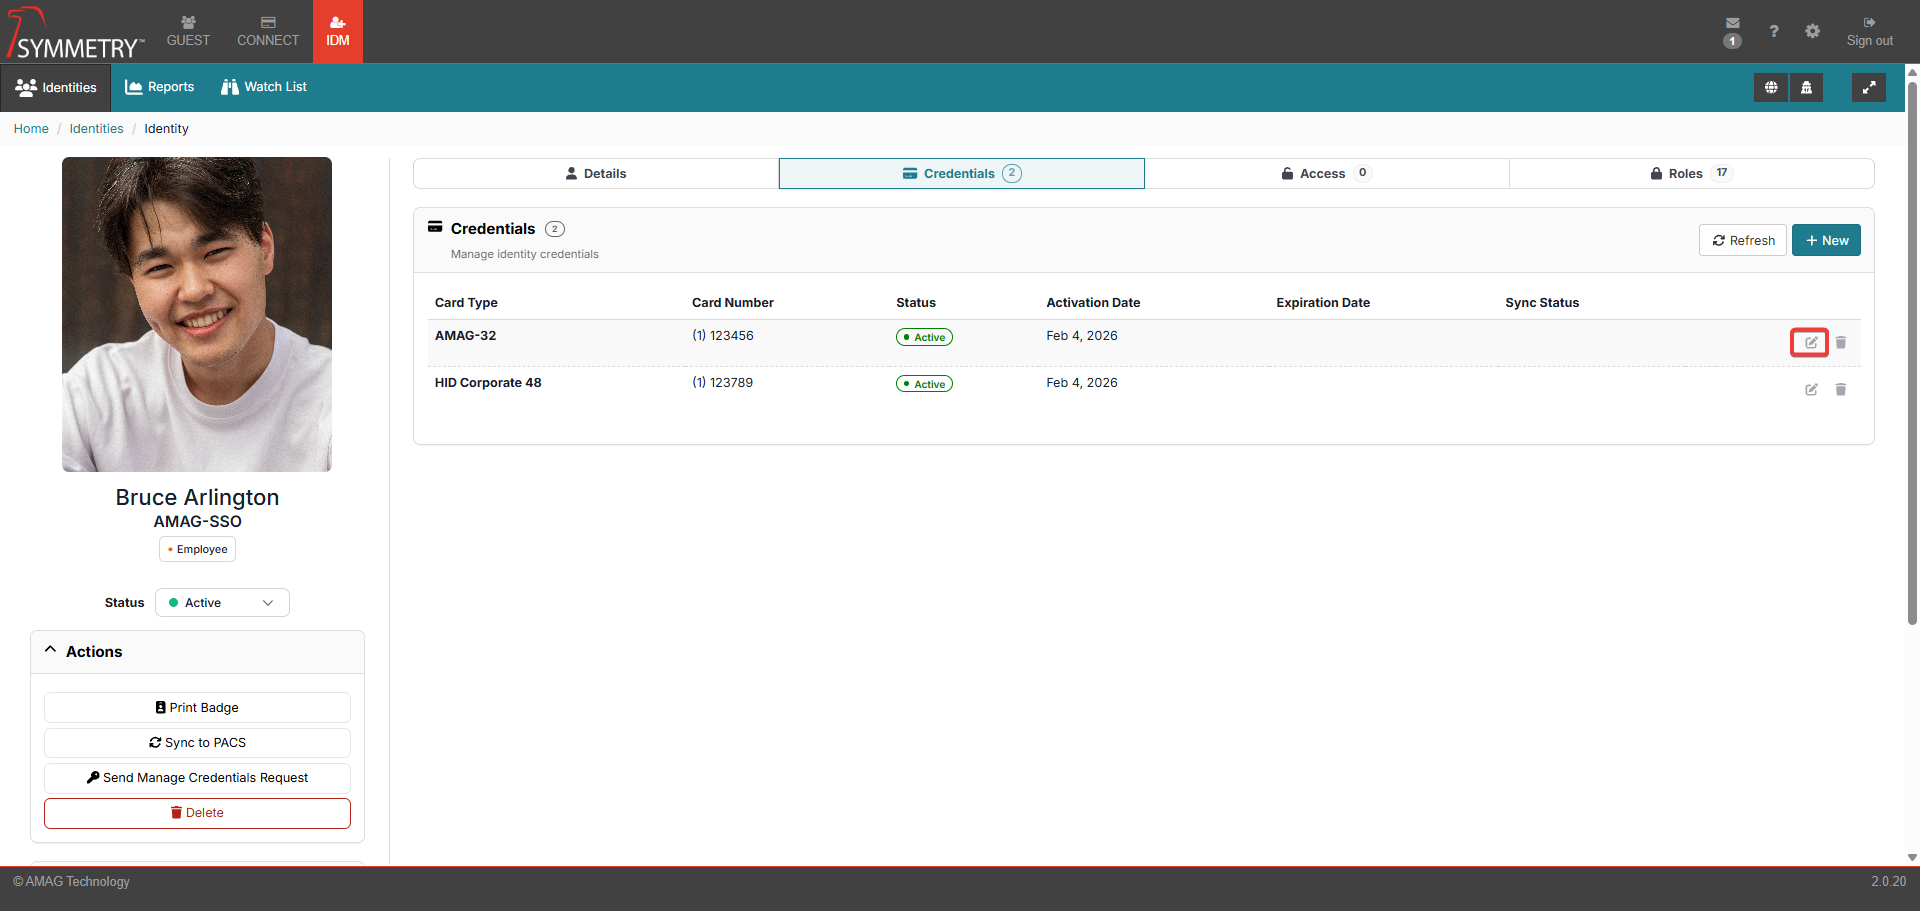
To issue a credential, the user (if authorised to do so) can click on the credential/card icon from the main IDM > Identities page, or simply click on the name of the Identity and navigate to the Credentials Tab.
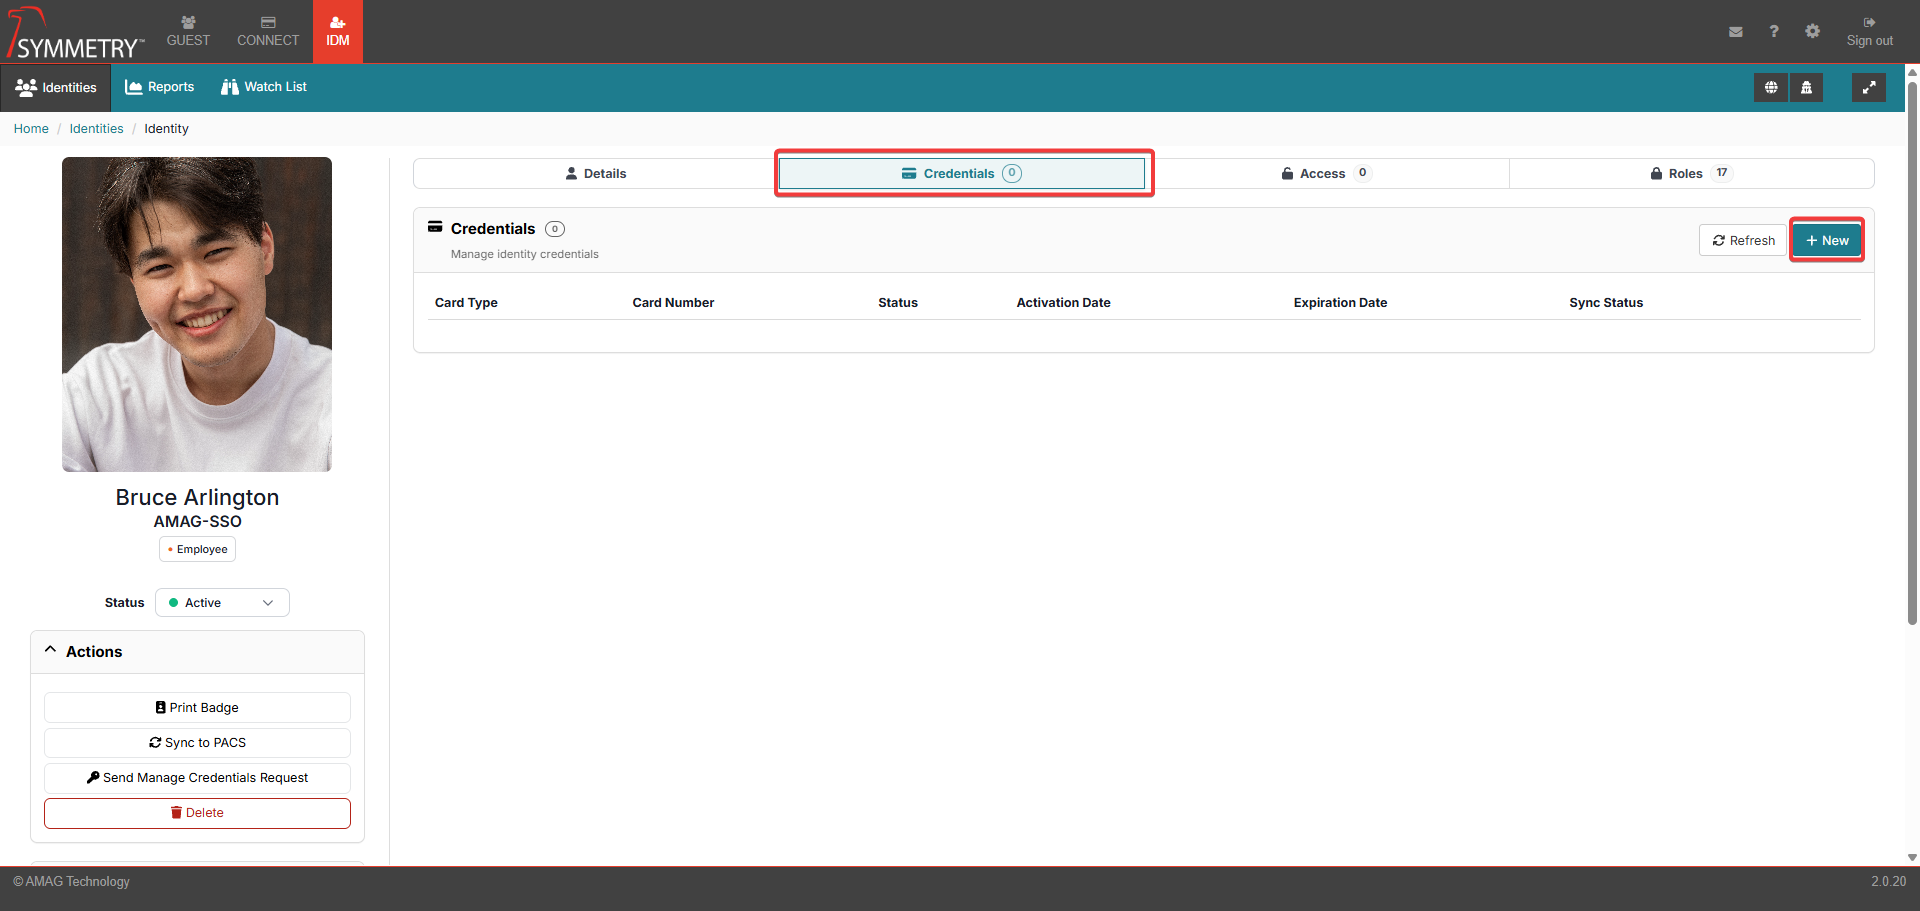
To issue a Credential to the Identity, click the New button on the Credential sub-section.
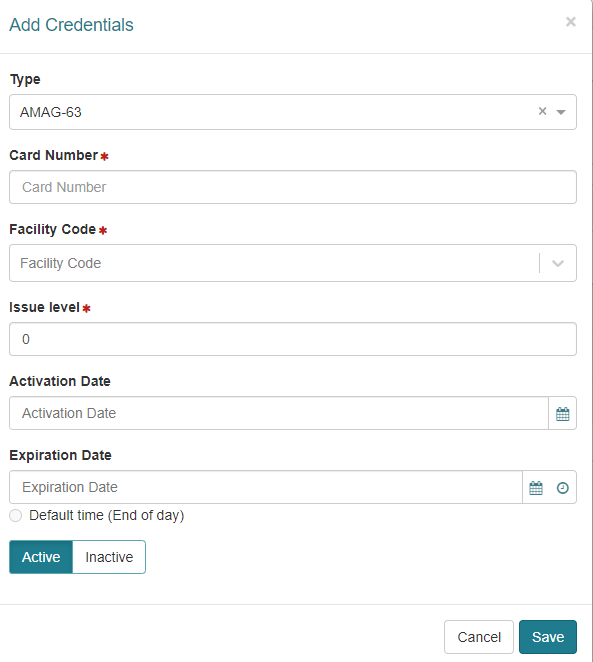
In the Add Credentials dialogue:
Select the Card Type. Options include:
Legacy
SR Series (15 digit)
SR Series (10/12 digit)
HID SE
HID Corporate 48
HID Corporate 35
AMAG-63
AMAG-62
AMAG-32
Barcode 37
HID Wallet 26
Corporate ID (Wallet 57)
Enter the Card Number (or use a compatible reader to read the number from the card).
Note
HID Wallet 26 and Corporate ID do not require a card number or facility code to be added. Corporate ID (Wallet 57) is automatically assigned a card number and a facility code. HID Wallet 26 is provided with a card number and facility code already assigned.
Enter Facility Code (if Card Type is configured to require one).
Enter Issue Level (if Card Type is configured to require one).
Enter an activation date (optional).
Enter an expiration date (optional). The time of expiration can also be selected. Clicking the Default time (End of day) button automatically sets the time of expiration to 11:59 PM on the date selected for expiration. Note that it is possible to configure the default time in Configuration > General to something other than the end of the day.
Select Active or Inactive
Click the Save button.
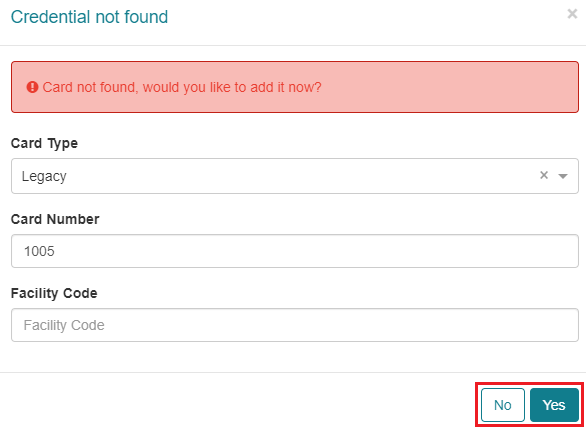
If the Credential is part of an existing Credential Range (review the Credentials section for further information), it will be saved automatically. If the Credential is not part of an existing credential range, then the following dialogue will be displayed. Note that certain roles only allow the user to select credential numbers from existing credential ranges.
There is also functionality to provide dialog for duplicate card numbers. Dialogue displayed: Duplicate card number and facility code combination found. Please enter a unique card number and facility code combination.
Once the record has been saved, the Sync Status may show that the Credential is in the process of syncing with Symmetry Access Control. Click Refresh to update the status.

Once the record has synced successfully the icon will successfully change to show the sync has been successful.
If the Sync Status fails, it will be displayed as an exclamation mark in a red triangle (as displayed in the image below). Clicking on the failed sync status icon will open a dialogue box showing further information on the sync status.
Note
If the sync status does not change after several minutes, there may be an issue with the Symmetry Access Control integration service.
Edit a Credential
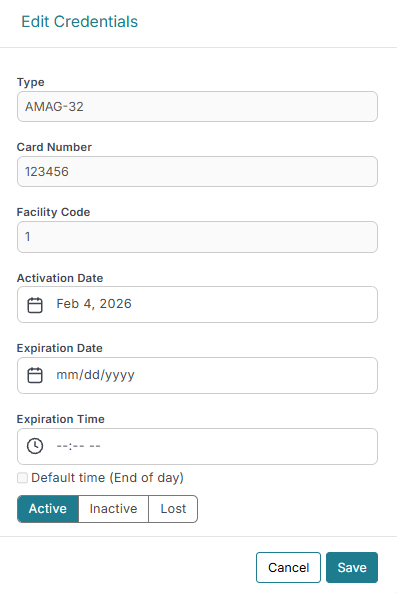
Credential details can also be edited/updated from this screen. Click on the Edit button to enter the Edit Credentials section.
The user can now edit the Activation Date and the Expiration Date/Time. The credential can also be set to Active, Inactive or Lost (Setting the status to Lost will display a Flag). The status of the credential is also displayed with an icon against the credential on the Identity Information main page. Click the Save button to confirm and save any edits made.
Remove a Credential
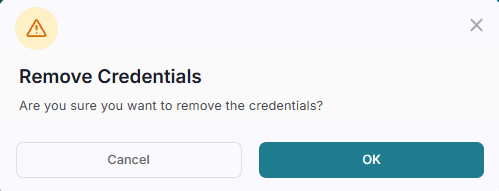
A Credential can also be removed from an identity. Click the Remove button on the Credential that the user wants to remove. The user will then be prompted to confirm the process. Click the OK button to confirm the removal of the Credential. Note that, dependent on the configuration, the credential may not be removed from the Identity if it is the last credential assigned to them. Instead, it will just be marked as Inactive.
Assigning an Access Group
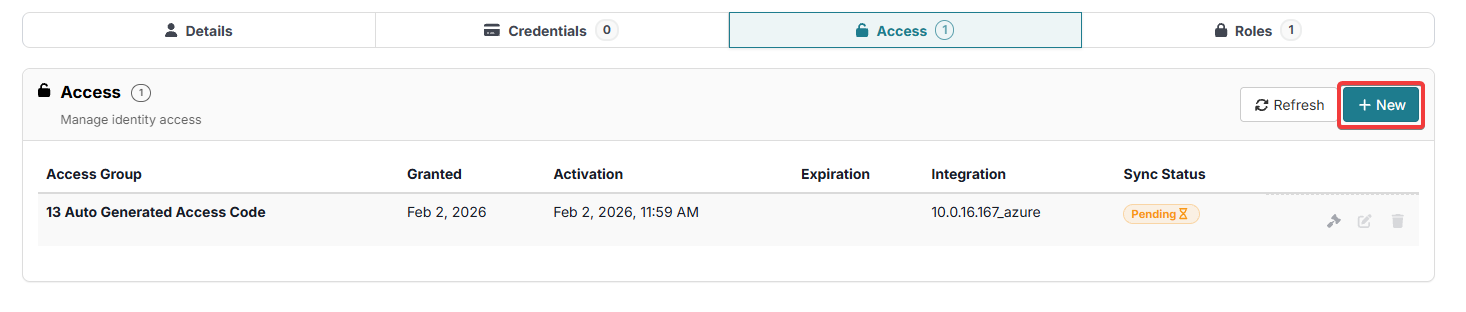
If they are authorised to, the user can click on the 'Grant Access' icon from the main IDM > Identities page, or simply click on the name of the Identity and navigate to the Access Tab.
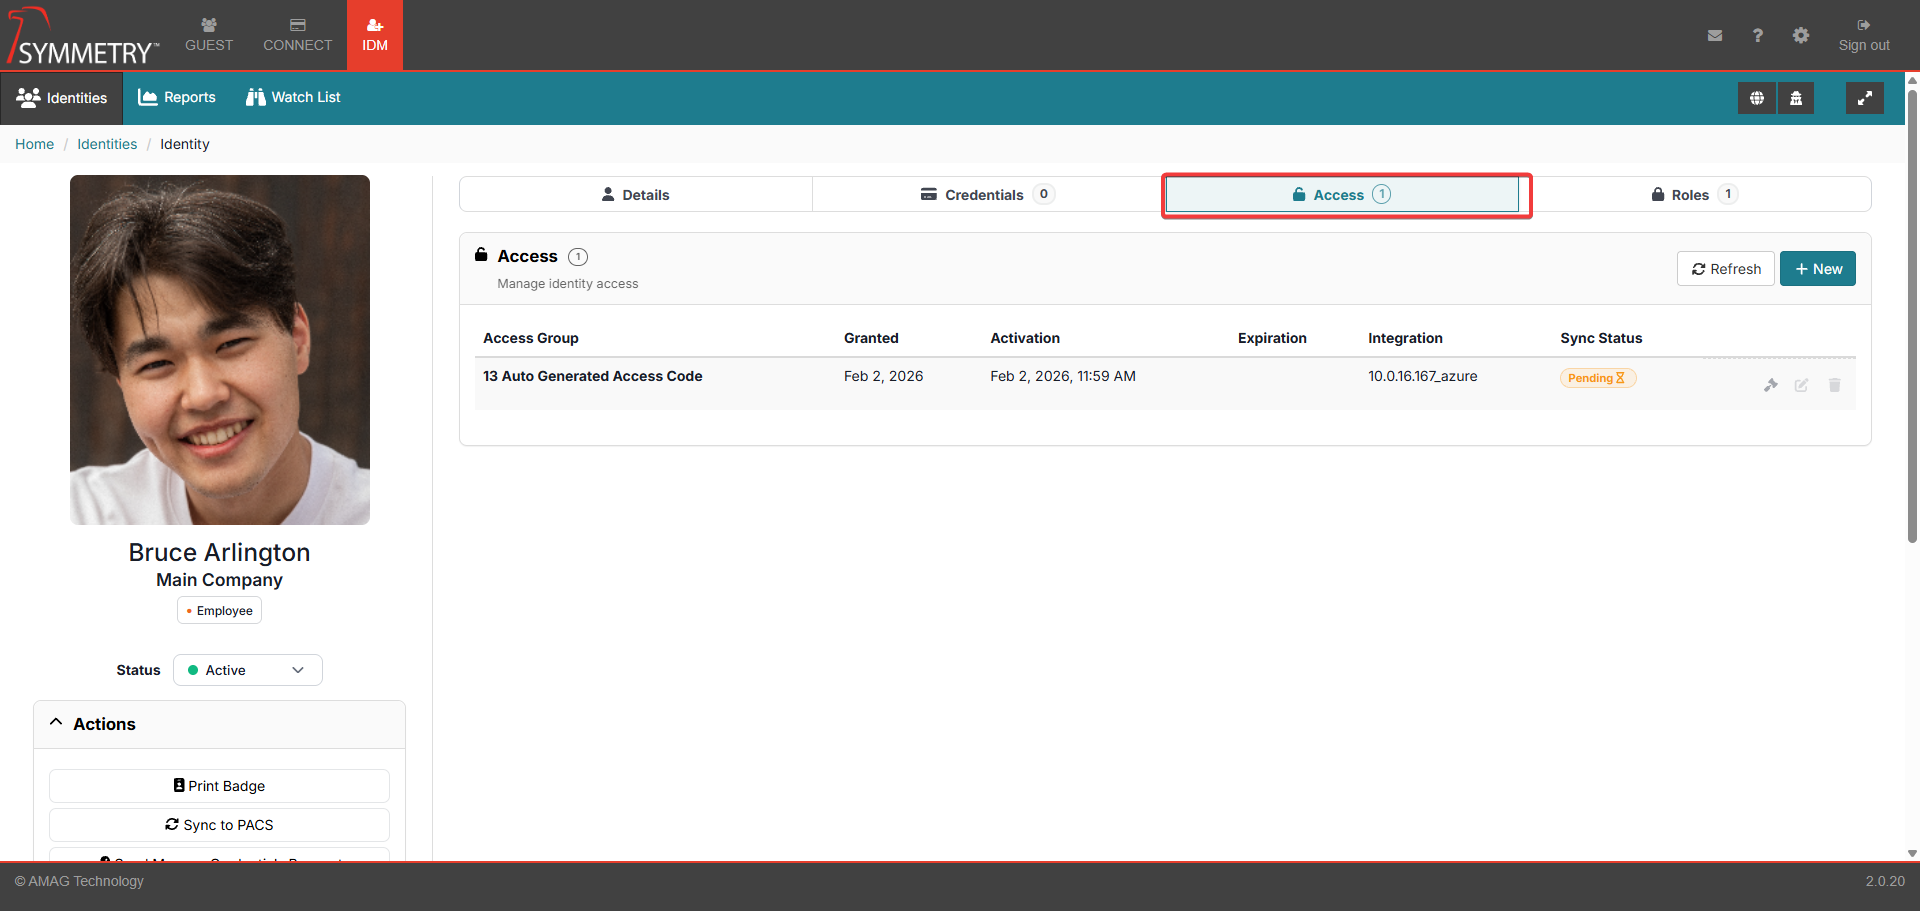
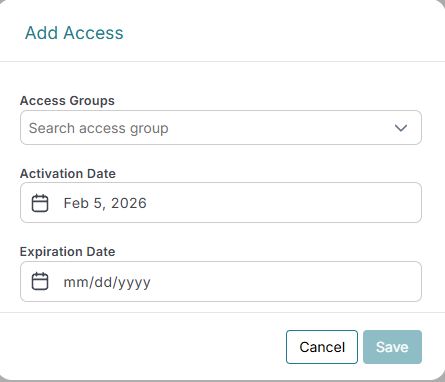
To assign an Access Group to the Identity, click New on the Access sub-section.
Select the Access Group from the drop-down list, enter Activation/Expiration dates (optional) and click the Save button.
As with Credential issuance above, once the Access Group has been saved, the Sync Status may show that the Credential is in the process of syncing with Symmetry Access Control. Click the Refresh button to update the status.
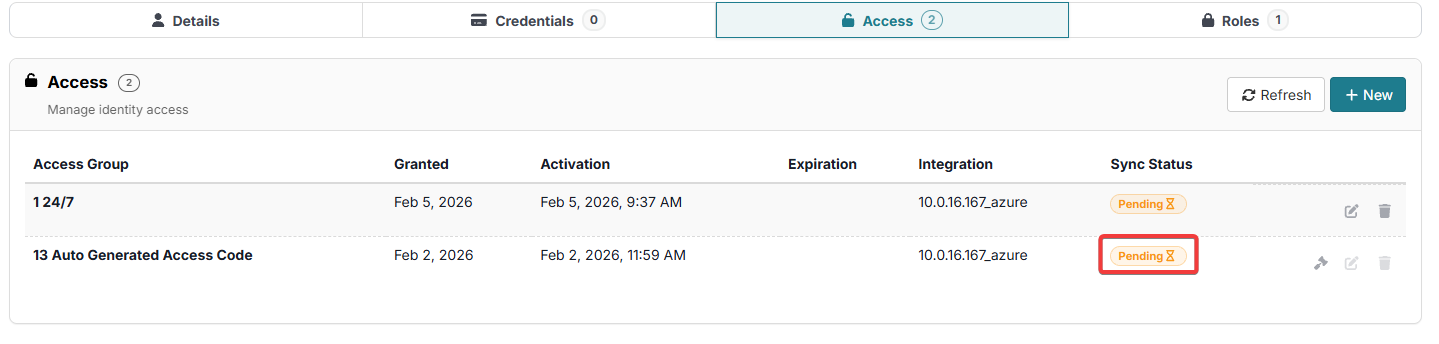
Note
If the sync status does not change after several minutes, there may be an issue with the Symmetry Access Control integration service.
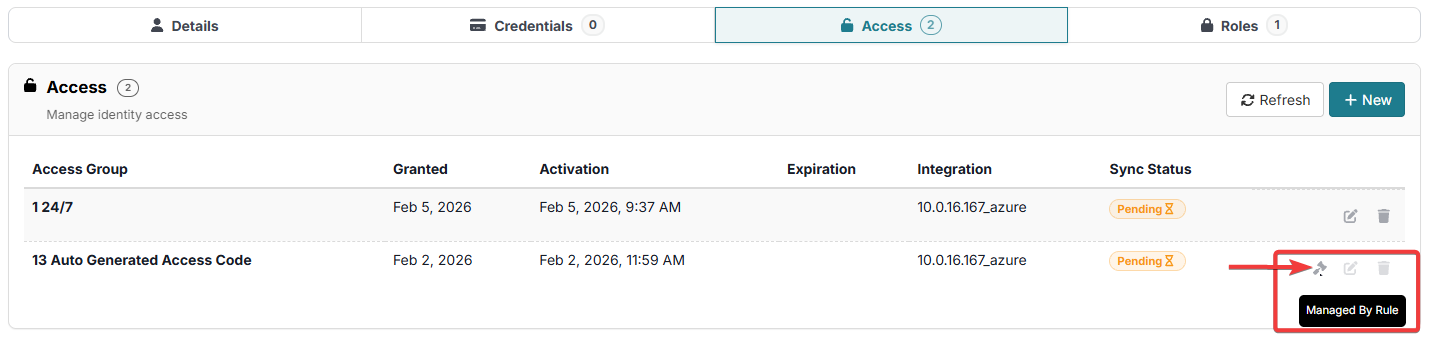
It is important to note that some Access Groups are assigned automatically by Access Group Rules. For more information, refer to the Access Group Rules Rules section of this guide. Any groups that are assigned in this manner will display Managed By Rule. These Access Groups cannot be edited on this screen since they were assigned by a rule.
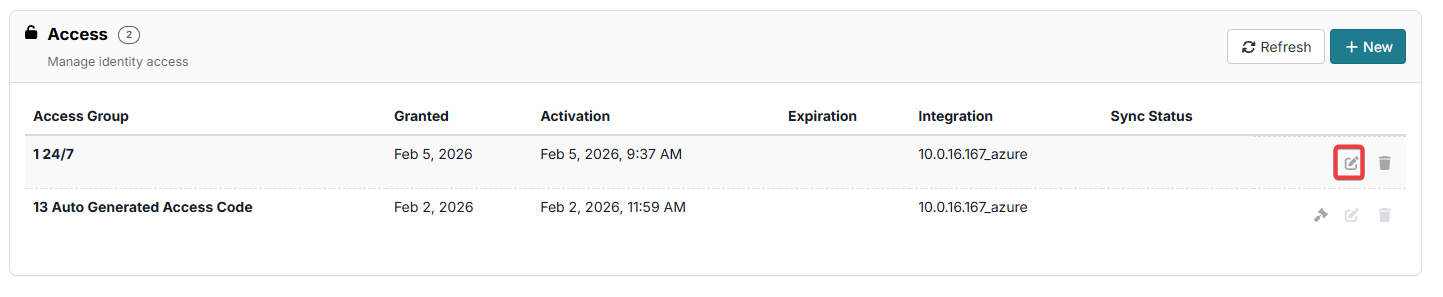
Edit Access Group
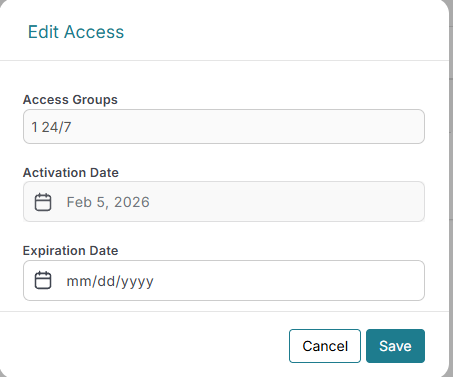
Access Group details can also be edited/updated from this screen. Click on the Edit button to enter the Edit Access section.
The user can now edit the Activation Date and the Expiration Date. Note that the user can only edit the Activation Date if the current Activation Date is in the future. Click the Save button to confirm and save any edits made. Then click the Sync to PACS button. and refresh to sync the changes to the Integration system.
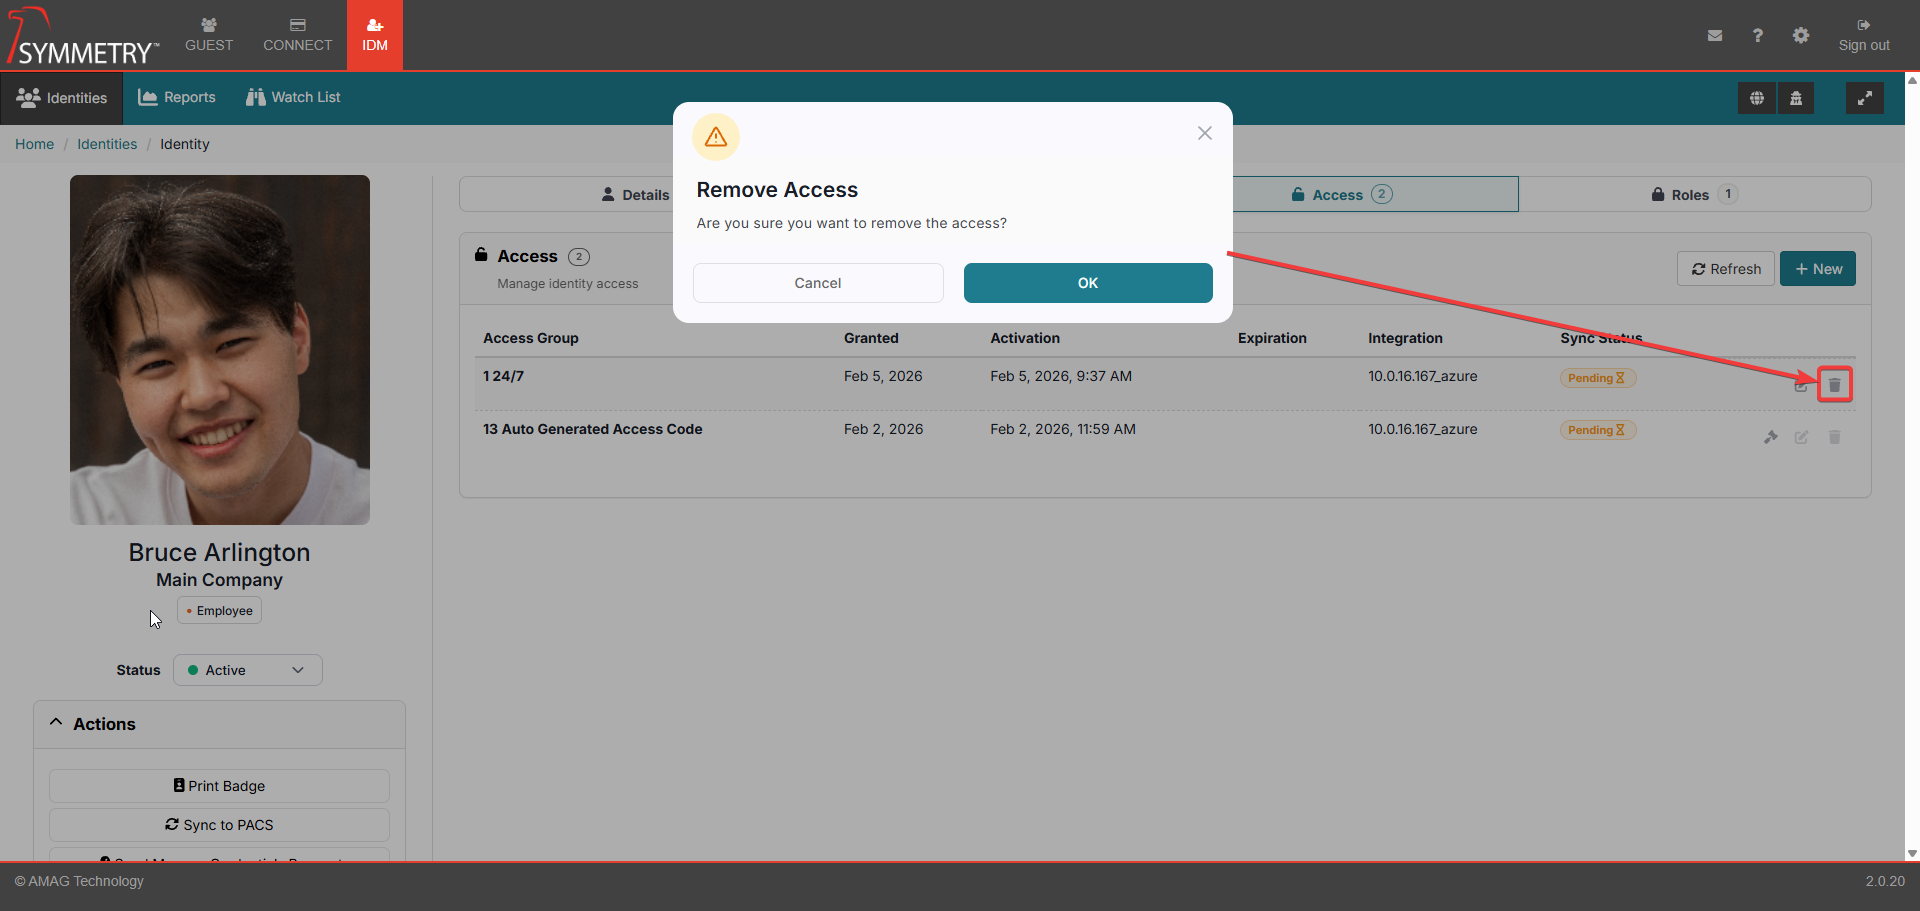
Remove Access Group
An Access Group can also be removed. Click the Remove button on the Access Group that the user wants to remove. The user will then be prompted to confirm the process. Click the OK button to confirm the removal of the Access Group. Then click the Sync to Pacs button and refresh to sync the changes to the Integration system.
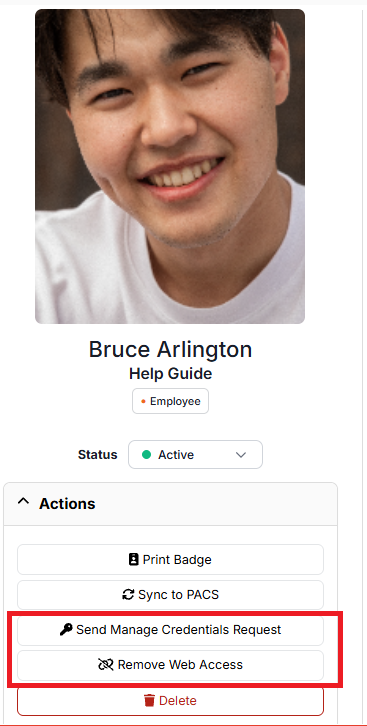
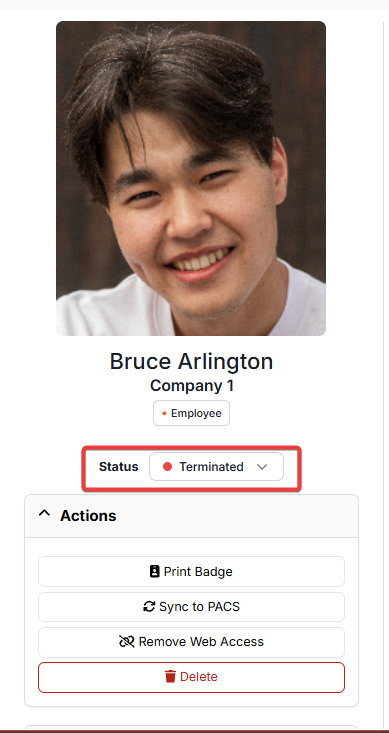
Add/Remove Web Access
One of the actions that can be performed on an identity is to Add or Remove Web Access Credentials. Only one option will be available to an identity, and it is based on whether they currently have a web credential or not. If the identity does not currently have a web credential, then a Send Manage Credentials Request button will be visible. If the user already has a web credential, then a Remove Web Access button will be visible.
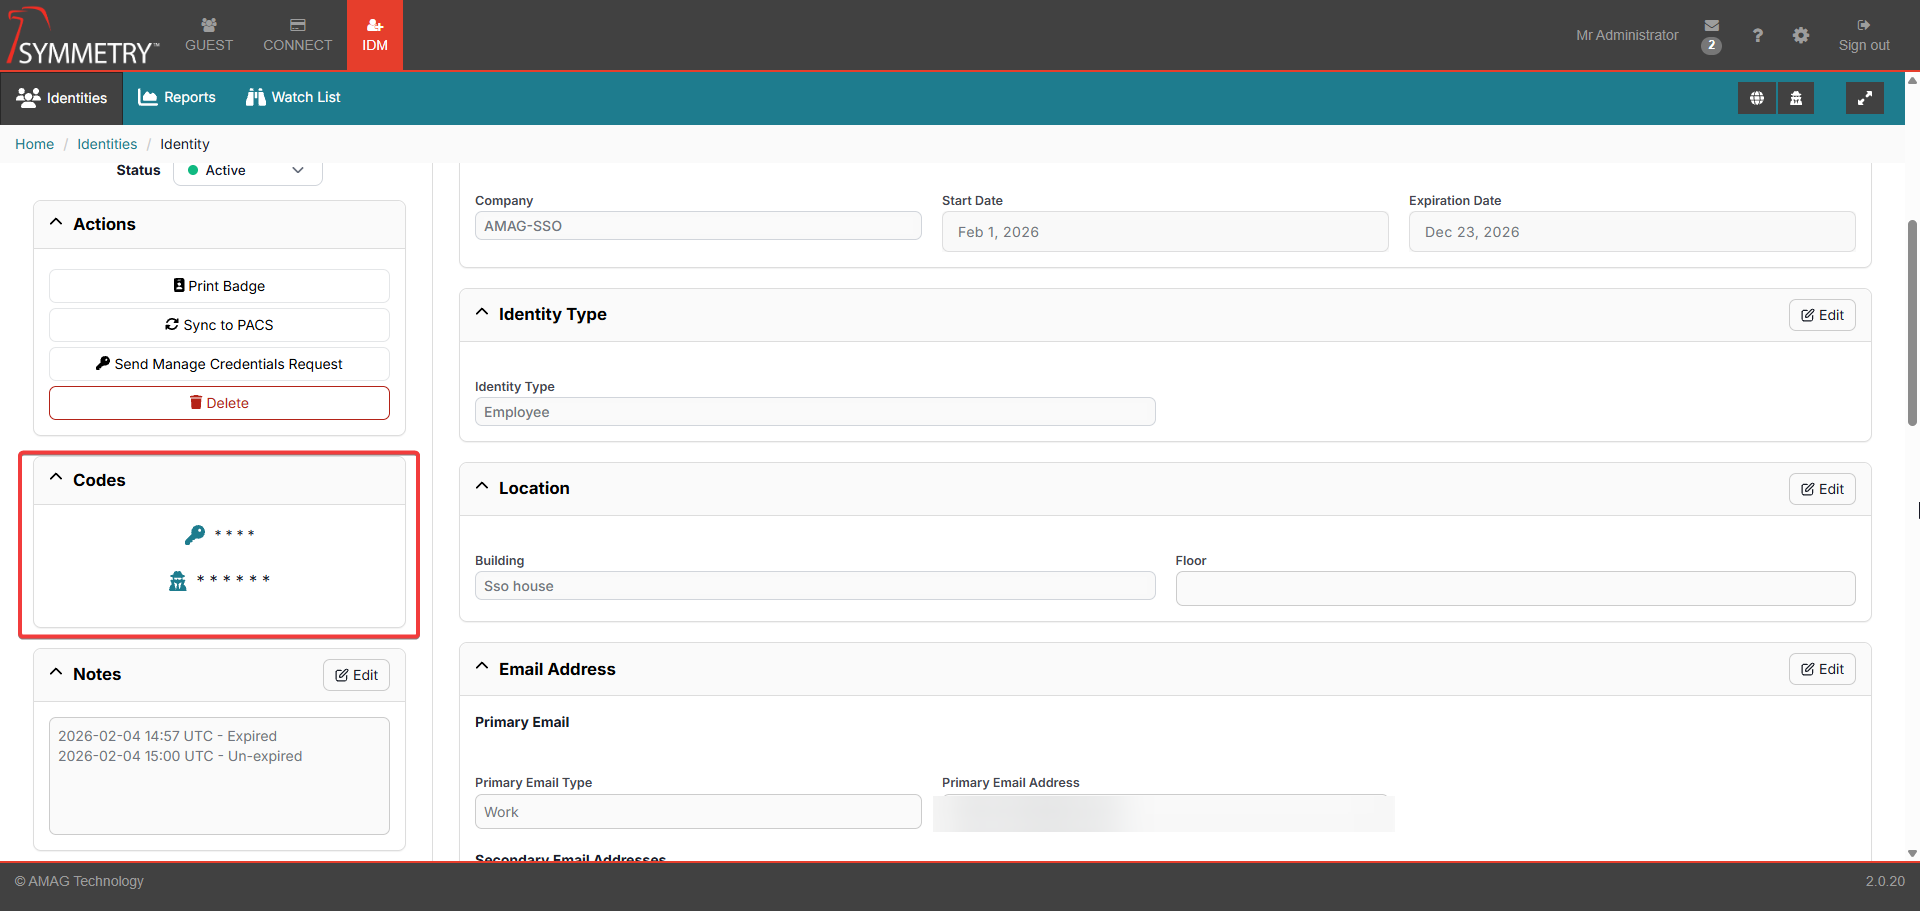
Assigning PIN/IDS Codes
If enabled, the user will be able to assign PIN and/or IDS Codes to the Identity.
Pin Code is a number used by the Identity at specific keypad readers in the Symmetry Access Control System to verify that they are the owner of the card.
An IDS Code (Intruder Detection System) is typically a unique code that an Identity uses to arm/disarm an IDS Alarm zone. The Symmetry Access Control System includes some IDS functionality, which requires the Identity to have an IDS Code assigned.
For more information, refer to the Identity Credentials Pin and IDS Code sections in the Configuration > General sections of this guide for further information.
Sync to Symmetry Access Control
Once the Identity has met the conditions defined in the Access Control Identity Sync section in the Configuration > General section of this guide, the identity will be synchronized to the access control system.
If the data ever needs to be resent for any reason, the user can click the Sync to PACS button, and all data will be resent.

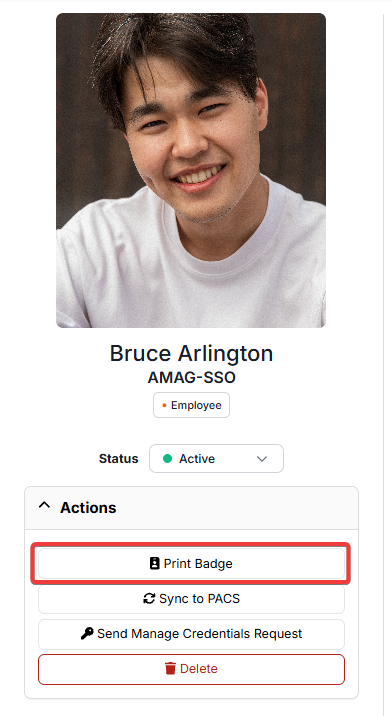
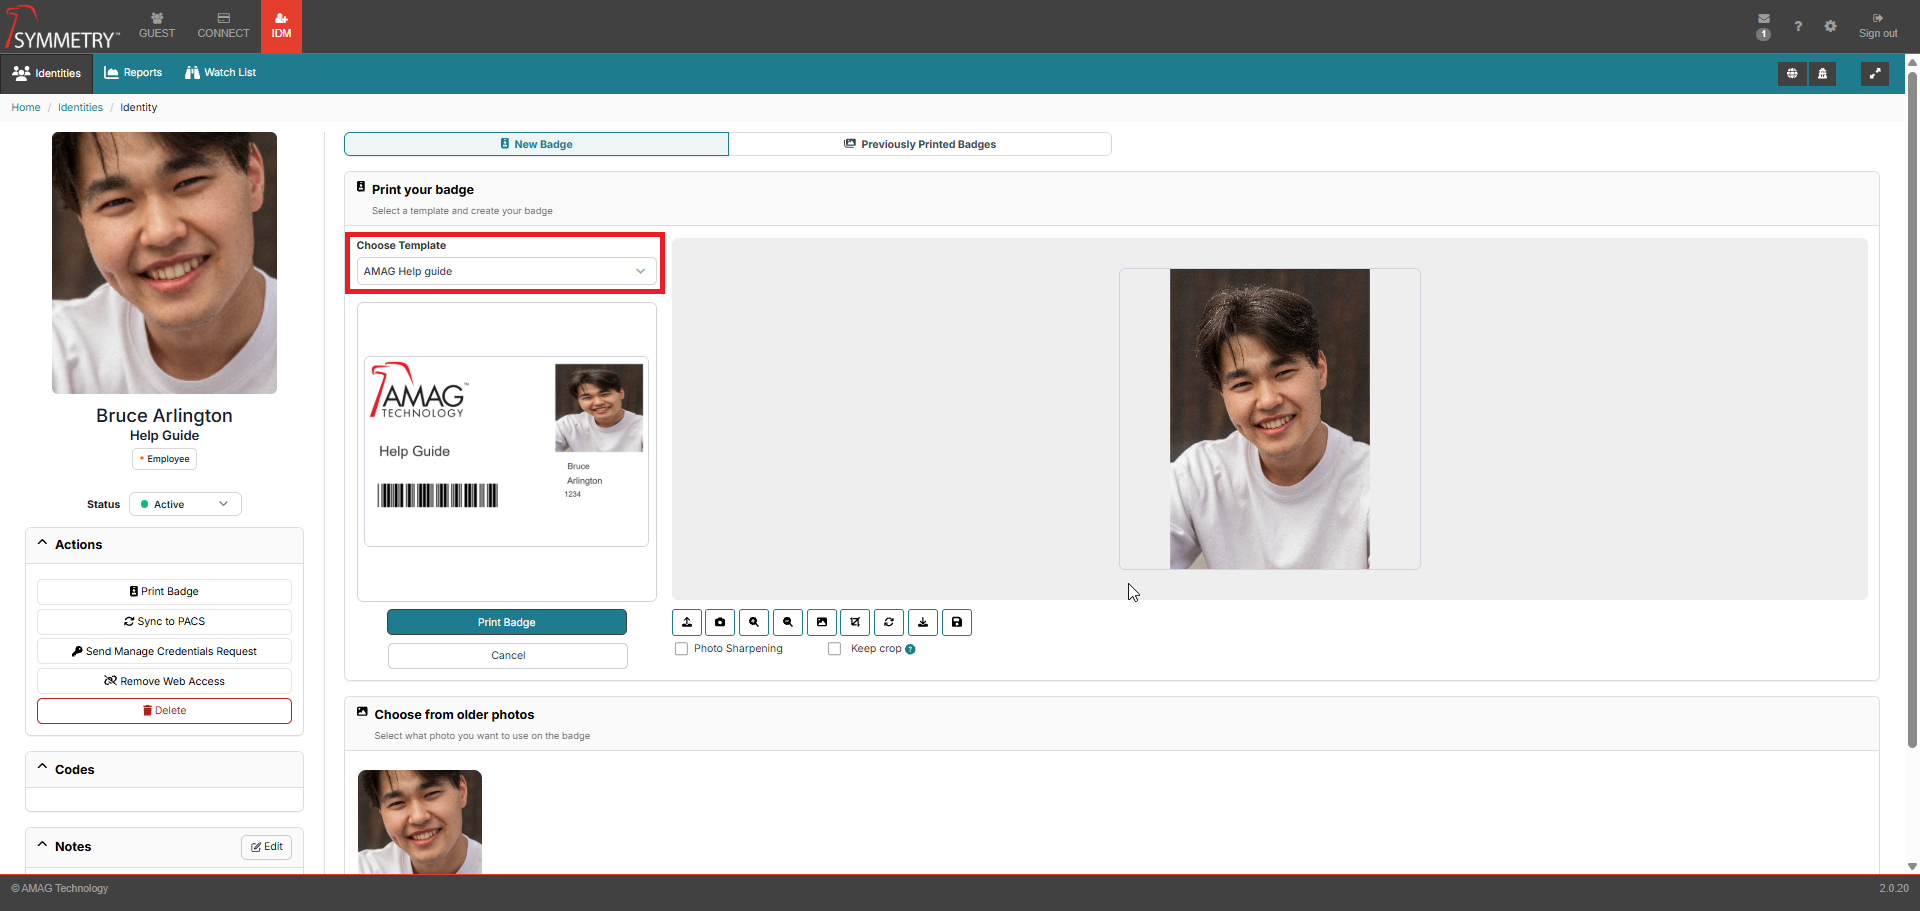
Badge Printing
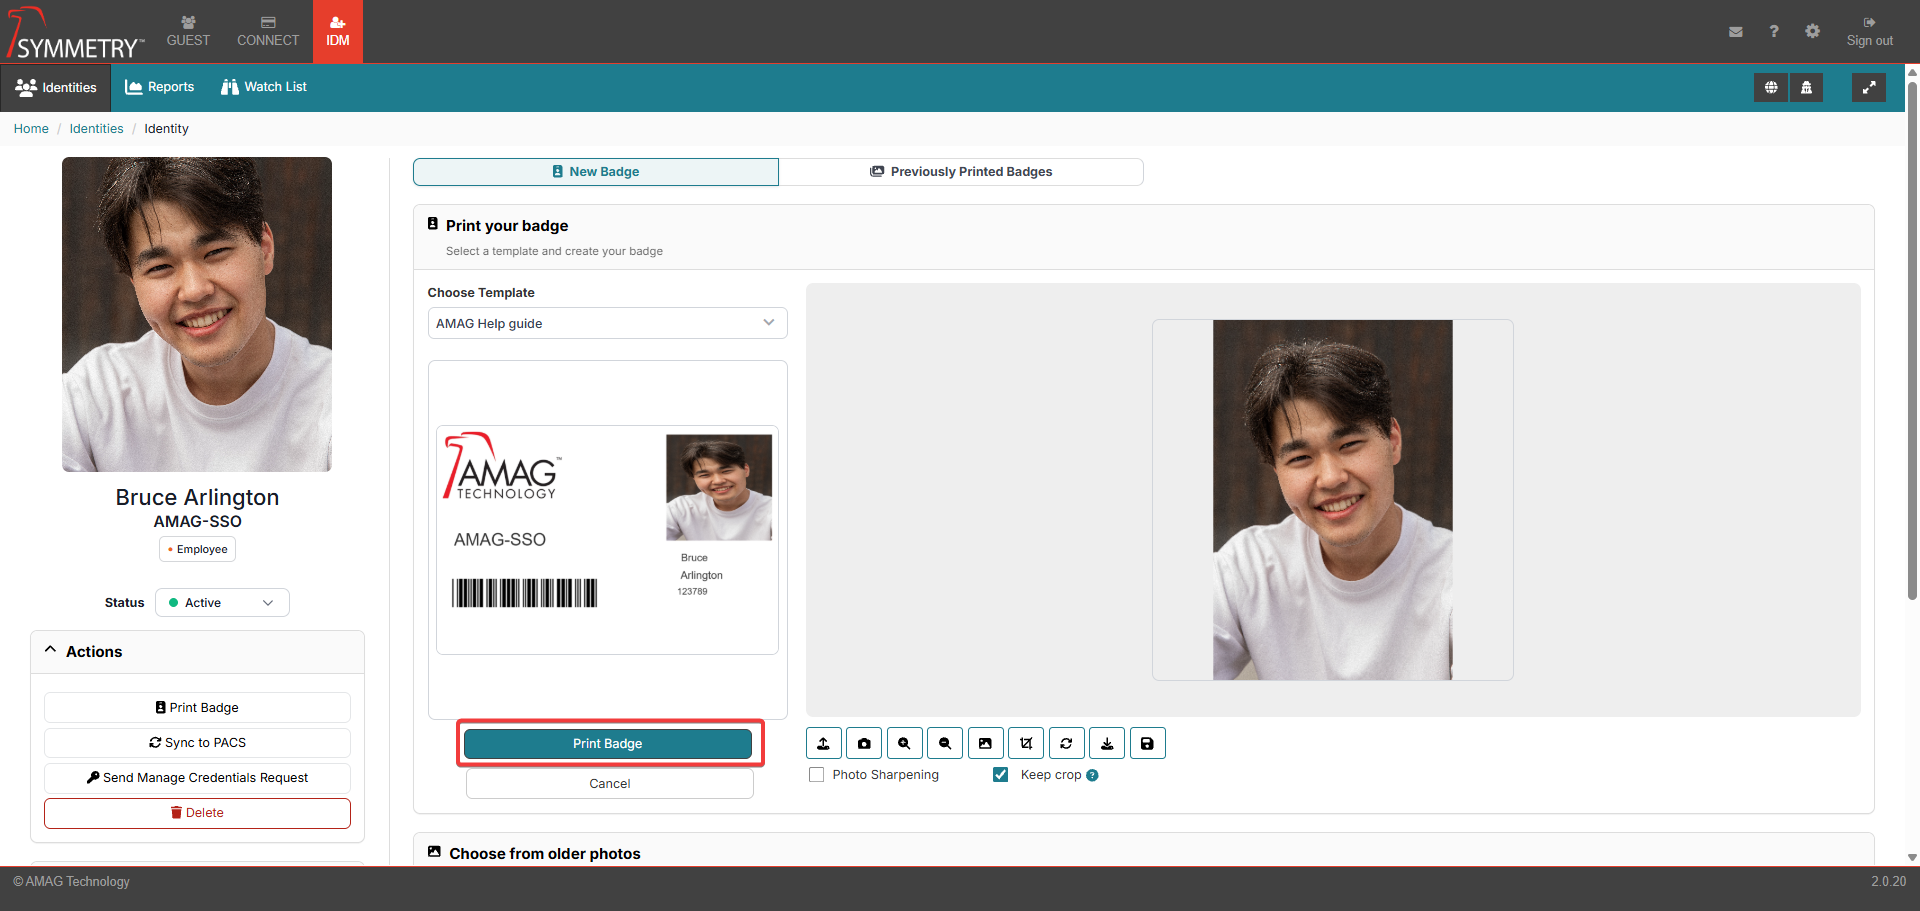
To print a badge for the Identity, click the Badge button on the Identity Information screen.
On the Badge Creation page, the user is able to select the appropriate Badge Template (if more than one is available), capture a photo and print the Badge for the Identity. There is also the option to preview the badge (and also preview the front and the back if the badge has been configured to be double-sided).
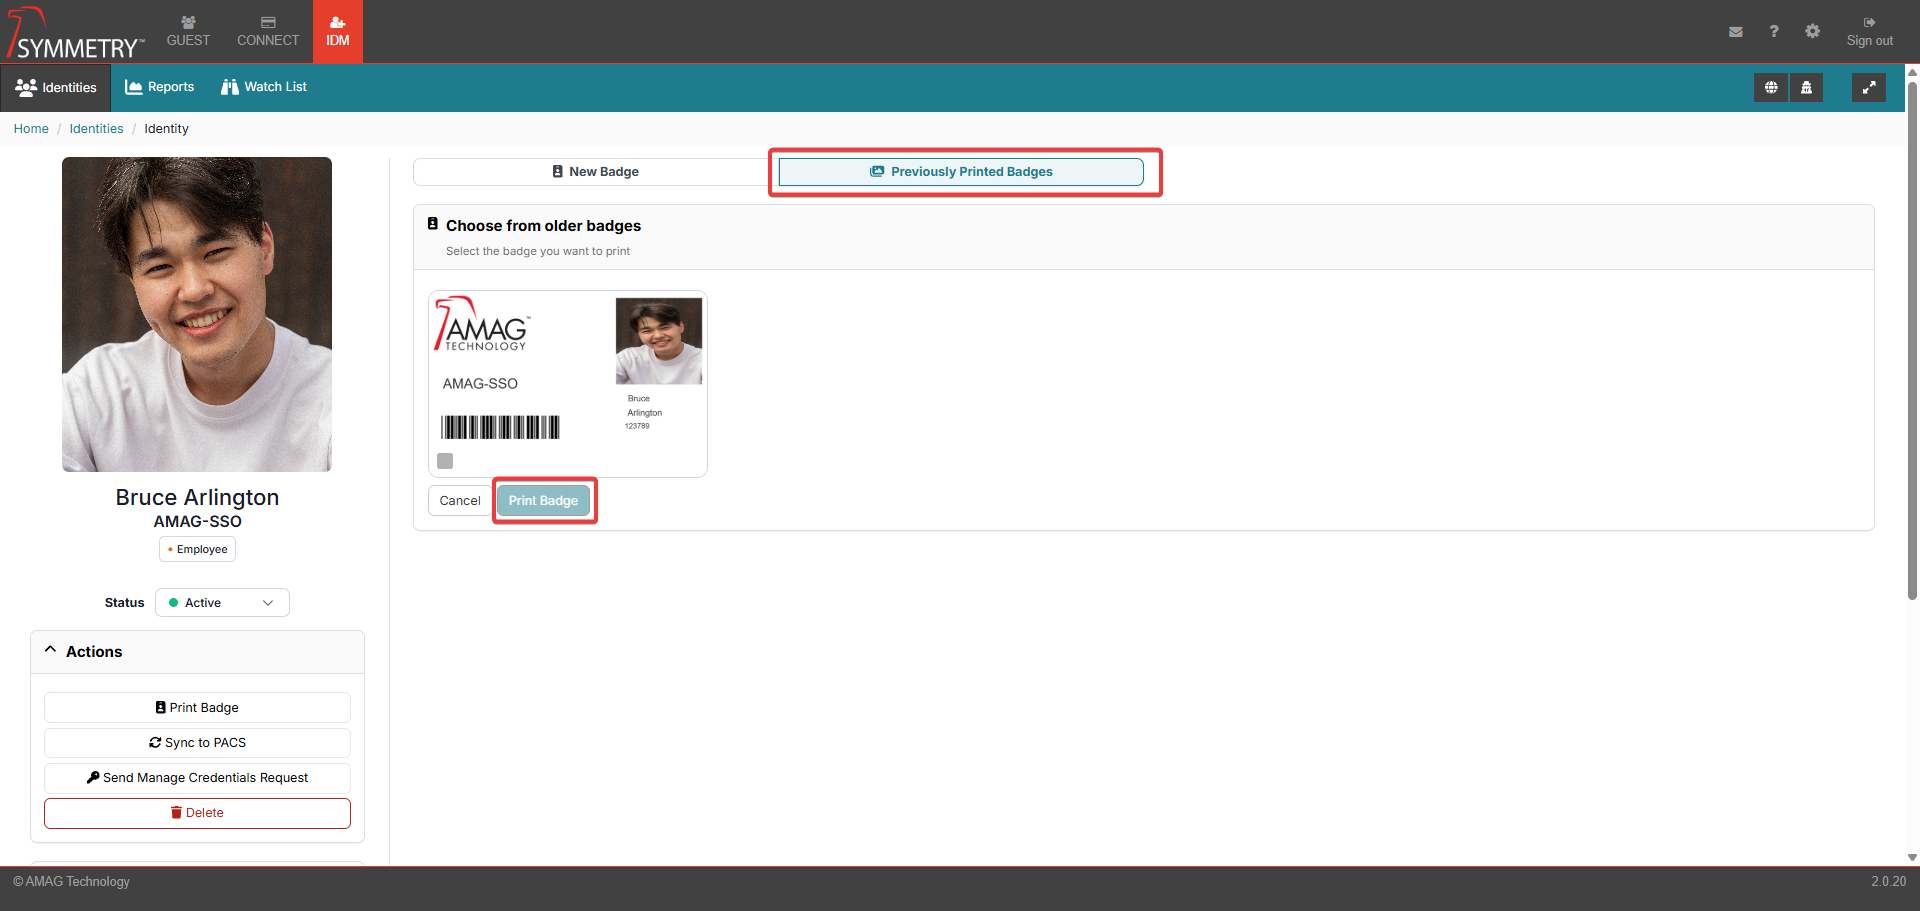
Click on the Previously Printed Badges to view any previously printed badges. If a previously printed badge is acceptable to use, it is possible to print the previous badge without the need to create a new badge. Click the Print Badge button on a selected previous badge.
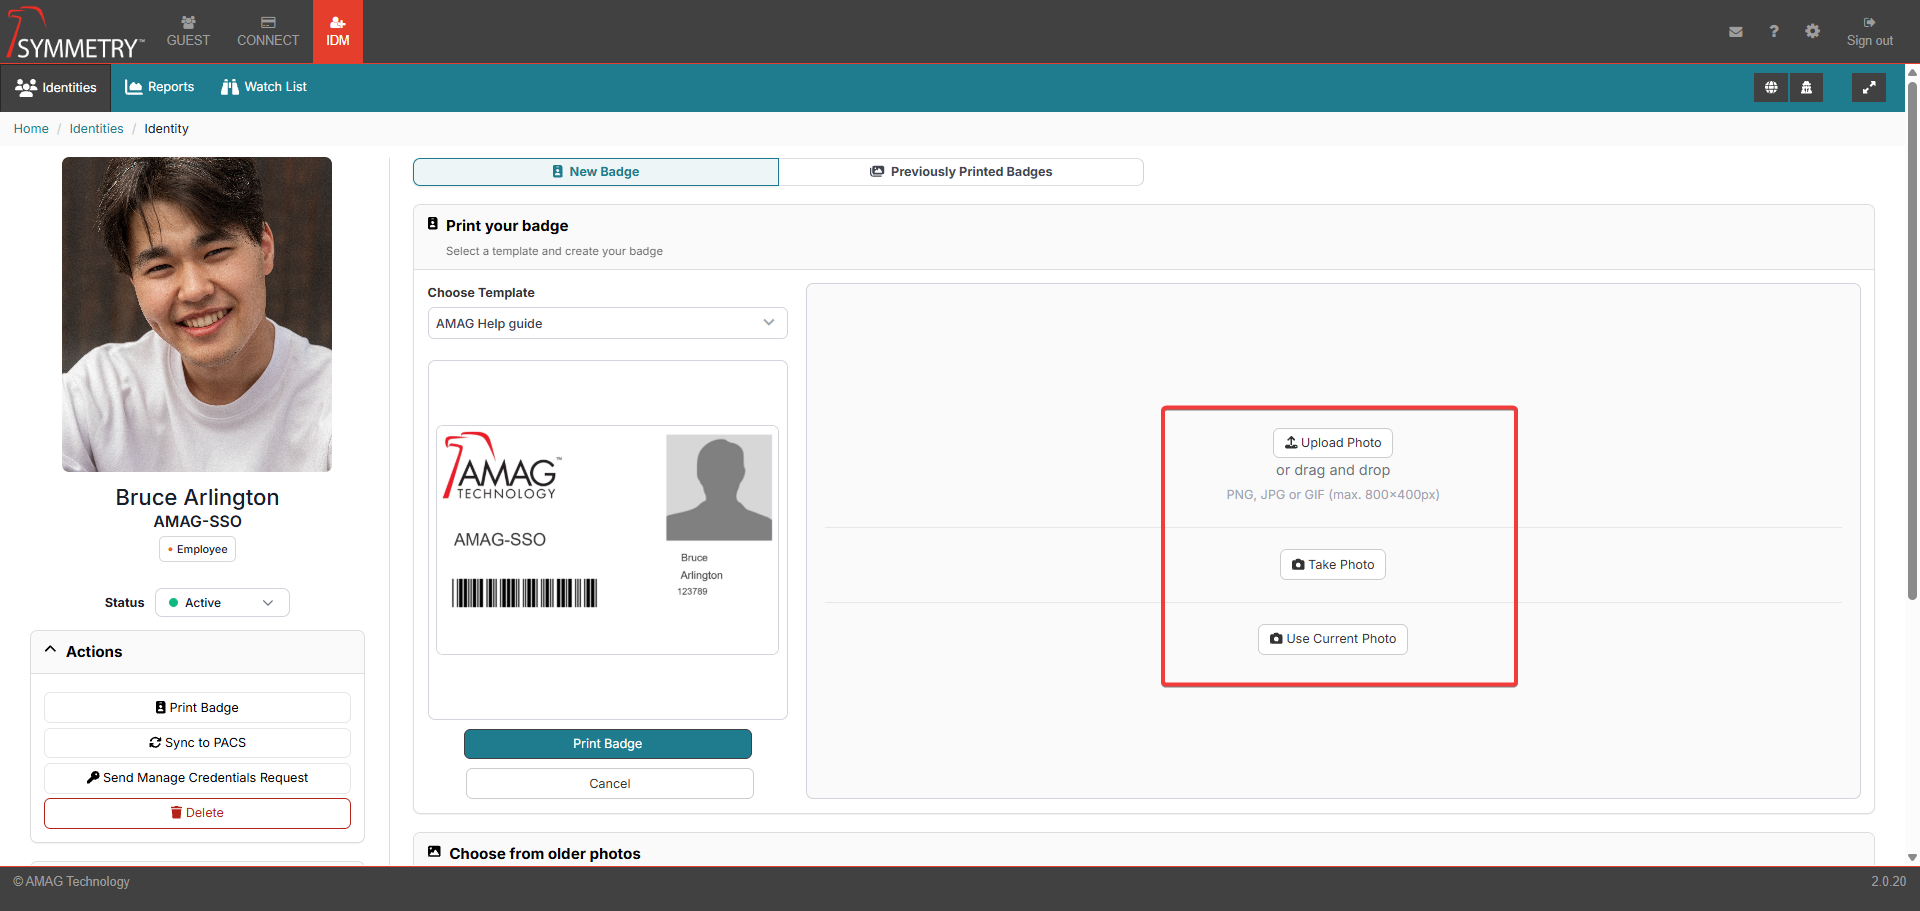
If a new badge is required, the user is able to upload a photo or capture a live image using a compatible web camera. There is also the ability to view Older Photos that are associated with the identity.
If a New Photo is to be uploaded or captured, the Process Photo section can be used to edit the photo as required. Edits made to the photo, for example, cropping or rotating the image, must be confirmed by clicking the tick in the top right corner of the process photo section. The options available in the Process Photo section, once the desired photo has been clicked on, are as follows:
Upload: Upload a previous taken or saved photo.
Select the Background: Select the background of the badge.
Crop the Image: Crop the image if required.
Take Photo: Capture a live image using a compatible web camera.
Zoom: Zoom in and out on the photo.
Rotate: Rotate the image as required.
Export Photo: Export photo to local environment
Save Photo: Will save the photo and edits/changes made. This saved photo will then be used on the badge.
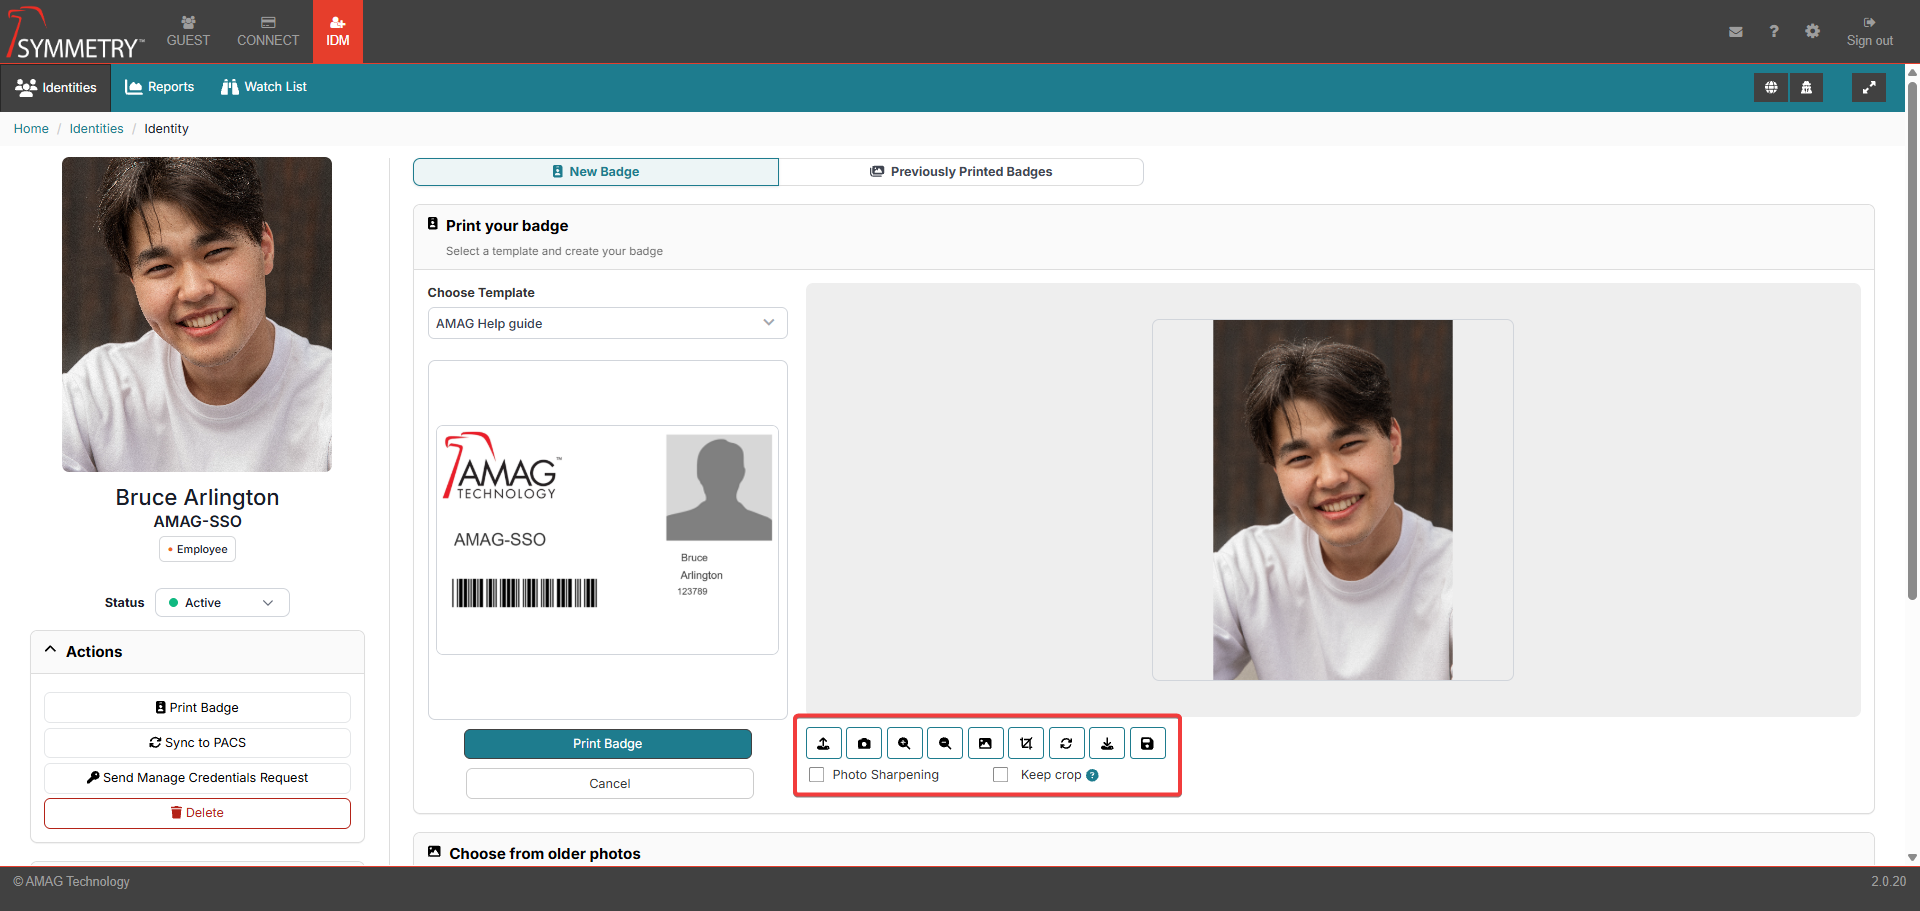
Clicking the Keep crop check box will make sure the crop box will be displayed for the user every time they capture a photo. The crop box will appear in the same location every time, making it easy to crop every image in the same way.
Clicking the Photo Sharpening check box will sharpen the picture (if required) to improve the quality and clarity of the photo for the printed badge.
Once the user has completed the creation of the badge and is happy with the preview, they are able to print the badge.
Note
For more information regarding Badge Template creation, refer to the Badges section in this guide.
Suspend, Terminate, Expire or Delete Identity
Expire an Identity
To manually expire an Identity, navigate to the Details tab, and click the Edit Company Info button. An authorized user can then set a Expiration Date and click the Save action button. Expiration Date can be in the past if the Identity is to be expired immediately.
To activate an identity that has expired, navigate to the Details tab, and click the Edit Company Info button. An authorized user can then set a Expiration Date in the future and click the Save action button. This will automatically make the expired identity active.
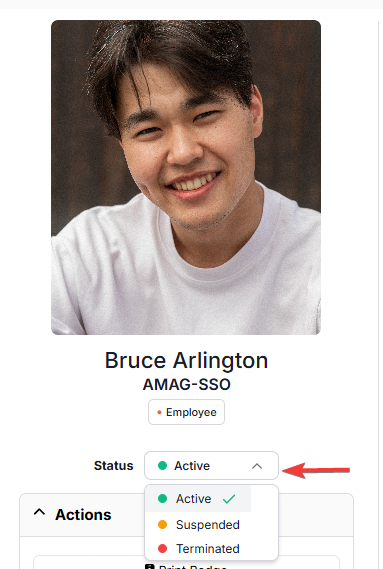
A user can also select 'Active' status from the dropdown box. Modal will appear requesting a new Expiration Date and clicking the Save will activate the Identity.
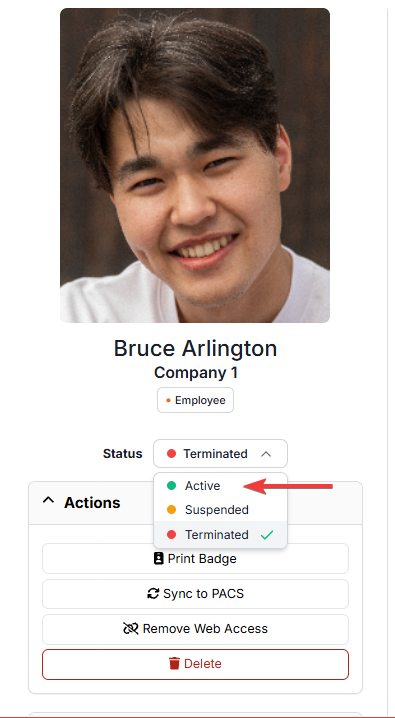
Terminate an Identity
Another action that is available is the Terminate Identity button. Navigate to the status section and select the Terminated option.
Terminating an identity is a soft deletion of the identity. Based on the configuration, they may no longer be visible in CONNECT or Guest, and will be marked as terminated in IDM. Terminated Identities can be reactivated at any time, and the history of the identity will remain intact.
Note that there are two separate statuses - Terminated and Terminated with Lock. This has no impact on functionality within the UI (User Interface). If an Identity status is Terminated With Lock, then they cannot be un-terminated / activated by the Application Programming interface (API) or by the IDM Importer until the lock is removed.
Note
Web Credentials assigned to an Identity will be removed on termination and will not be restored on reactivation.
Activate Identity After Termination
Navigate to the Status section of the identity details page.
Select the Active status from the drop-down box to set the identity status back to active.
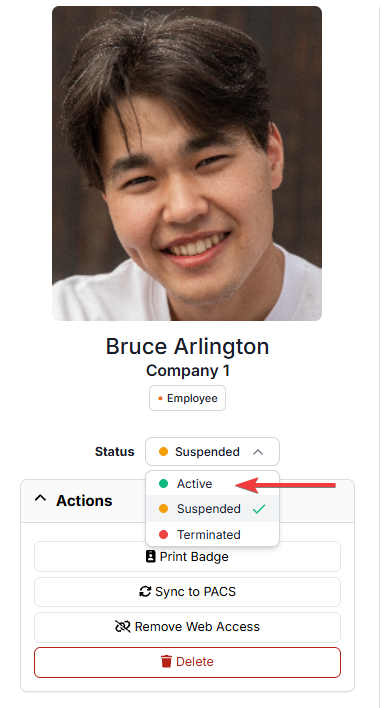
Suspend an Identity
Another action that is available is the Suspend Identity button. Navigate to the status section and select the Suspended option.
Suspending an identity is a soft deletion of the identity. Based on configuration, they may no longer be visible in CONNECT or Guest, and will be marked as suspended in IDM. Suspended Identities can be unsuspended at any time, and the history of the identity will remain intact.
Note
Web Credentials assigned to an Identity will be removed on suspension and will not be restored on unsuspension.
Activate Identity After Suspension

Navigate to the Status section of the identity details page.
Select the Active status from the drop-down box to set the identity status back to active.
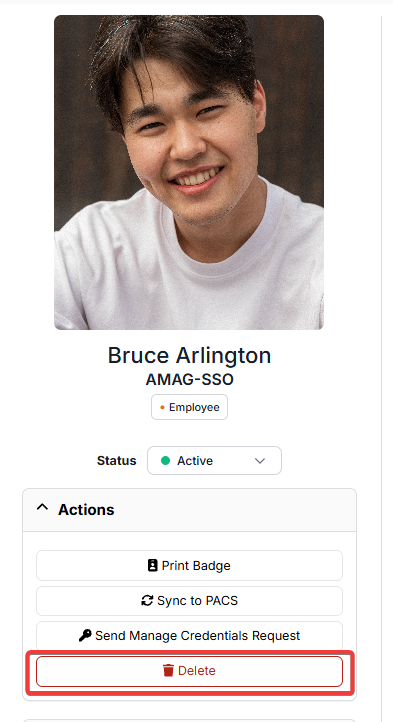
Delete an Identity
The final action that is able to be taken is Delete Identity button. Deleting an identity will also remove an identity from the system, unlike terminating or suspending an identity; this is a hard delete without the ability to undelete.