Adding Identities into IDM
Note
Required fields are indicated with a red Asterisk.
This section covers how to add Identities into the application. Identities is the generic term used to describe employees and non-employees (e.g. contractors, vendors etc.). Visitors can also be added (refer to Visitors for further information). Identities are essentially users of the system and are listed on the home page of the Identities tab.
Identities are added into the system in a variety of different ways including:
Manually: An authorized user is able to add a new Identity directly on the home page of the Identities tab.
Spreadsheet Upload: An authorized user is able to upload a spreadsheet of users via the uploads section within the identities tab.
IDM Importer: The IDM Importer Utility synchronizes Identities via an integration with a local SQL data source on an ongoing basis (details provided in a separate document).
Public API: Identities can be imported into the system via the public API (details provided in a separate document).
Adding Identities Manually (Employee and non Employee)
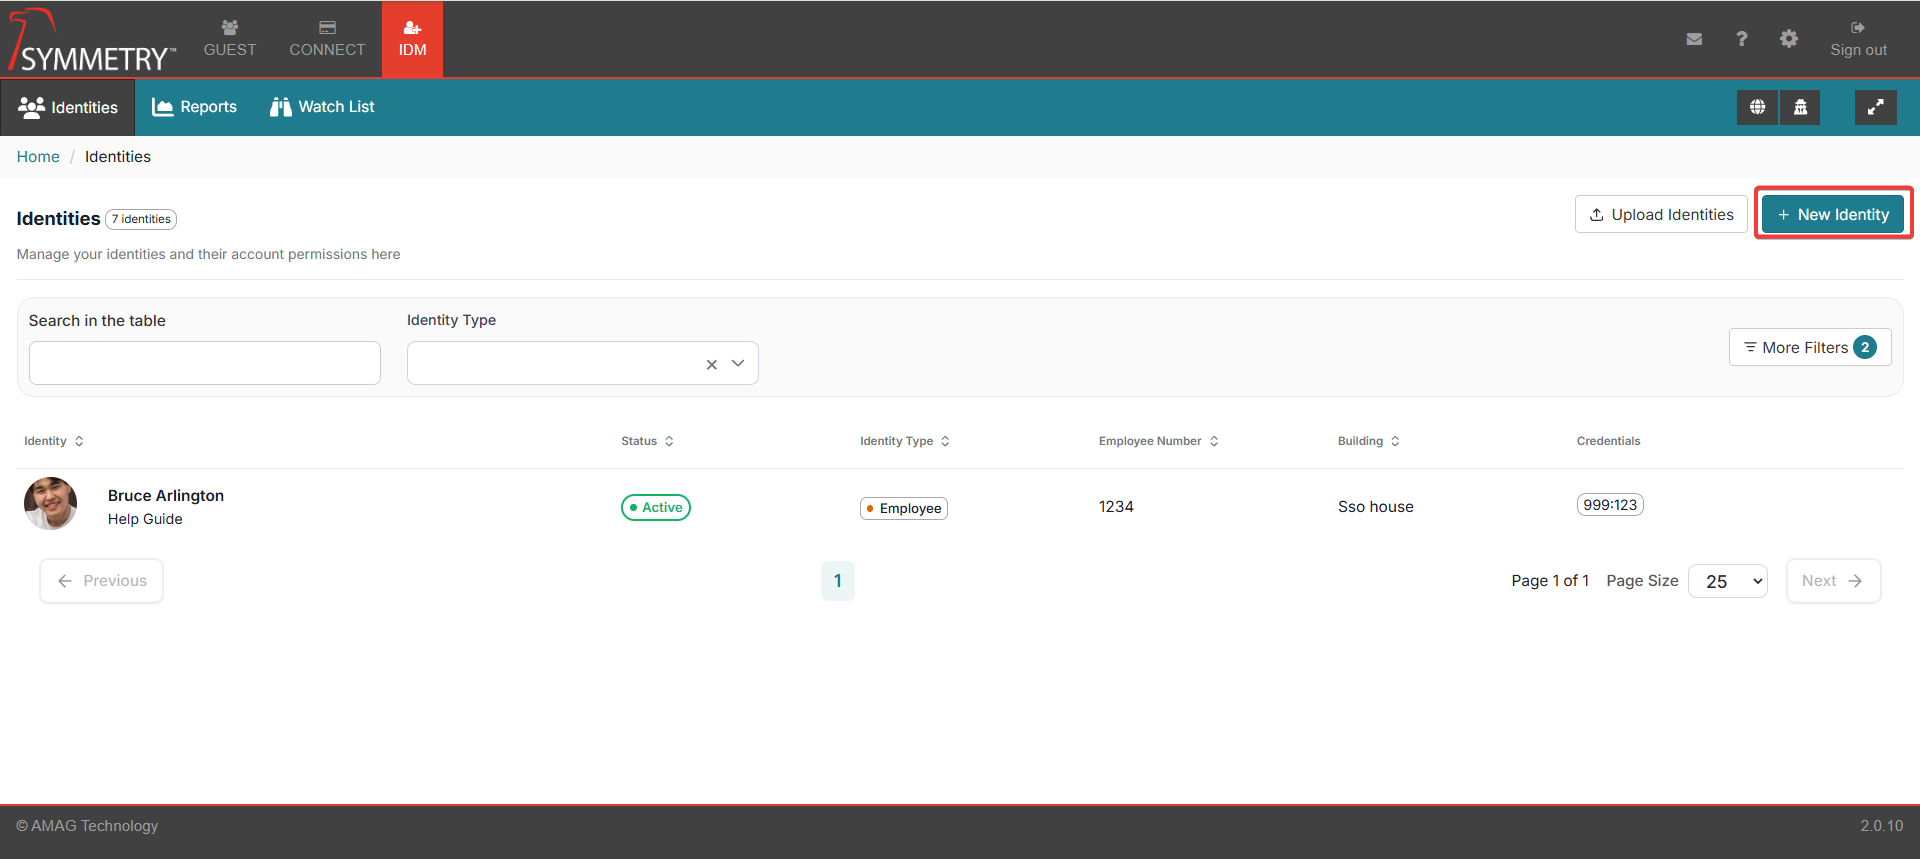
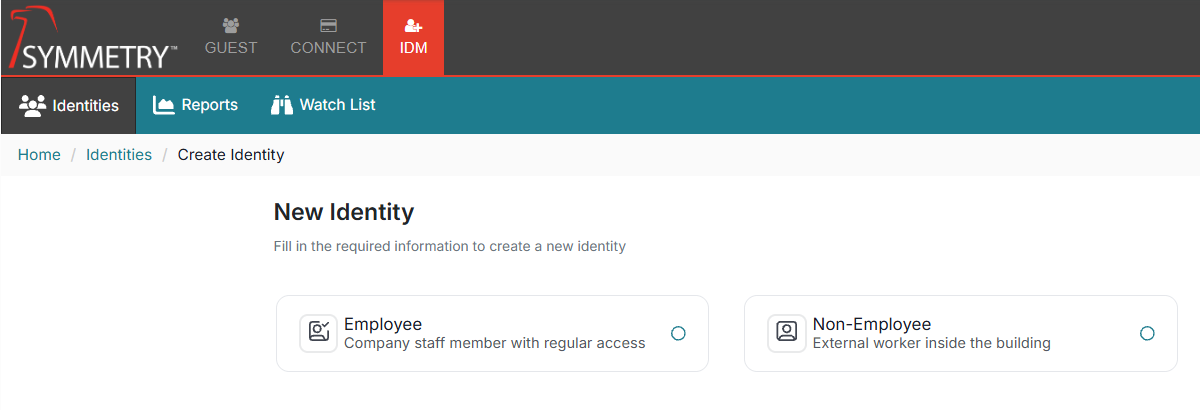
To add an Identity directly within the user interface navigate to the home page of the IDM tab and click the New button.
Select either Employee or Non Employee.
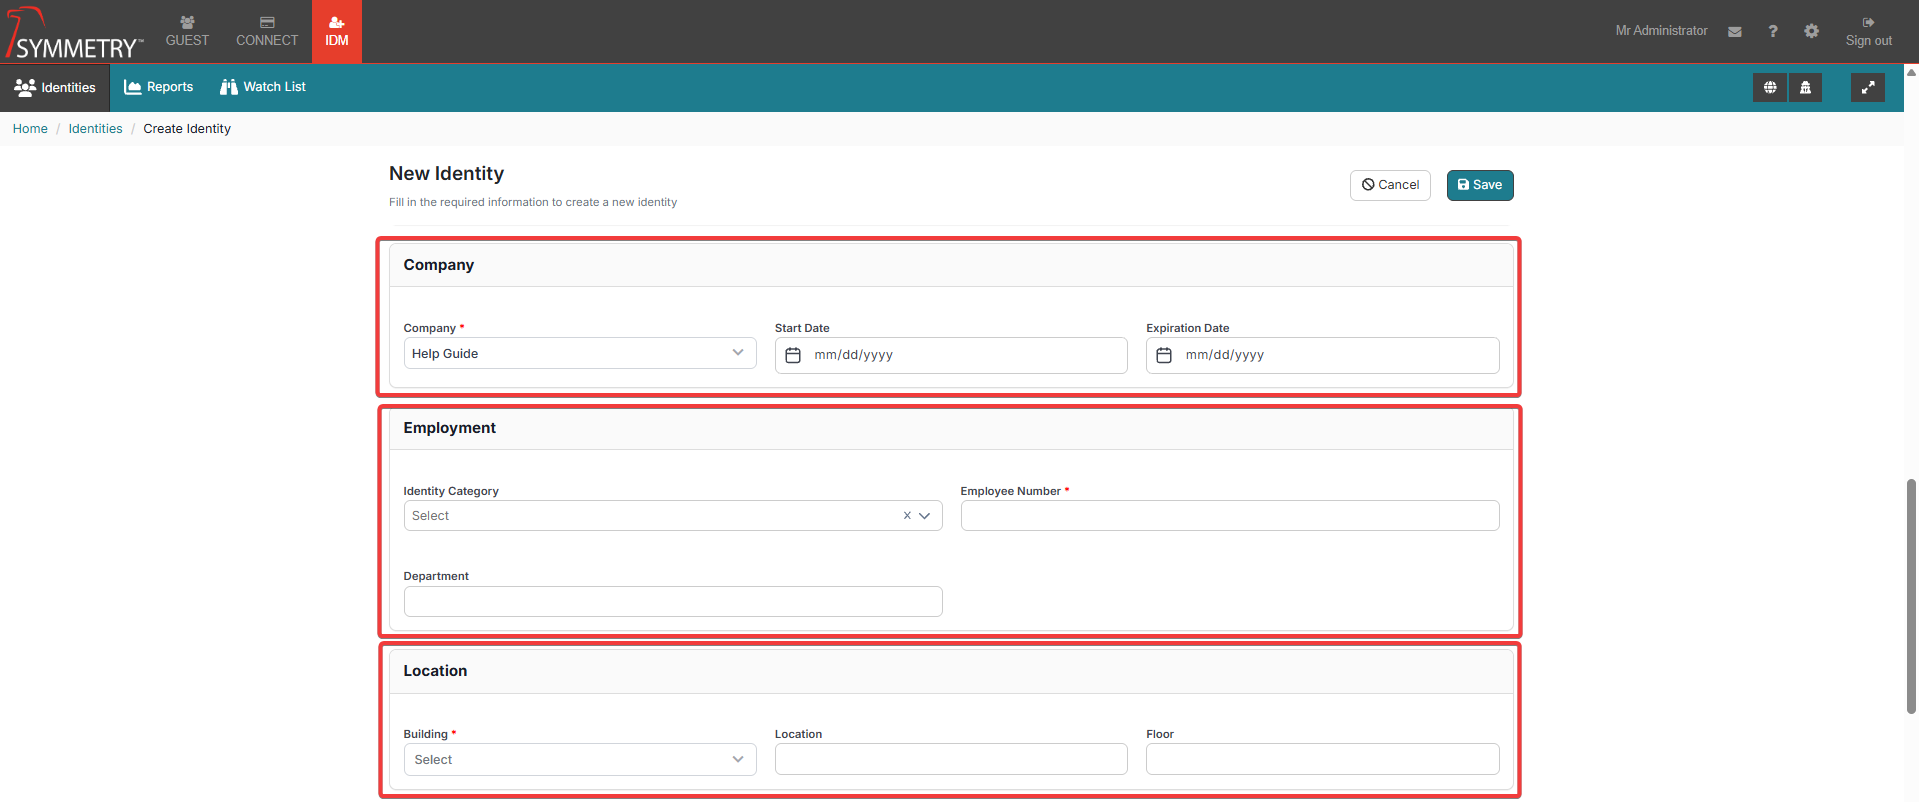
Enter the appropriate identity information on the Identity page and click the Next button to continue. Fields indicated below are enabled by default. You can enable or disable the user field types and add any user-defined fields in the IDM configuration section.
The Identity information is split into the following sections:
Identity Type
Language
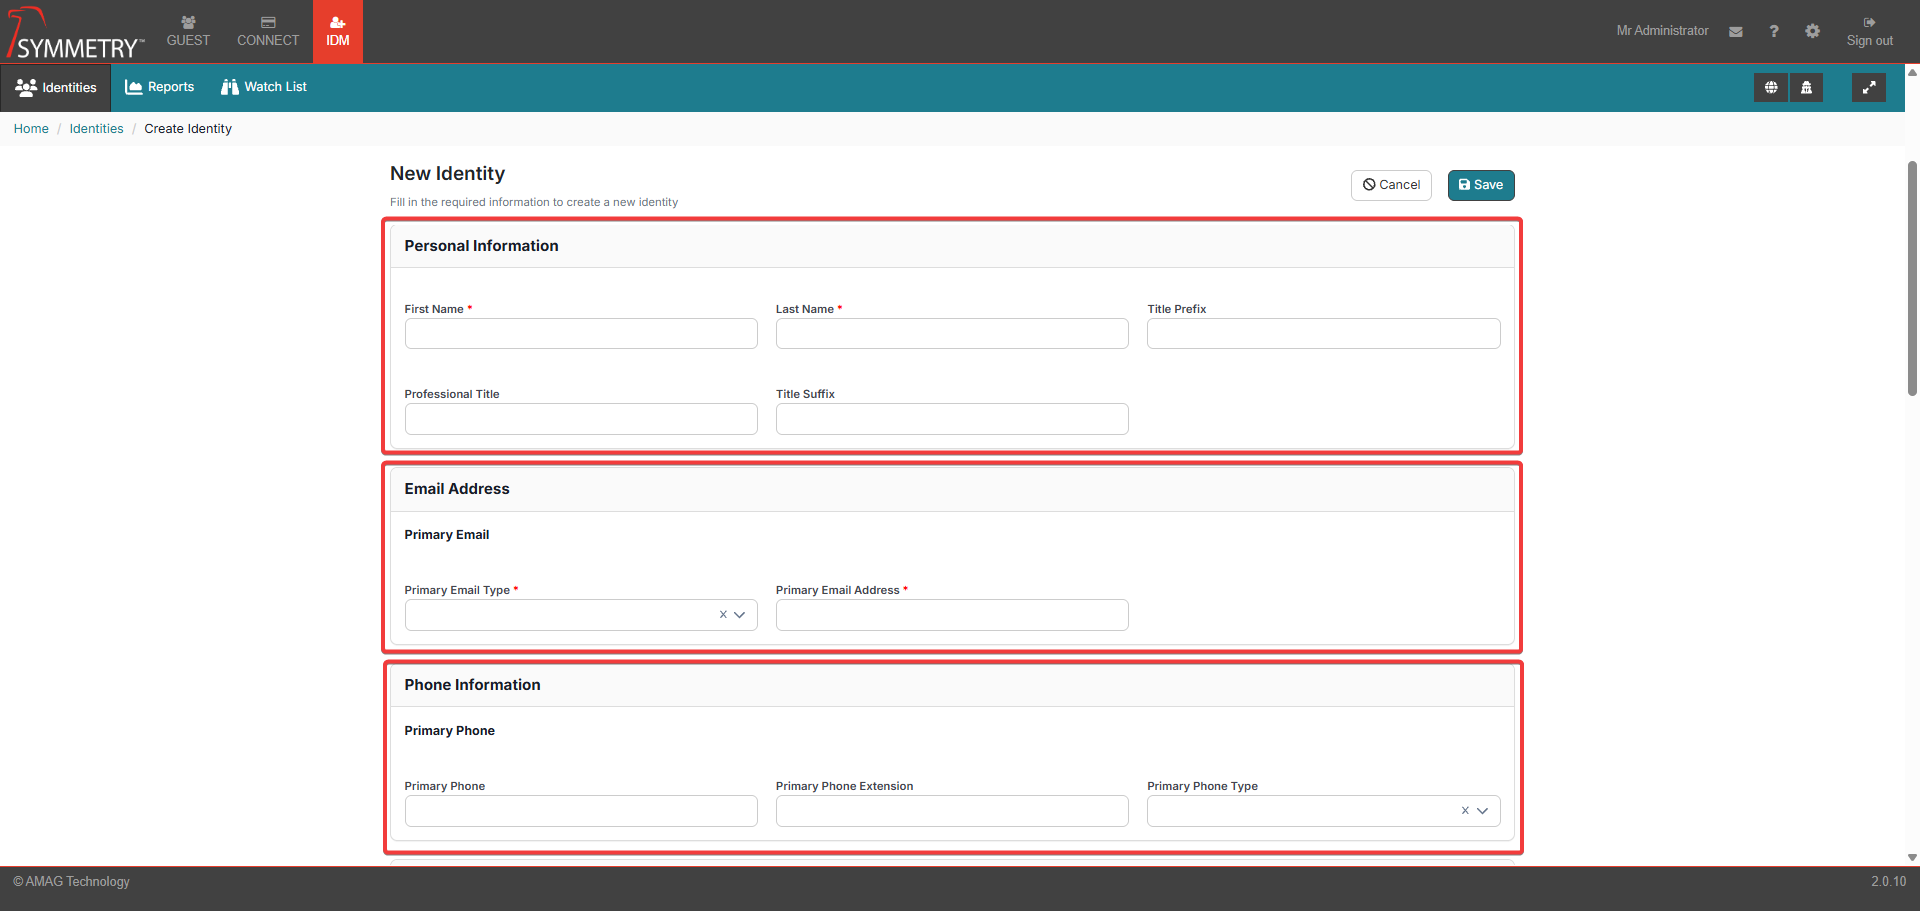
Personal information
Email Address
Phone Information
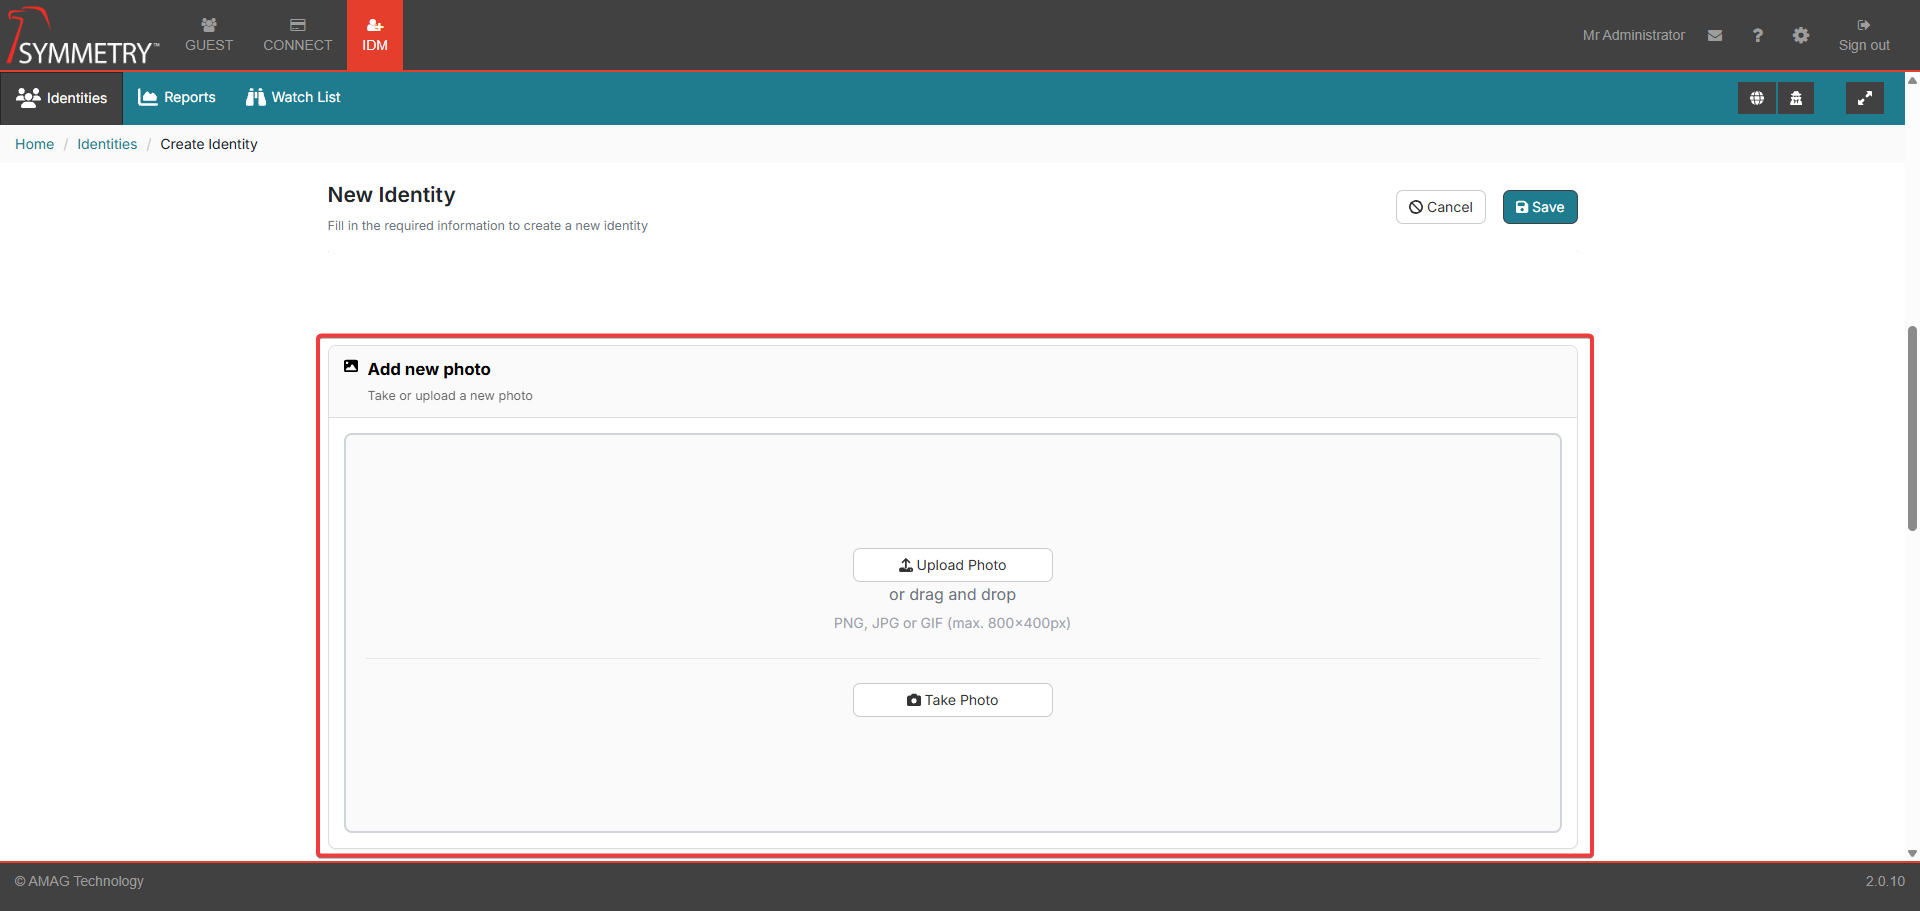
Add (New) Photo
Company
Employment
Location
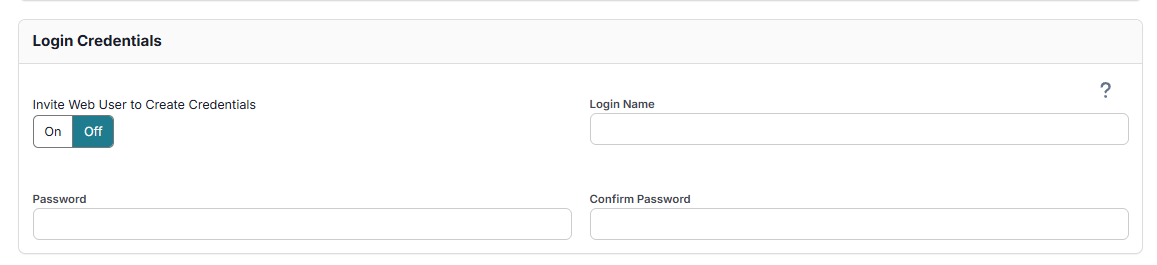
Login Credentials
Managers
Additional Details (User Defined Fields UDFs)
Identity Type: (Employee, Non Employee or Visitor, selected in the previous step)
Language: Select default language English or Spanish.
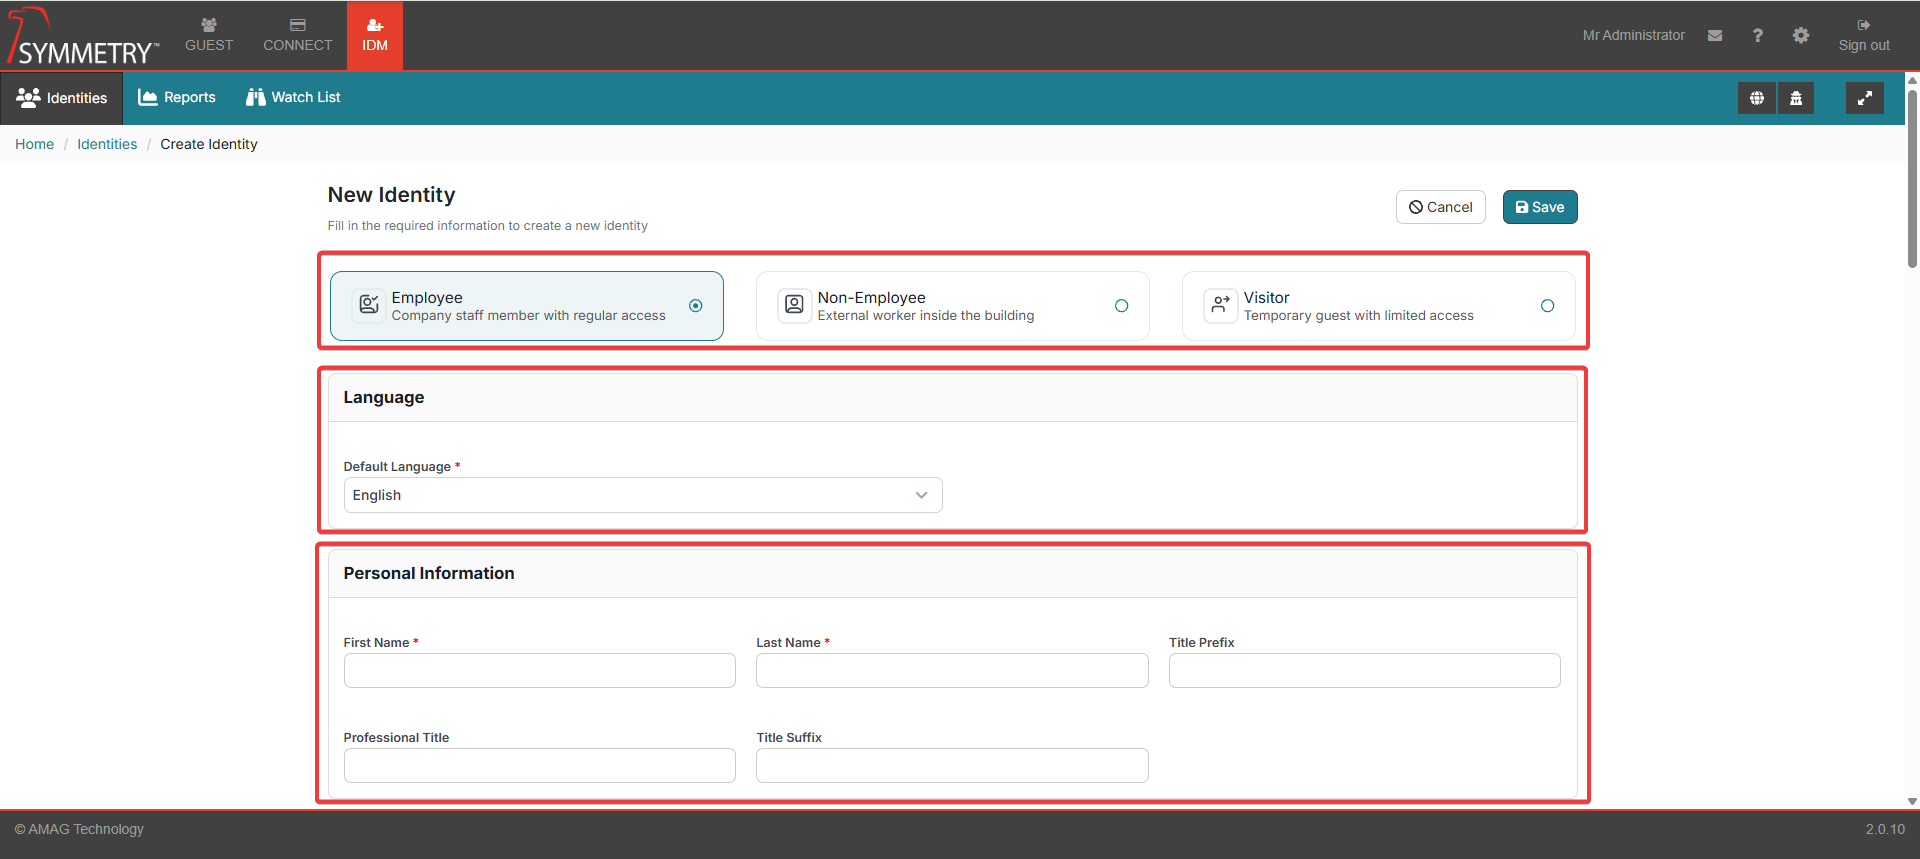
Personal Information: Provide details for (if required)
First Name (Required)
Last Name (Required)
Title Prefix
Professional Title
Title Suffix
Email Address: Provide details for (if required)
Primary Email Address (Required)
Primary Email Type (work or personal etc) (Required)
Phone Information: Provide details for (if required)
Primary Phone
Primary Phone Extension
Primary Phone Type
Add new Photo: Allows the administrator to take a photo (if connected to web camera) or upload a photo for the new Identity.
Company: Provide details for (if required)
Company: (Required) Select from the drop-down.
Start Date
Expiration Date
Employment: Provide details for (if required)
Identity Category: Select from the drop-down.
Employee Number: (Required)
Department
Location: Provide details for (if required)
Note
If a Building has been made Inactive it will not be visible and cannot be selected. Refer to Building Management for further information.
Building:(Required) Select from the drop-down.
Location
Floor
Login Credentials: The Login Credentials section allows the user to enter a user name and password for the Identity, or they can select Invite Web User to Create Credentials. Checking this box will send an email to the new Identity with a link allowing them to create their own user name and password for the system.
Note
If SSO is enabled, this step is not required.
Managers: Provide details for (if required)
Manager 1
Manager 2
Manager 3

Additional Details: If any User Defined Fields have been configured, they will appear on the Additional Details section. This section is blank if no User Defined Fields are configured. Refer to the IDM Settings User Defined Fields section for more information
Make sure the identity information is correct, and then click the Save button.
Once saved, the user is taken to the Identity page for the new Identity. The user is able to view and edit all existing data and is able to assign User Roles.
Please note that on the Identity Details page, there is a section called 'Citizenship Details' (provided it has been set to enabled in Screen Configuration) that does not appear in Add Identity. This contains the fields:
Is U.S. Citizen
Is Green Card Holder
Is Visa Holder
Visa Name
Country Of Citizenship
Citizenships
The Actions section allows the administrator to Send Manage Credentials Request. This will send the identity an email, allowing them to update their login credentials for the application (this does not apply if SSO is enabled for this user). Users for whom sign on credentials have already been issued, will display Remove Web Access rather than Send Manage Credentials Request.
Adding Identities via Spreadsheet Upload
Spreadsheet uploads provide great flexibility and ease of use without a complex integration, making this is an effective way to manage users. Spreadsheet Uploads can be used to add new Identities, or update existing Identities in the system.
Bulk upload of visitors via spreadsheet is also available from this section.
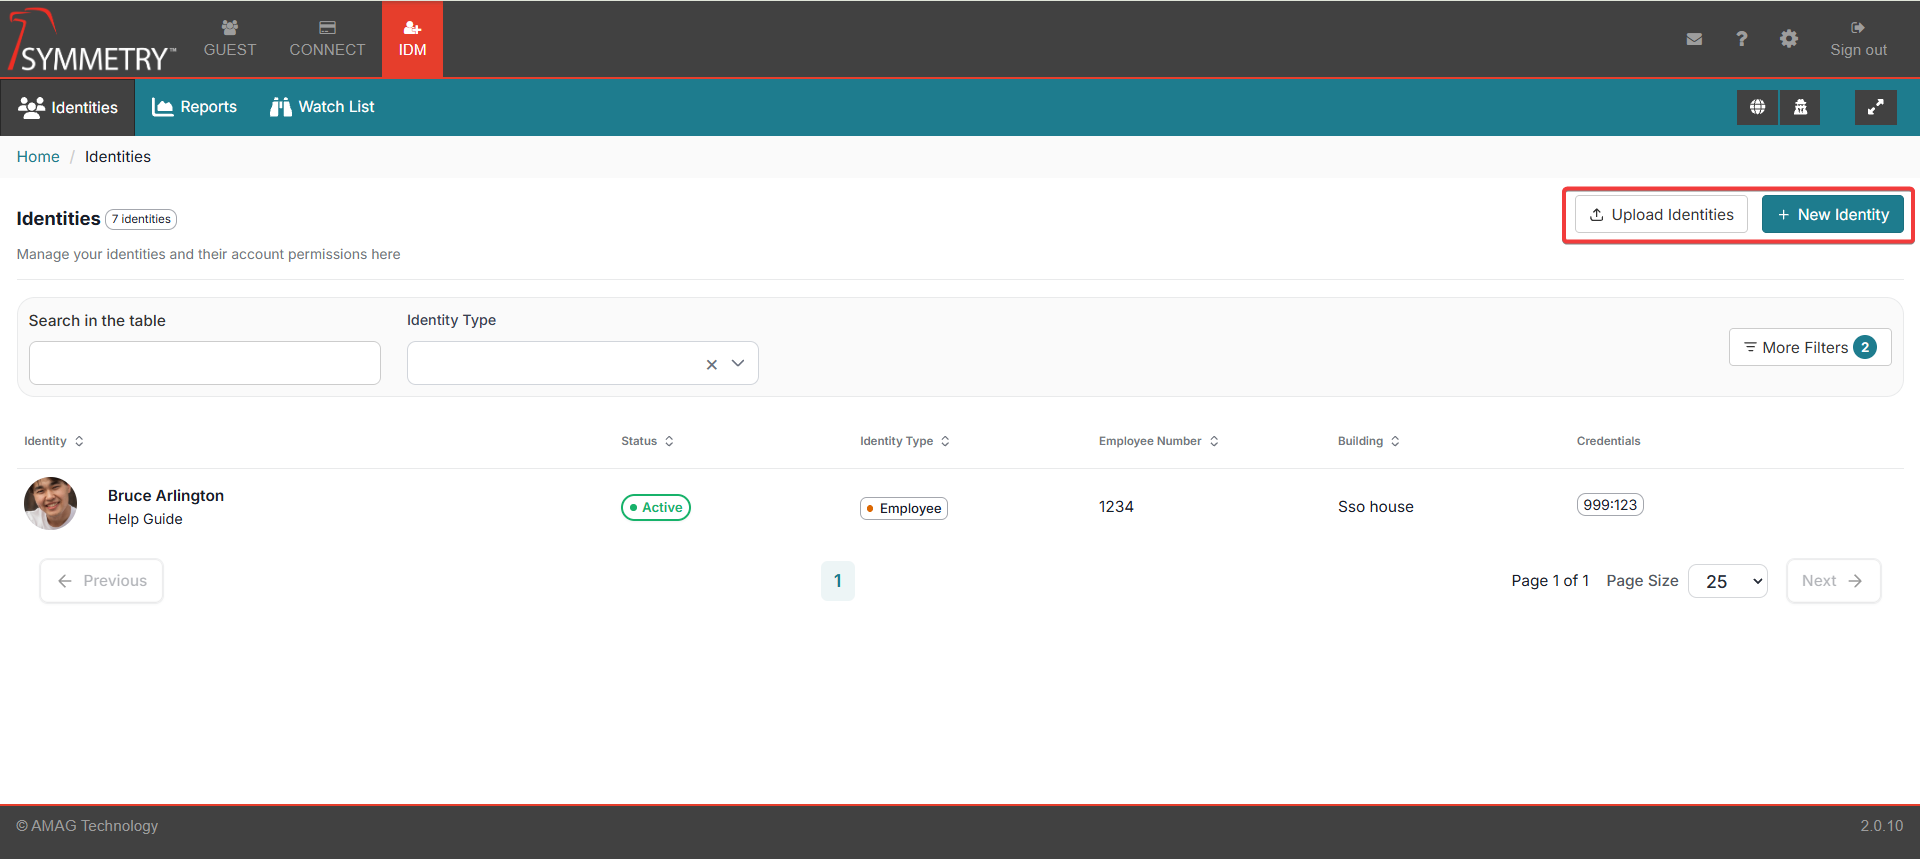
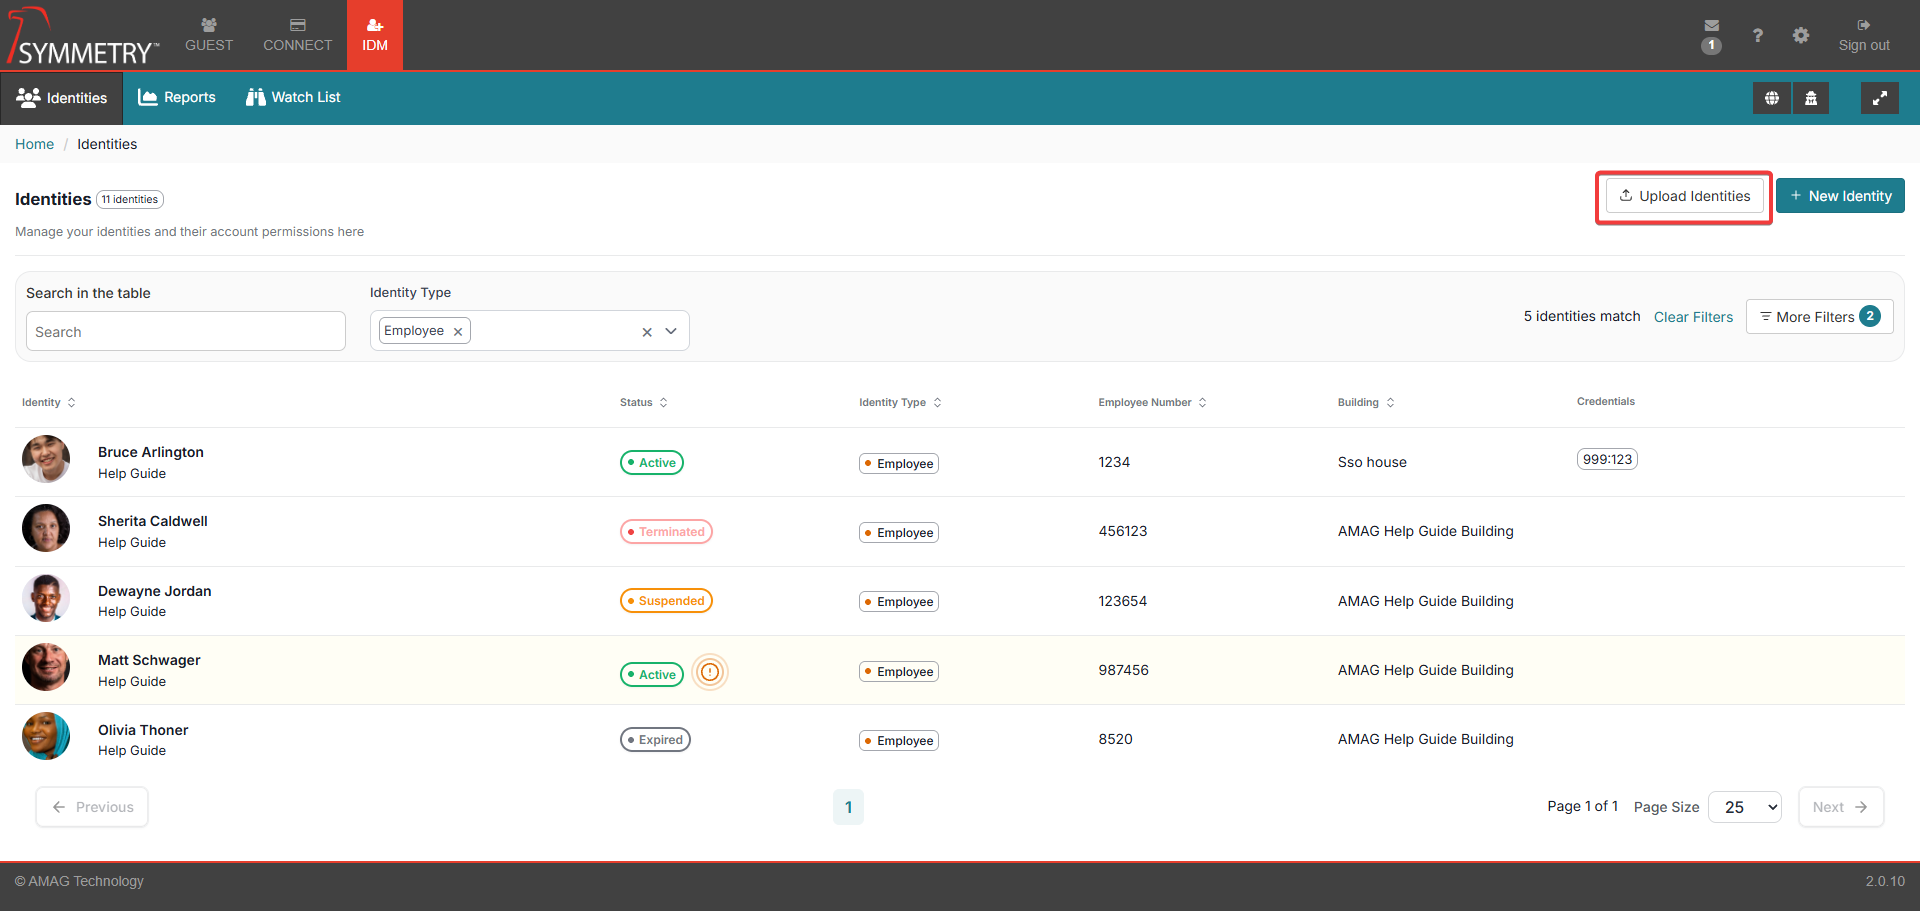
To upload users via a spreadsheet, Select the Upload Identities button.
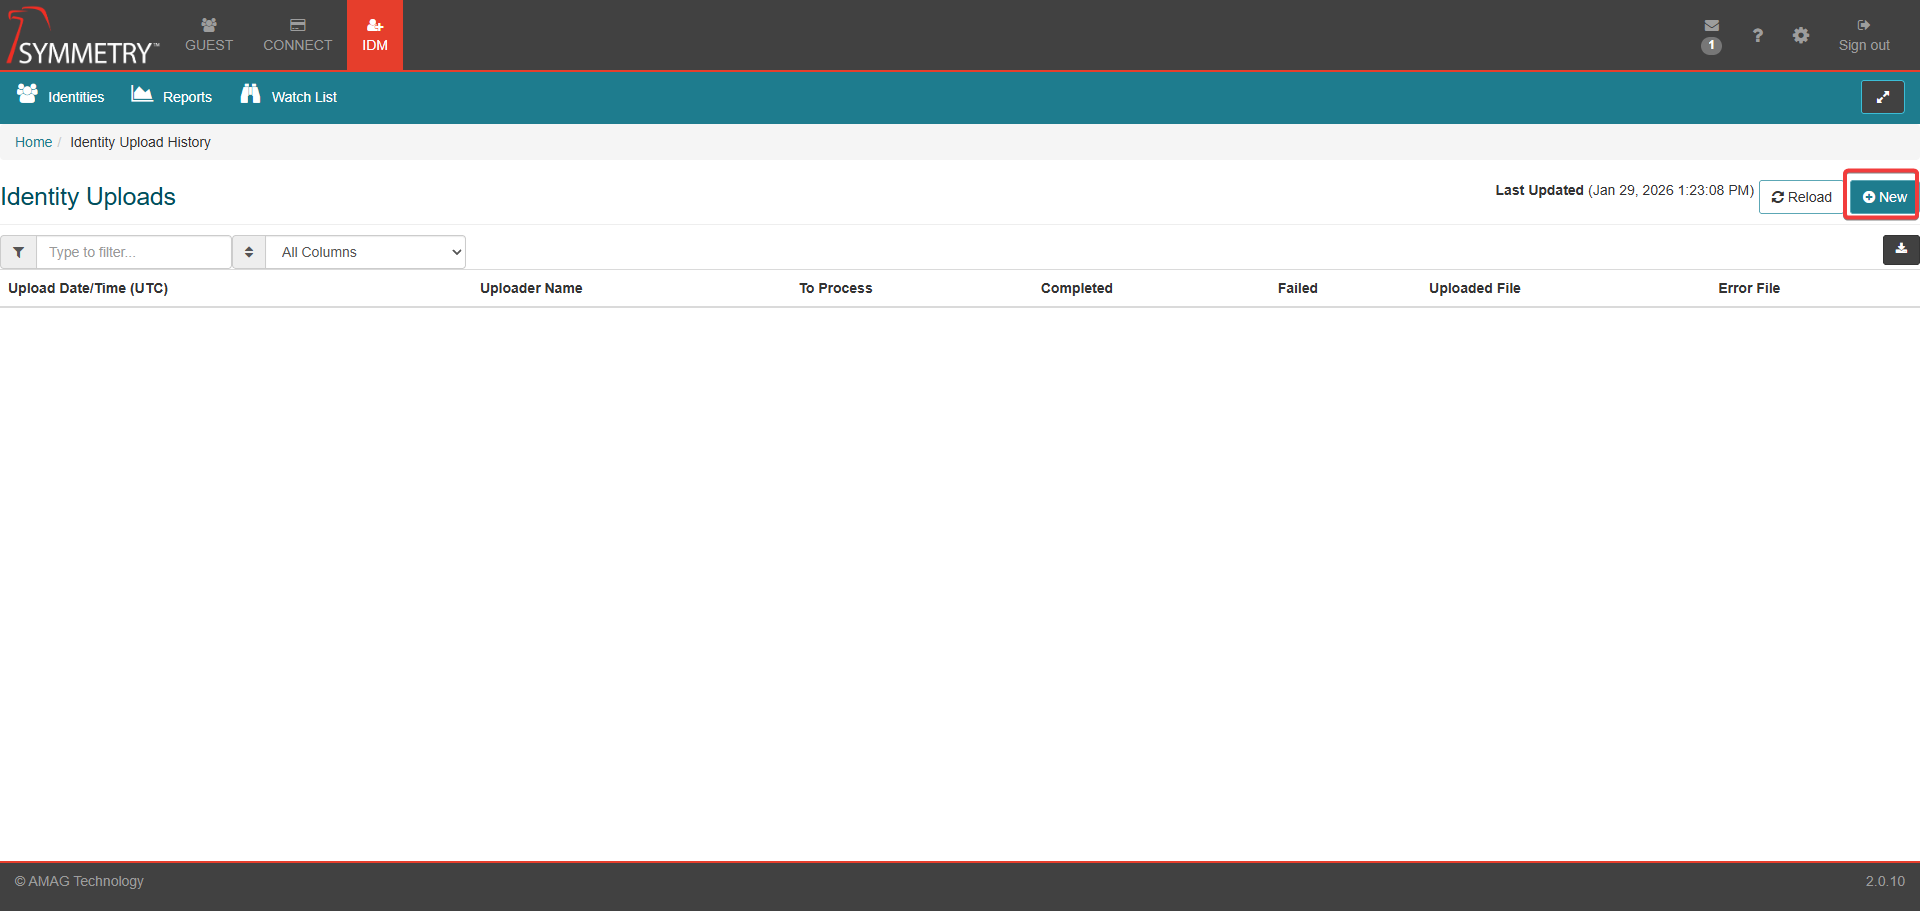
Click the New button to configure a new upload.
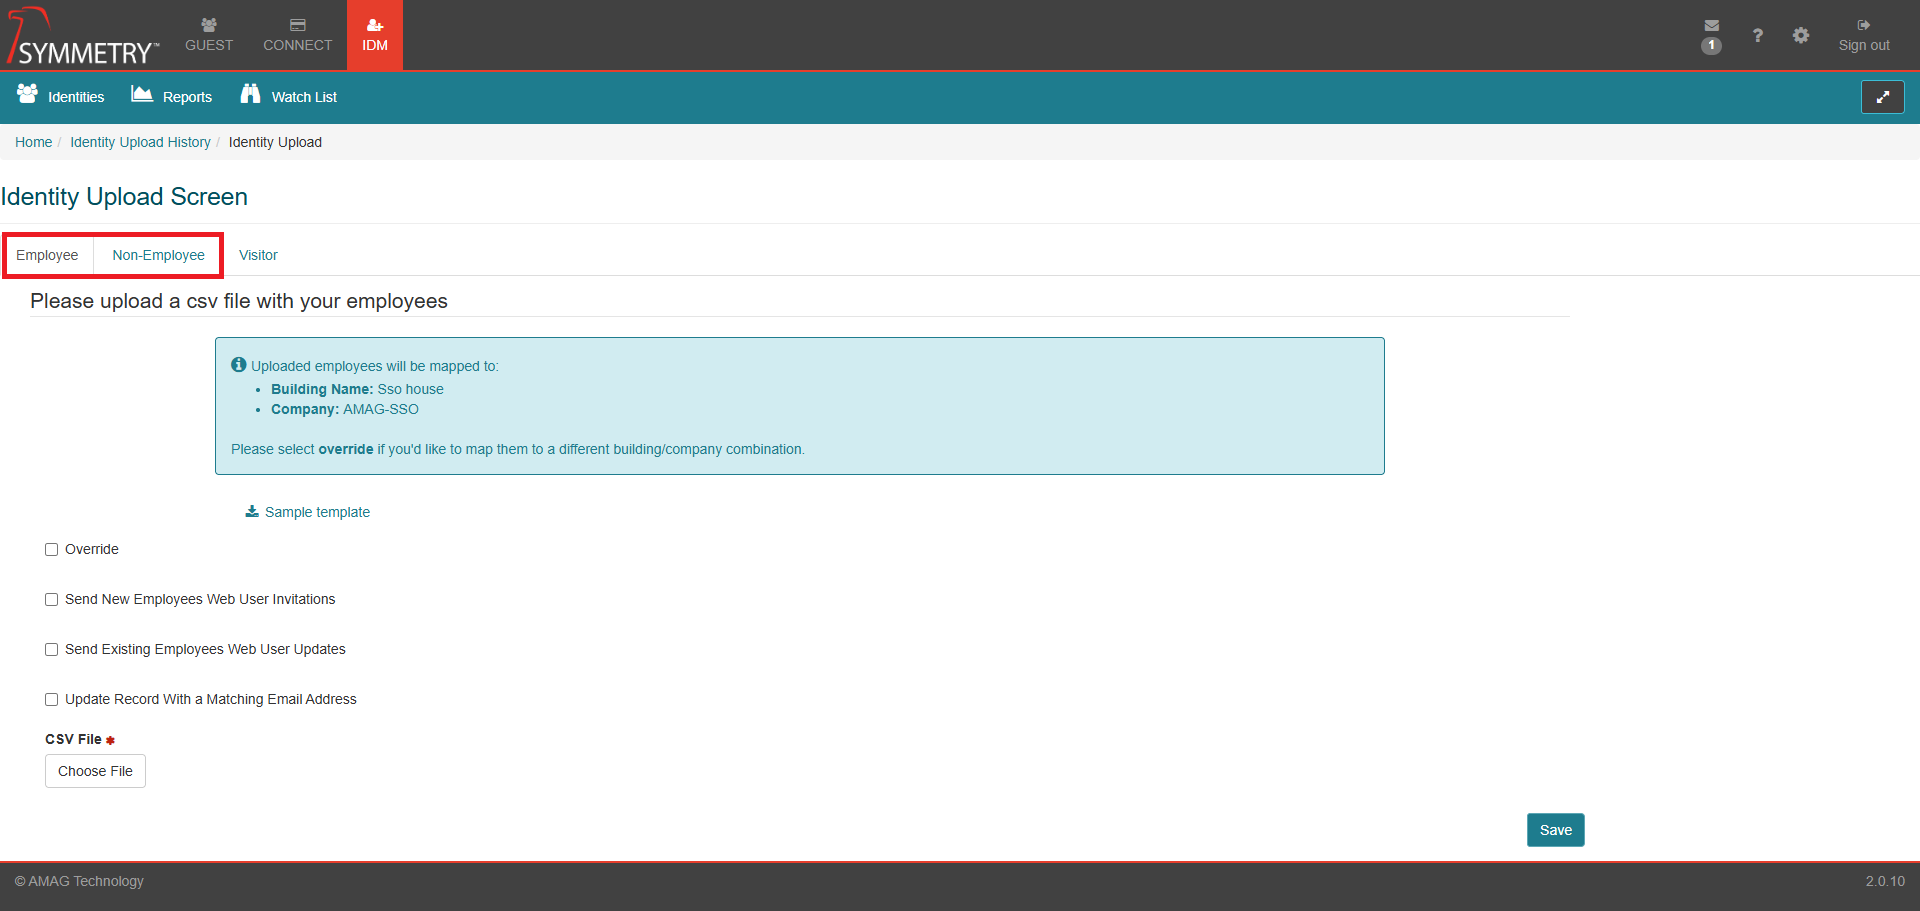
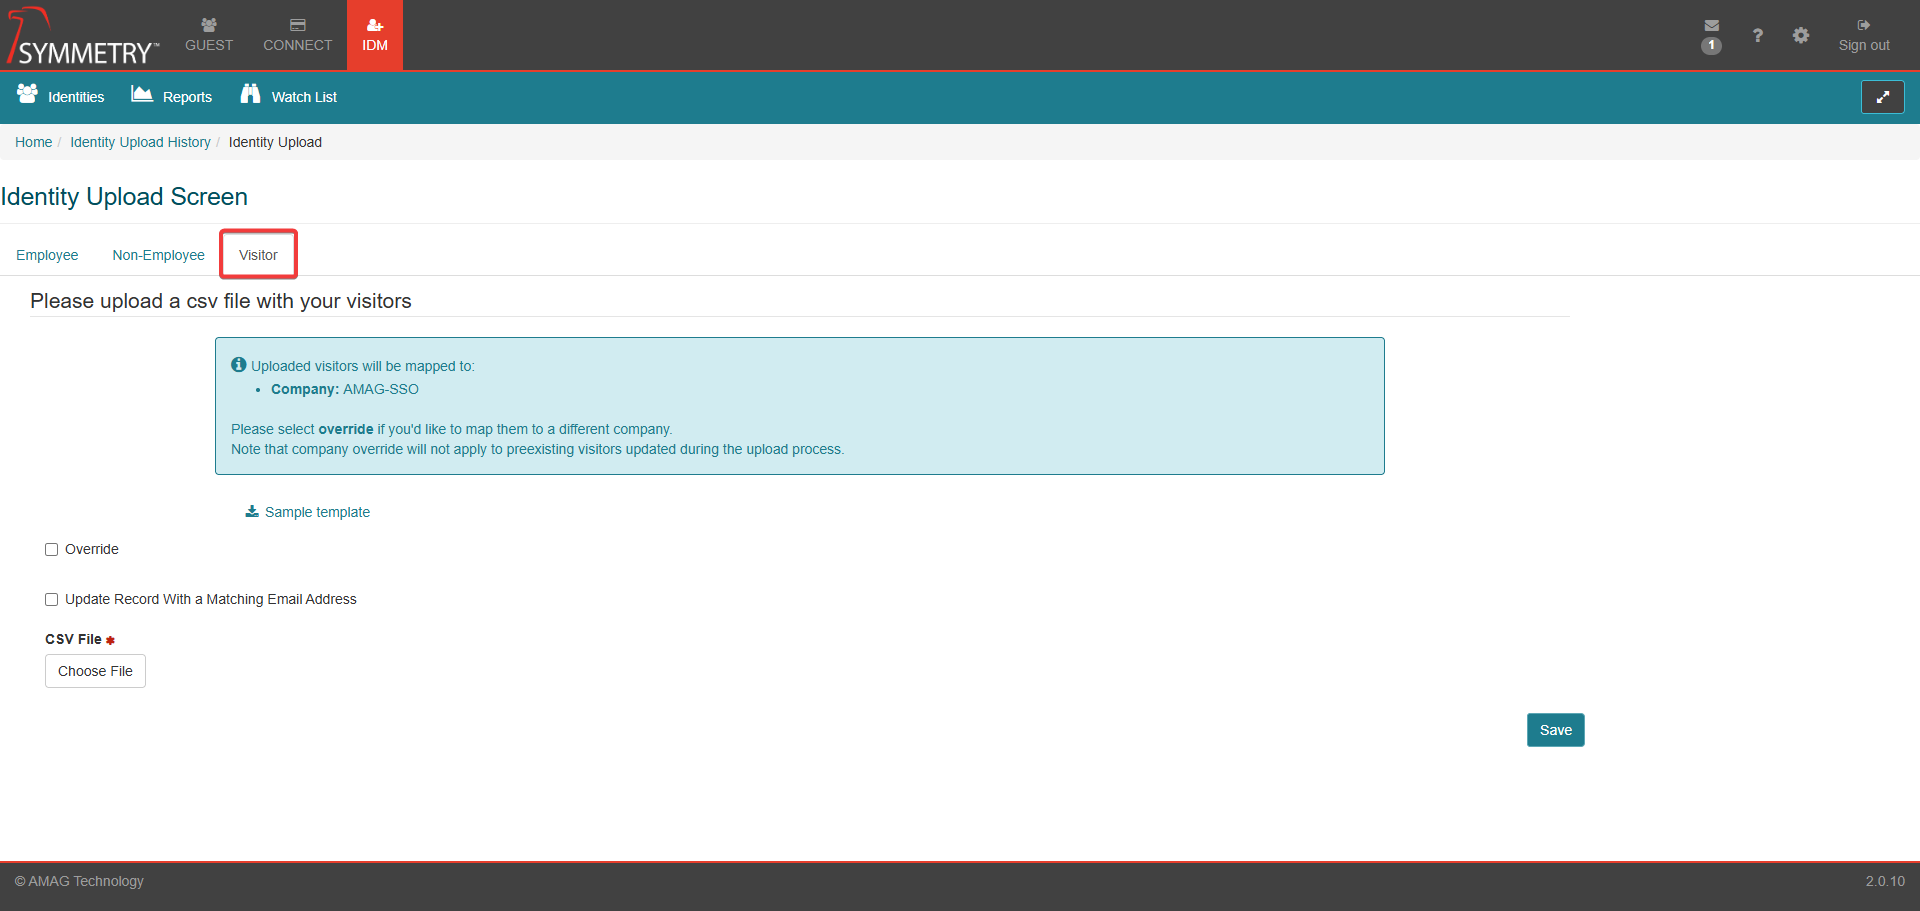
Select Employee, Non-Employee or Visitor from the selection tab.
Note
Employee and Non-Employee have the same options. However, the Visitor tab has a reduced number of options, as displayed in the graphic below
Download a sample template of the csv file.
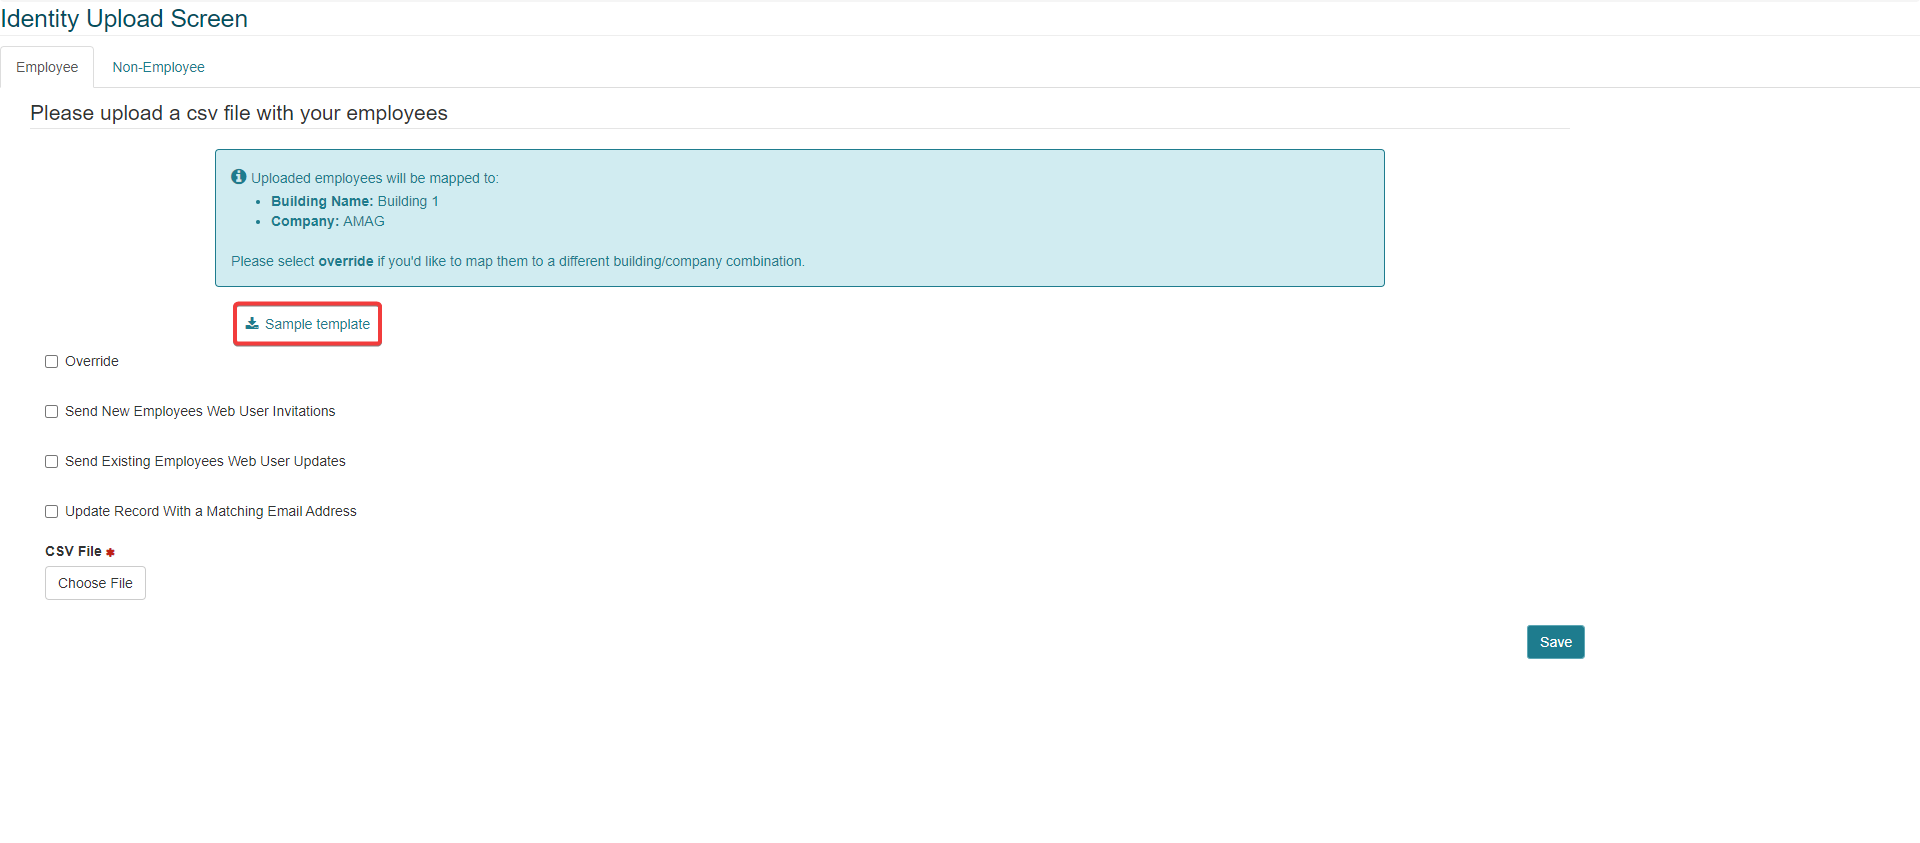
The CSV template only contains the relevant column headings and a sample row of data (provided as an example). The column name lists which columns are optional.

Enter all the required information for all Identities into the spreadsheet (overwrite the sample data provided but leave the column headings as they are) and upload the CSV file.
Note
Employee Number is typically used as the unique identifier for all Identities. If Employee Number is not present, then Email Address is used. If the unique ID in the sheet matches an existing Identity in the system, their record will be updated, instead of a new record being created.
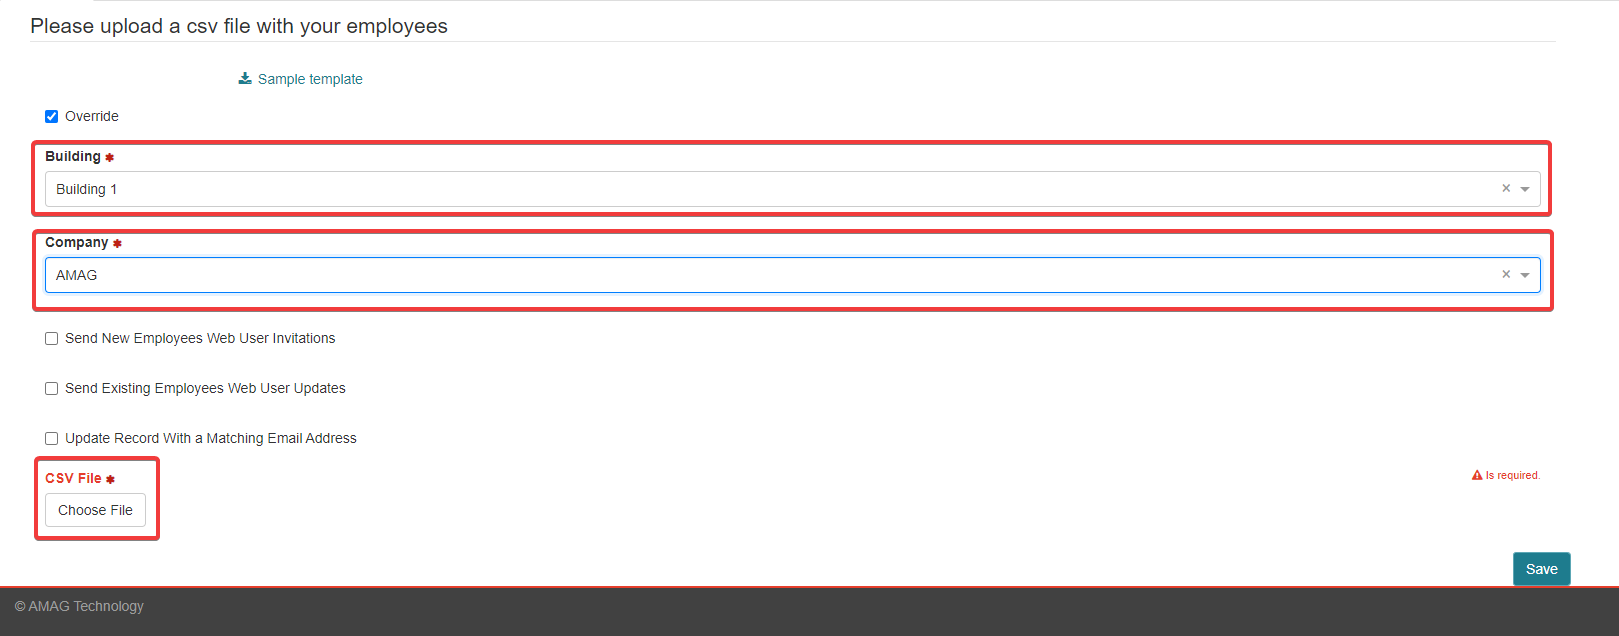
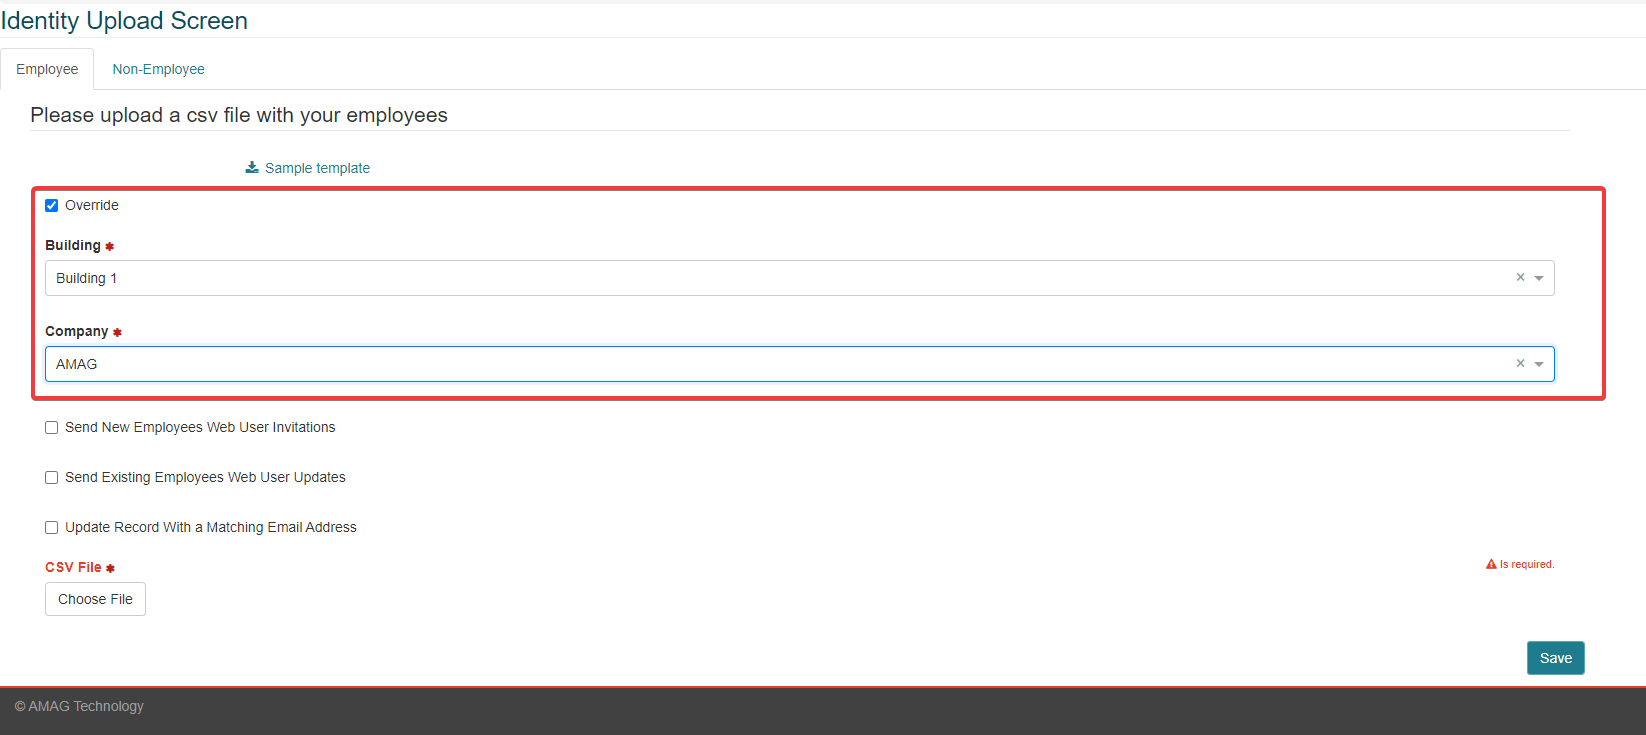
The User Interface will specify which Building and Company will be assigned to the new Identities. Select Override to change the Building and/or Company. The user will only be able to assign specific Buildings/Companies according to their User Role.
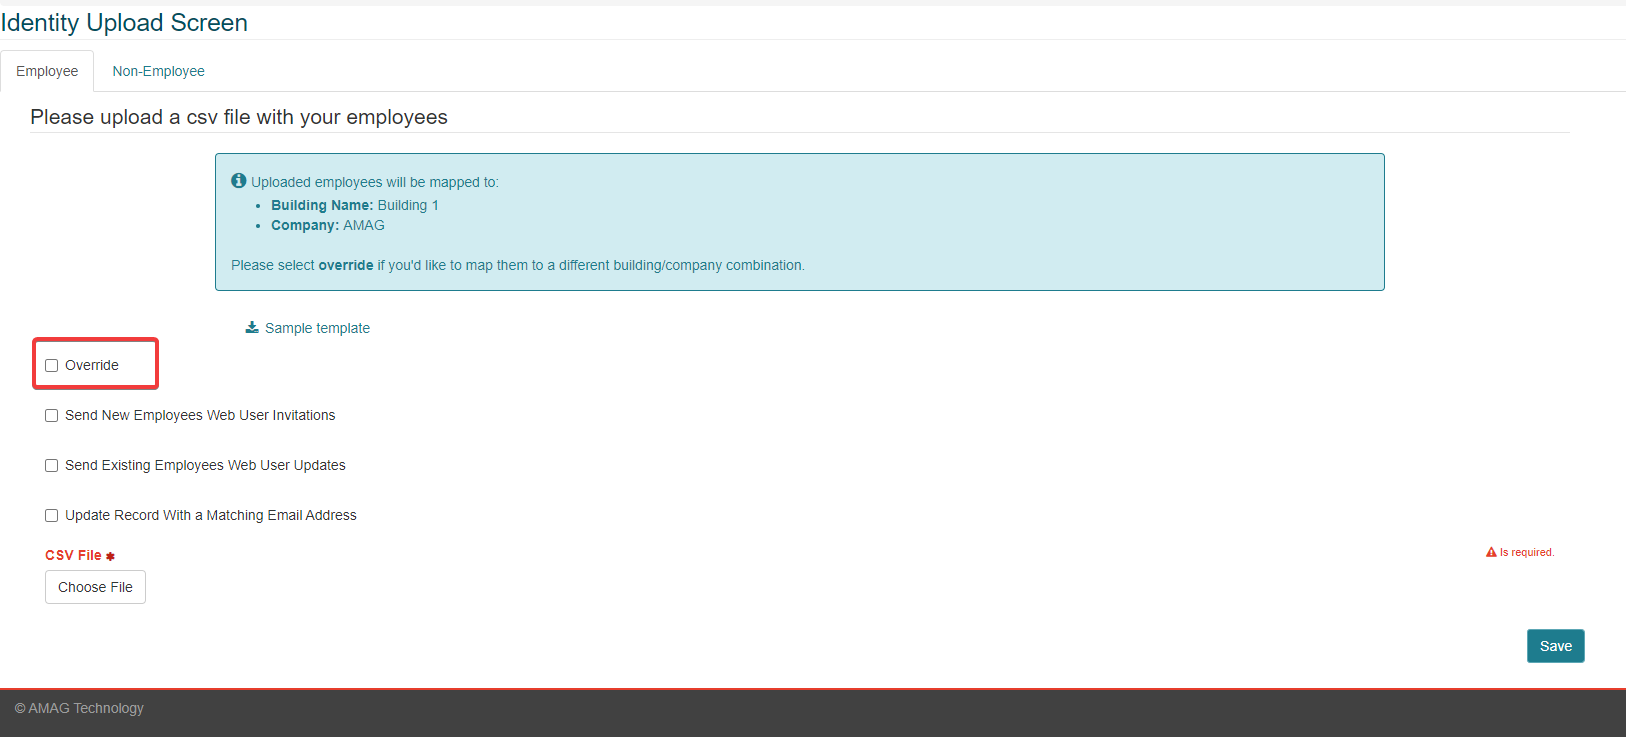
Additional Configuration Options:
Send New Employee Web User Invitations: By selecting this option, email invites are sent to all the new users uploaded in the spreadsheet, allowing them to set up their own login credentials.
Send Existing Employees Web User Updates: If the existing users were updated via upload, this option allows them to receive an email allowing them to create/update their login credentials. This can be used for example, if the existing users were not sent the registration email when they were first added into the system.
Click the Save button to upload the file. The application displays File Received along with the number of records being uploaded and processed.
The user will see the results of their file upload. If there are errors, then any records with errors will not be uploaded. Records with no errors will still be successfully uploaded. An error file will be generated in Excel format. Open the download, and the last column will display the error message, confirming the type of error for each of the records in the error file.
User Registration and Login Process
Note
If Single Sign On (SSO) is used, the steps below are not required. Please contact your local IT Administrator for SSO login instructions.
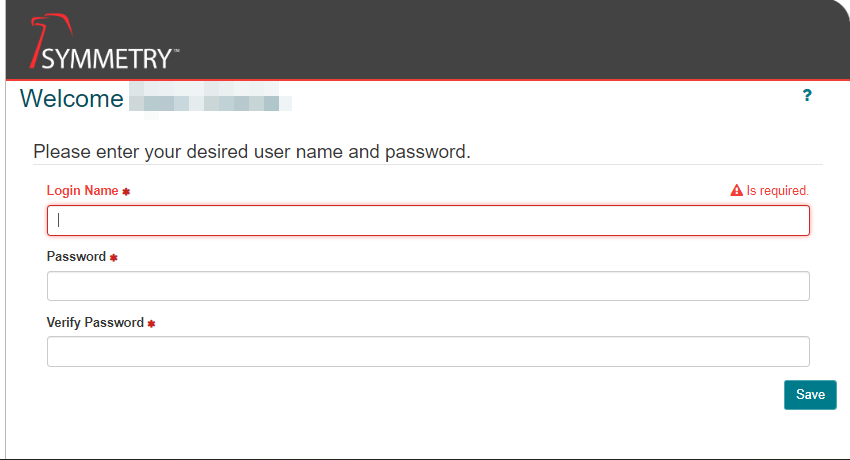
As part of this process of adding a new Identity into the system, a user name and password can be entered manually, or an email can be sent to the user allowing them to create their own user name and password.
A sample registration email can be seen below. The new user will click the link in order to register (create a user name and password).
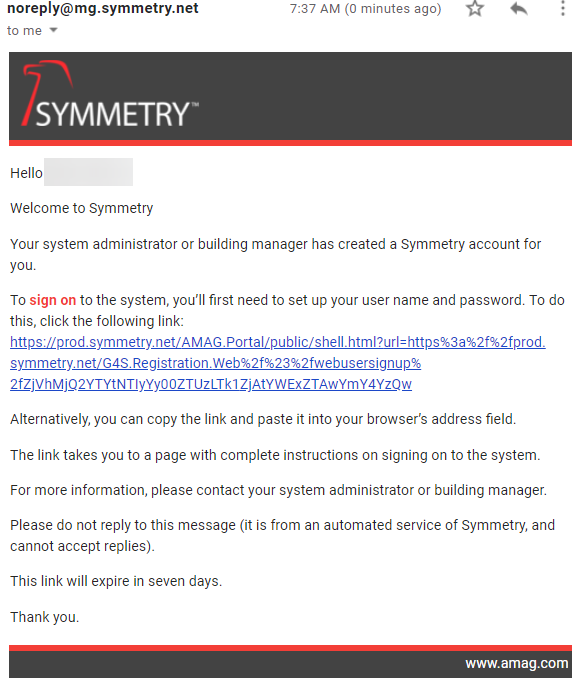
The user is able to register by clicking the link in the email.
Note
Please use your customer specific URL to log into the system. This guide uses https://training.symmetry.net/ as an example only.
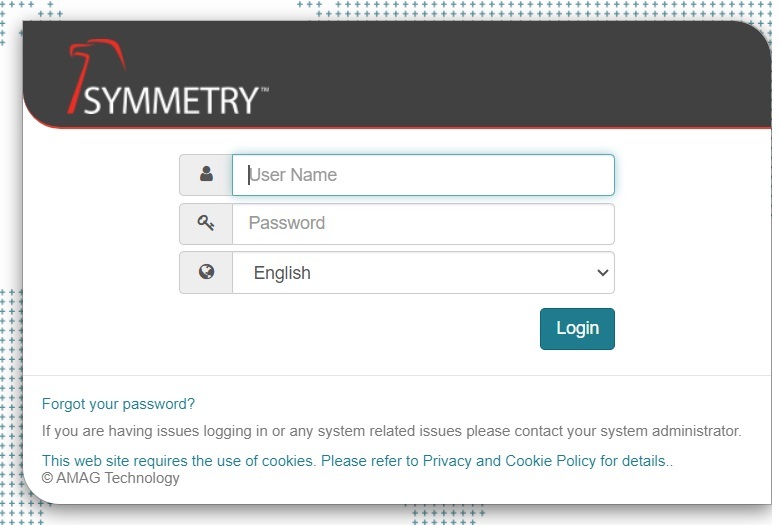
Login Page
To log into the Application, go to https://training.symmetry.net/ (replace “training” with your own specific sub-domain) and enter your username and password.
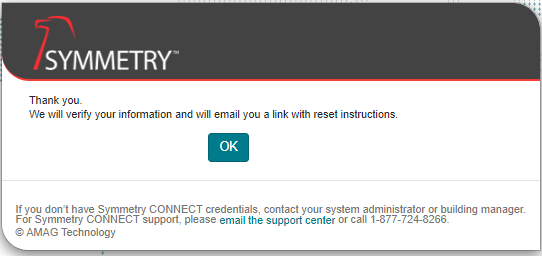
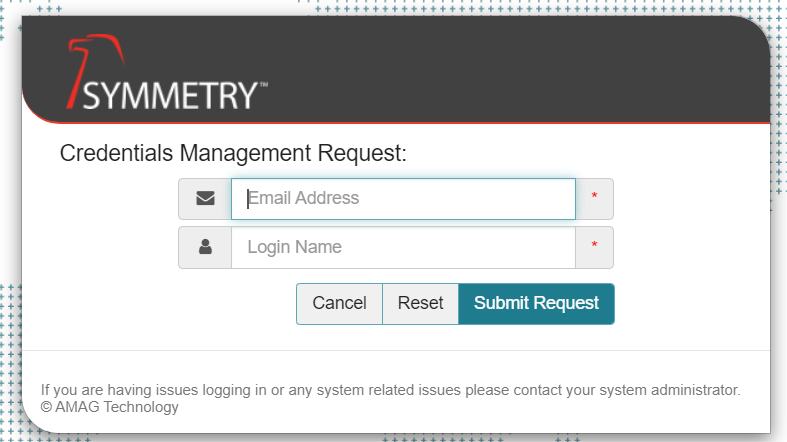
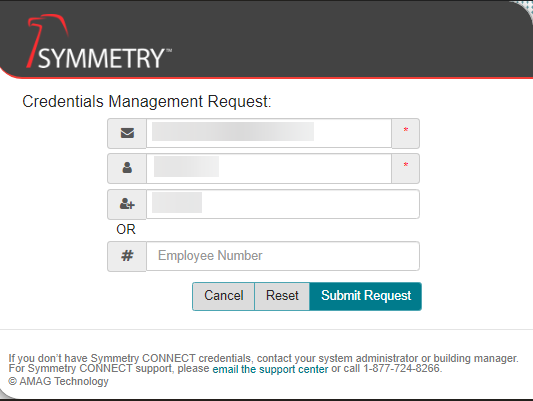
To reset your password, click the Forgot your password? link on the login page and enter the required information.
Note
The images above are dependent on whether or not your system has been configured to Use Email Address As User Name. Refer to the Settings (Group settings) for further information.
An email is sent to the user with a link that allows them to reset their password.

Identity Expiration, Termination, Suspension and Deletion
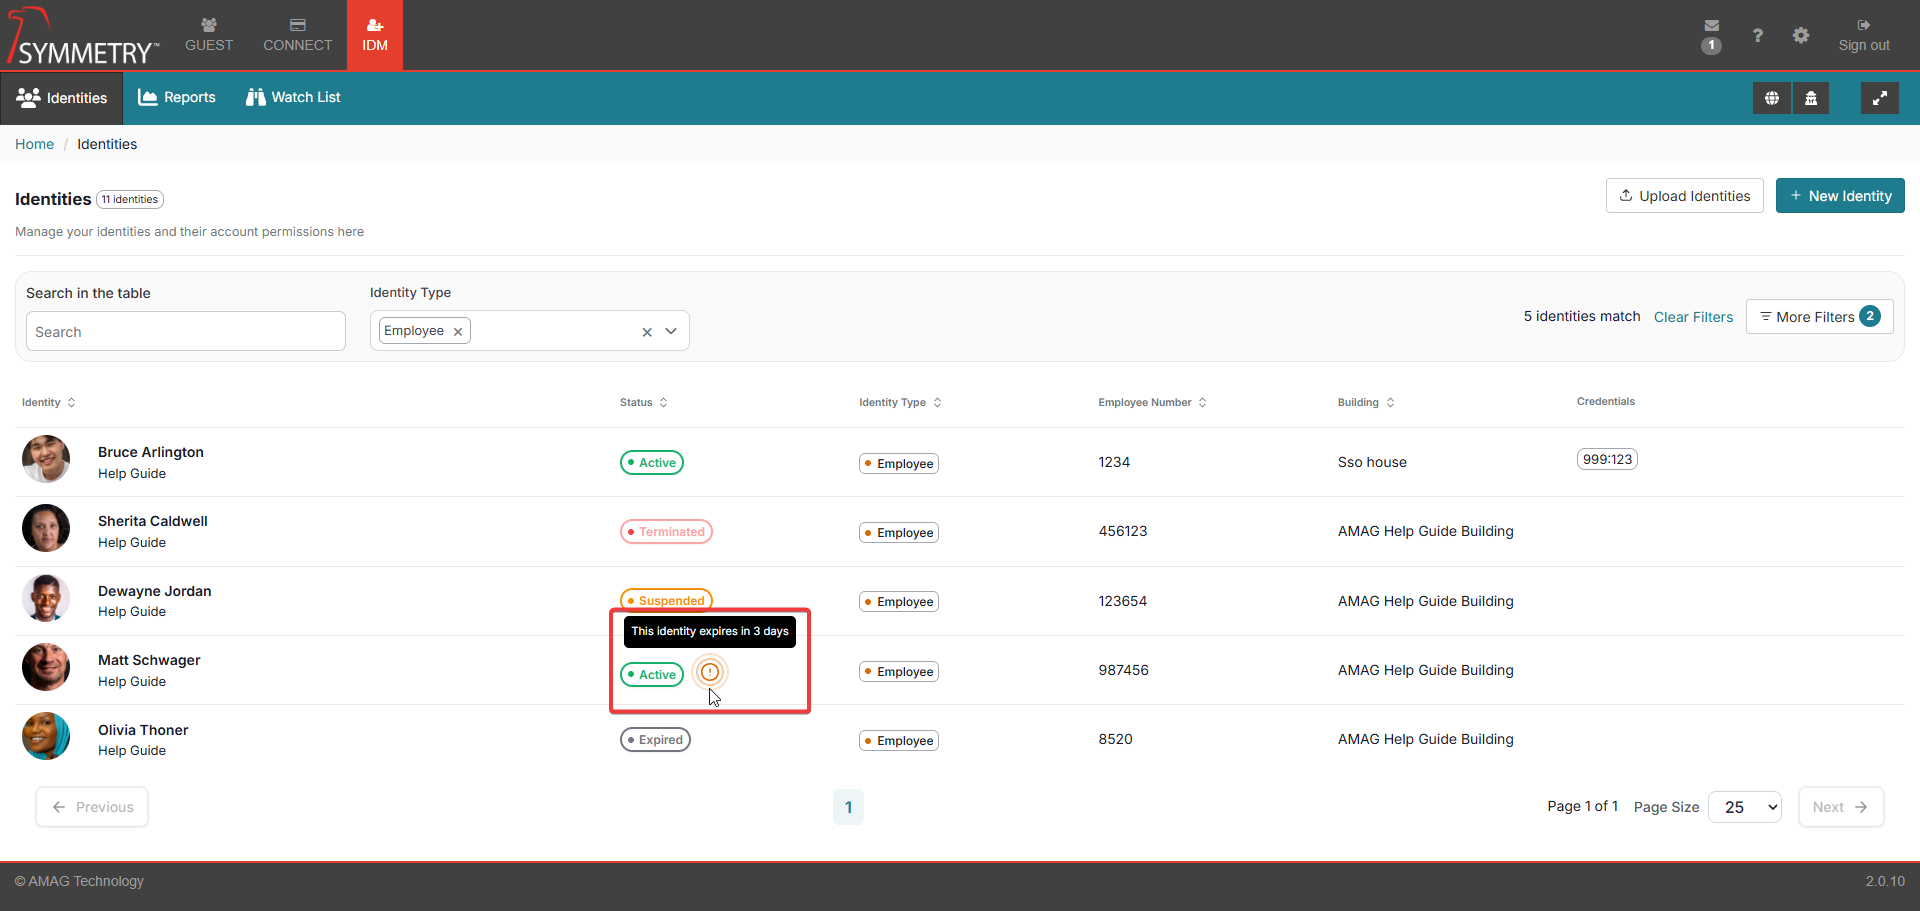
Identities displayed on the IDM home page can expire automatically (on a specified date), or they can be manually Expired, Terminated, Suspended or Deleted.
Viewing Expired/Terminated/Suspended Identities
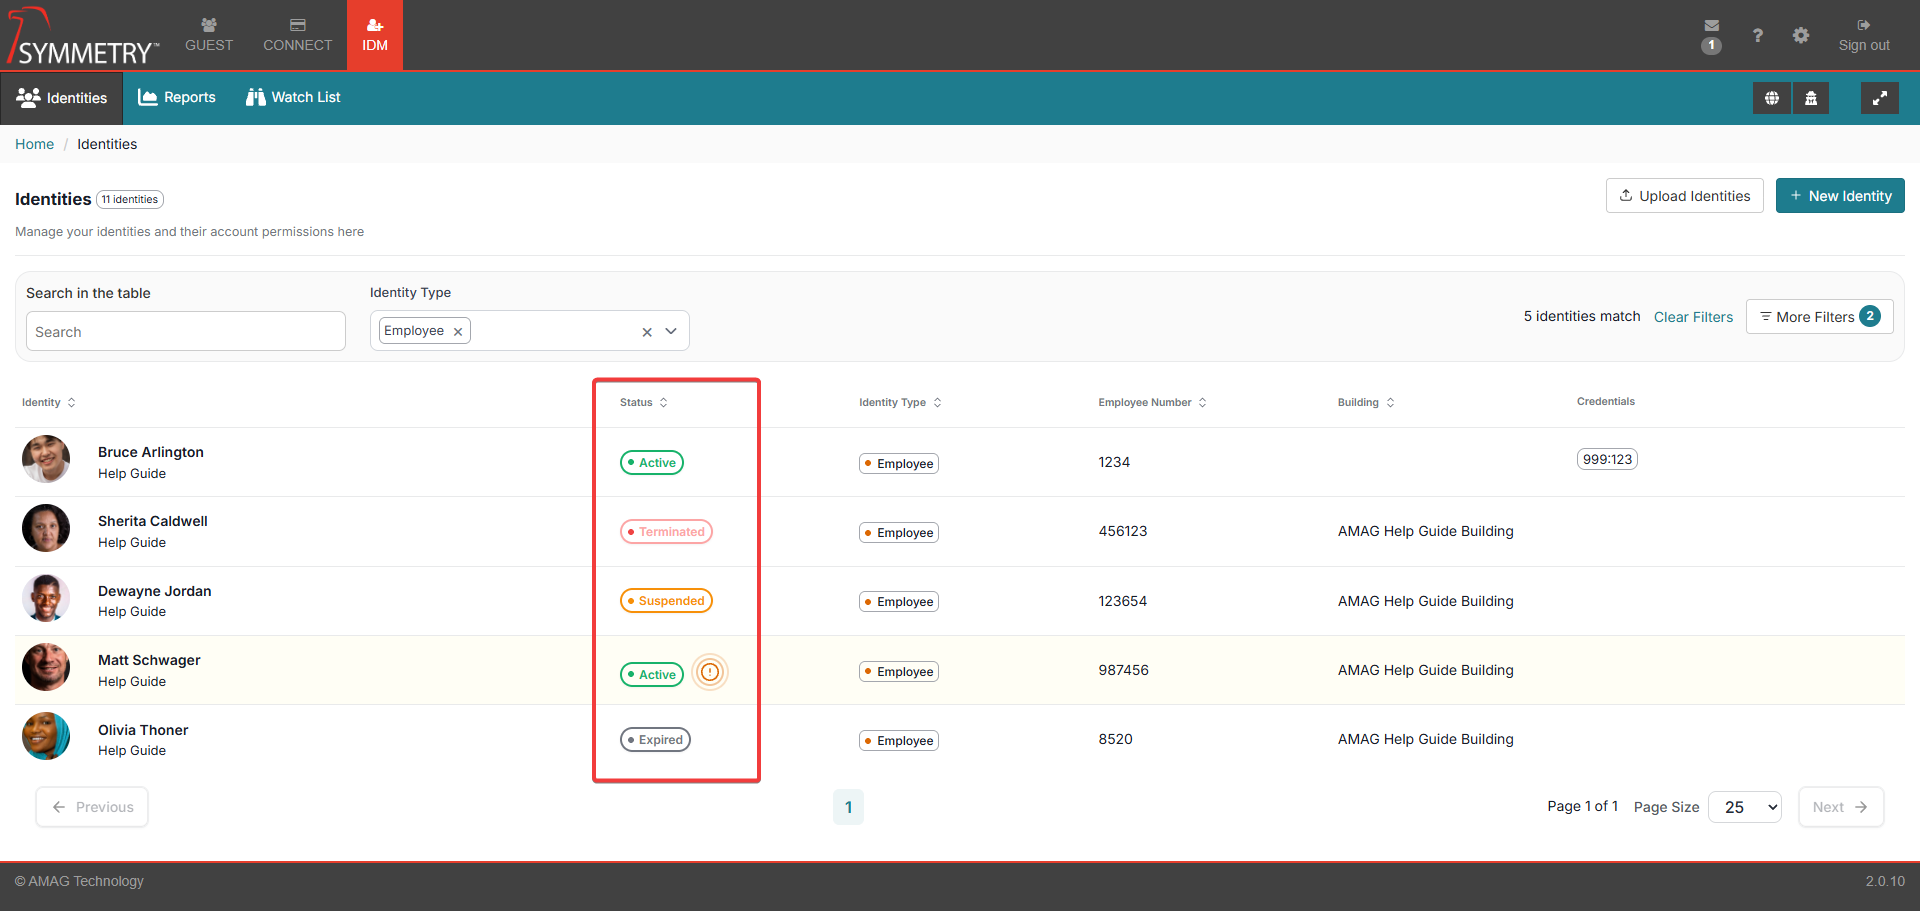
The status of each Identity is visible on the IDM Home page. Expired (Grey Expired status), Suspended (Orange Suspended status) or Terminated (Red Terminated status) are displayed in the status column.
Note
Deleted Identities are completely removed from the system and are no longer visible.
Identities About to Expire
Identities that are scheduled to expire in the next 30 days will appear with an Active Status (displayed in green) with an exclamation mark symbol, if the user hovers over the (orange) exclamation mark, the number of days left until the identity status expires will be displayed. This is to visually flag that the person will expire in the near future, but they are still active at the present time.