Access Control
Note
Required fields are indicated with a red Asterisk.
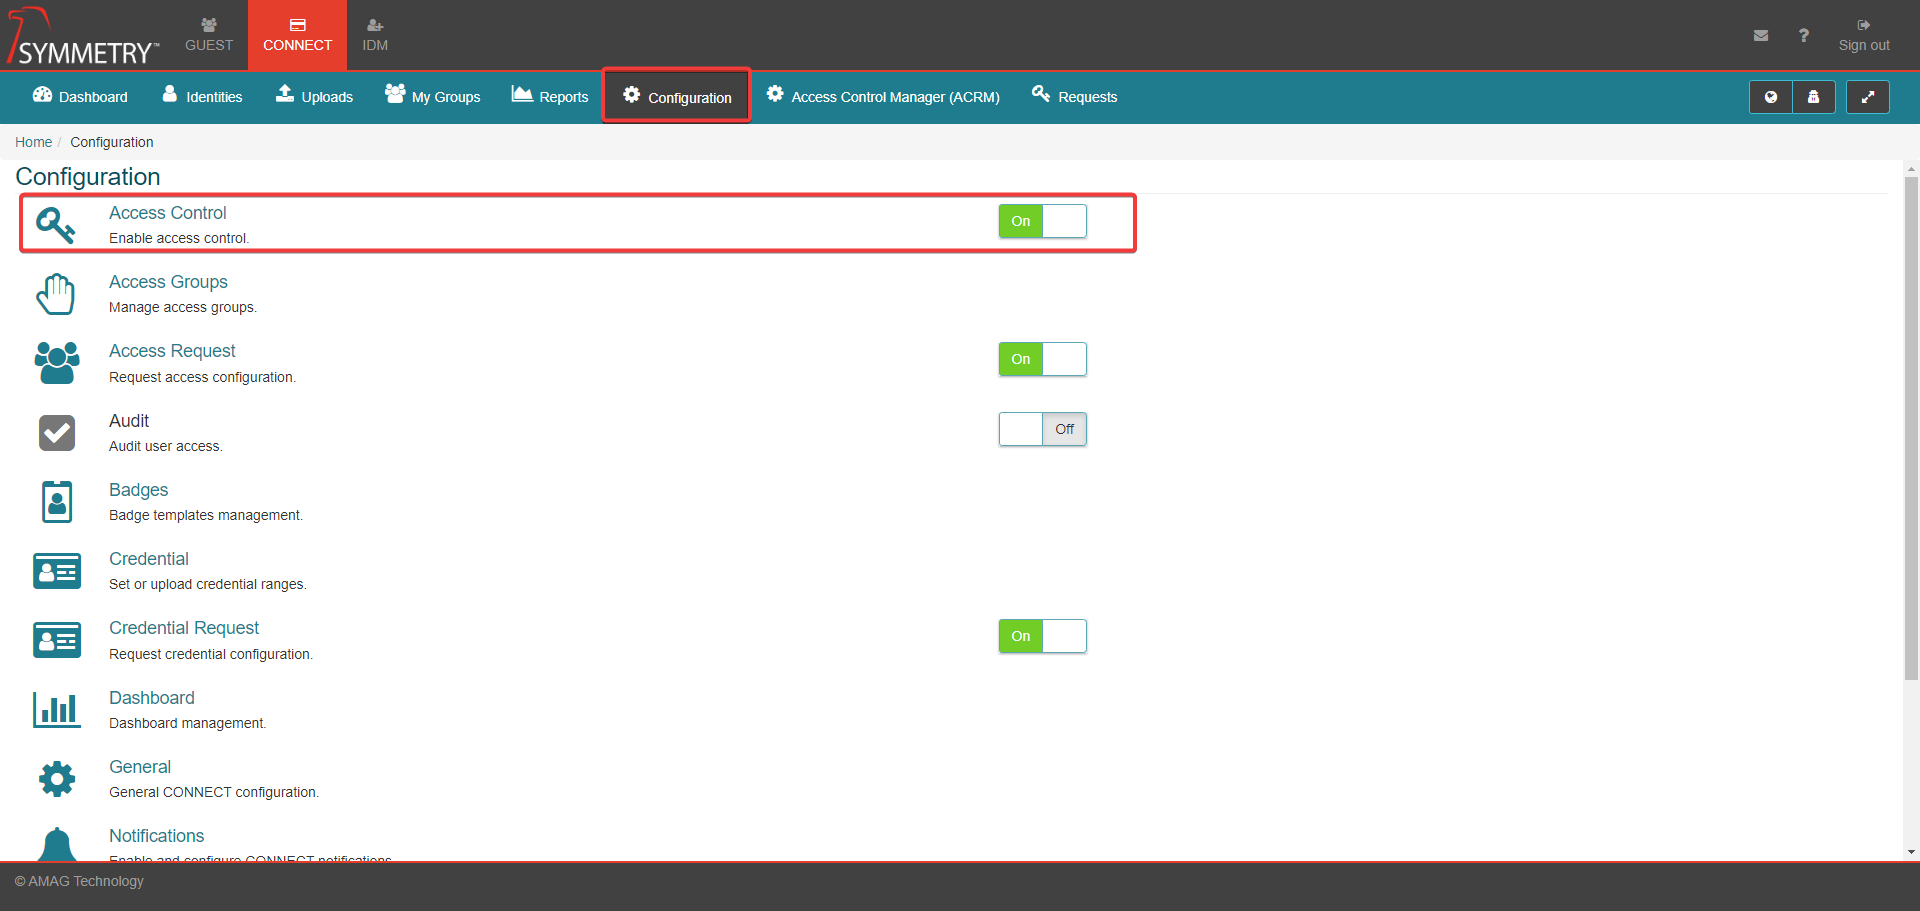
CONNECT > Configuration > Access Control: Integration with a physical access control system is configured within the Access Control sub-section. Integration provides the following functionality:
Access Control Configuration can be toggled between the On and Off position. to either enable or disable the Access Control function within CONNECT.
Access Groups (known as Access Codes in the Symmetry Access Control System) are imported into CONNECT.
The Access Groups are assigned by an administrator to specific Access Group Rules, or they can be assigned to specific ACR’s (Access Control Representative); users can request access to the Access Group and the relevant ACR can approve/deny the request.
Credentials (access cards etc.) are issued from CONNECT. Based on system configurations, once a credential is assigned to an identity they are automatically pushed down to or pulled up from the access control system.
Any changes made to the Identity, such as Access Groups being assigned or removed, or a new Credential being issued, are automatically reflected in the access control system. For example, if an Identity is terminated in CONNECT, they are automatically removed from the access control system.
Reports in CONNECT will show where each Identity presented their card in access control system.
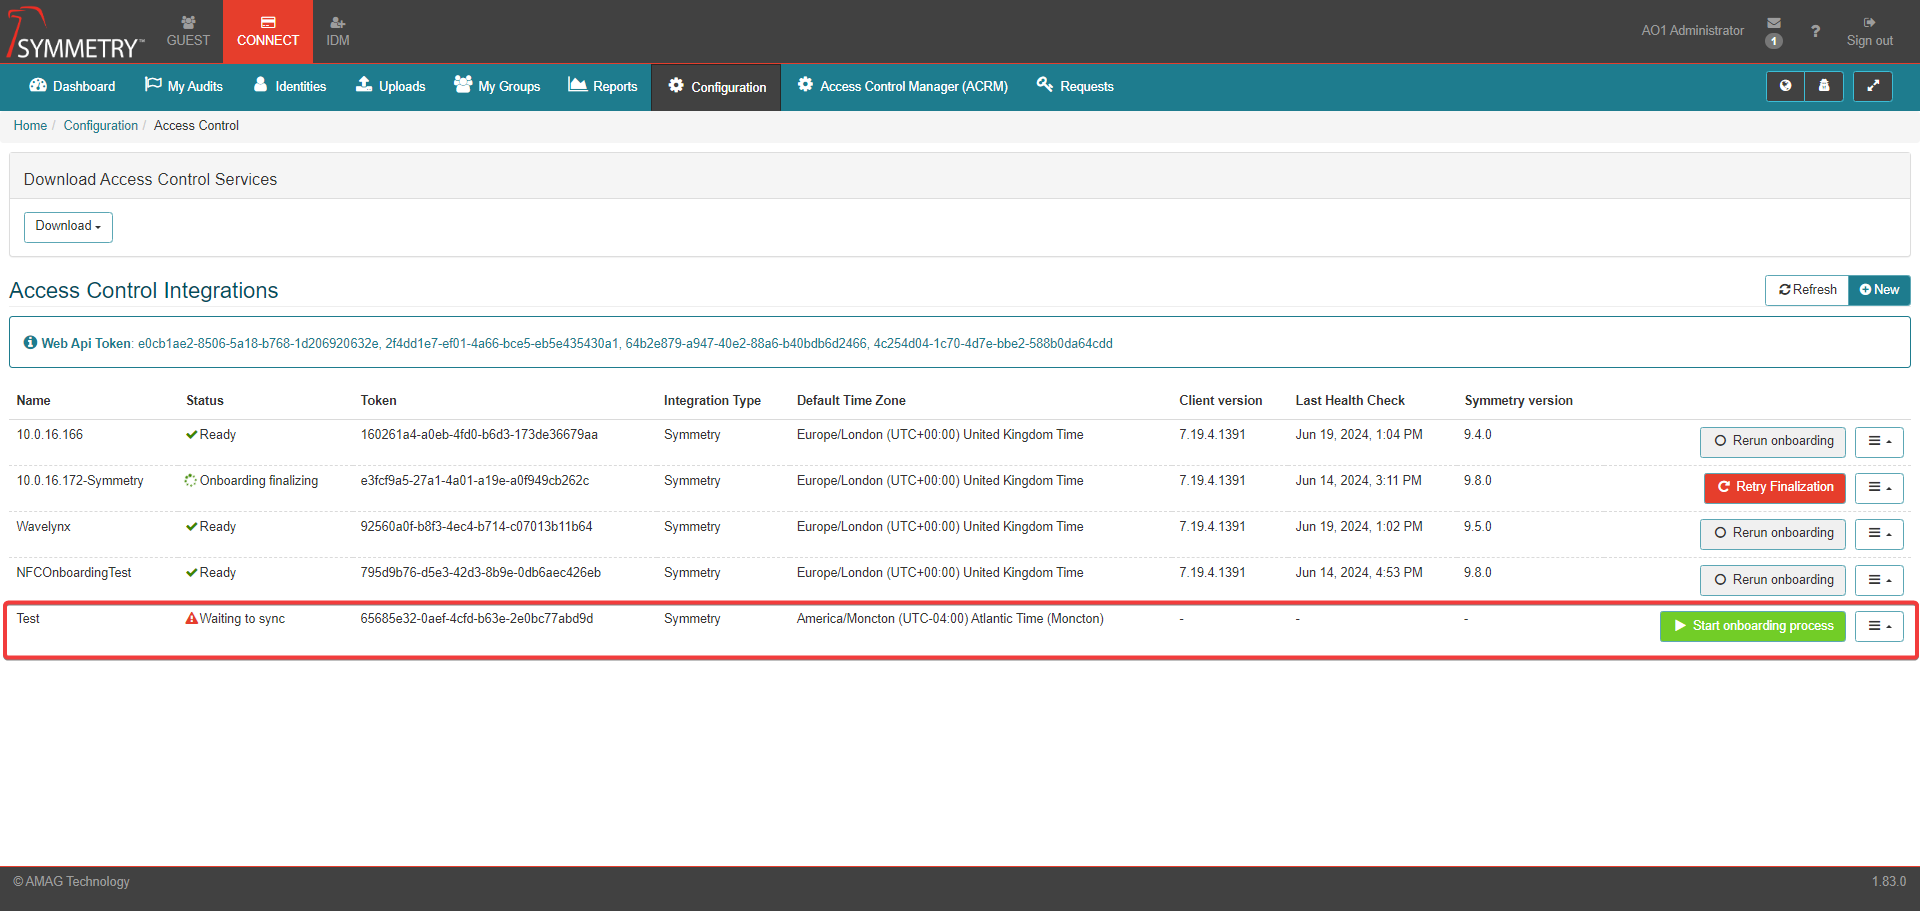
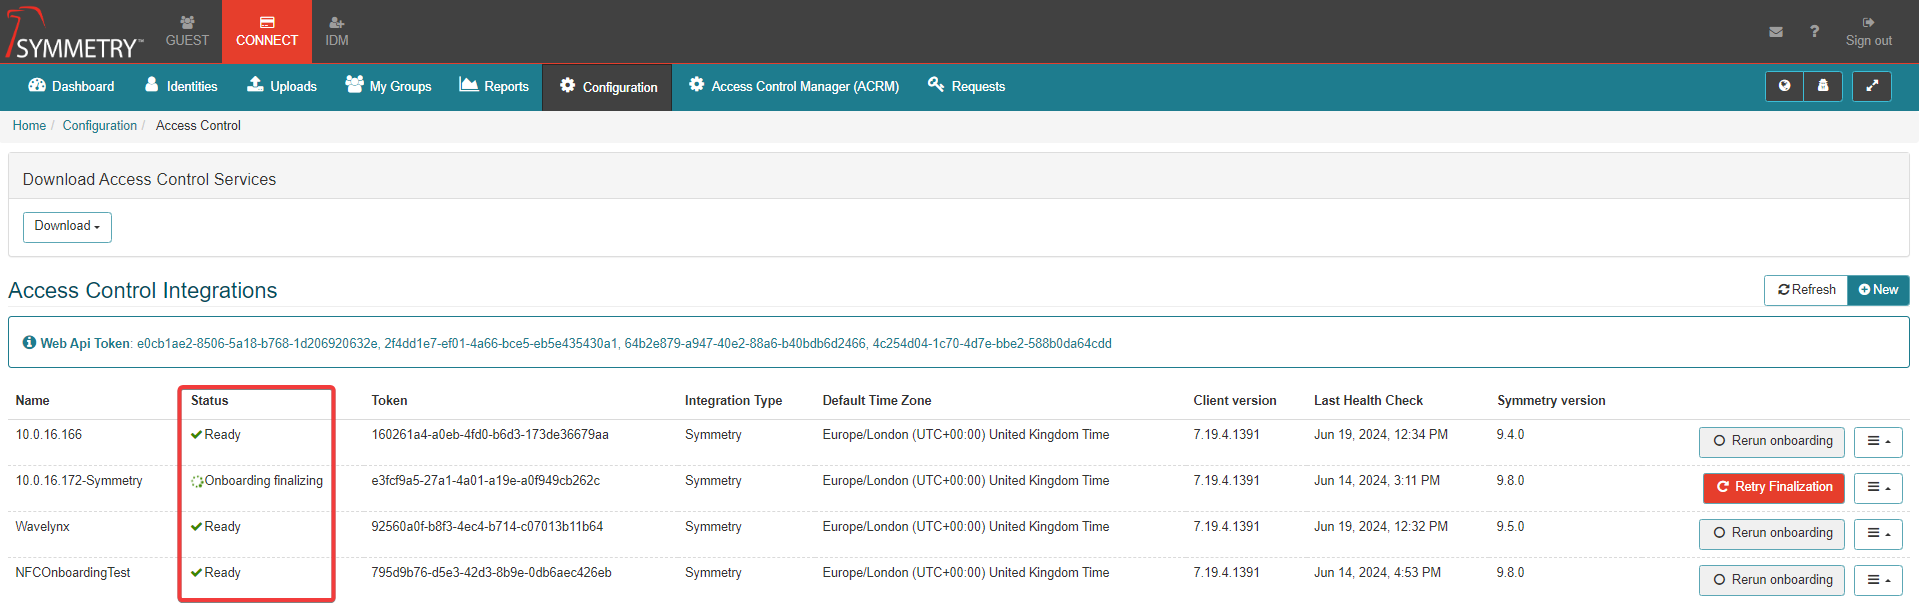
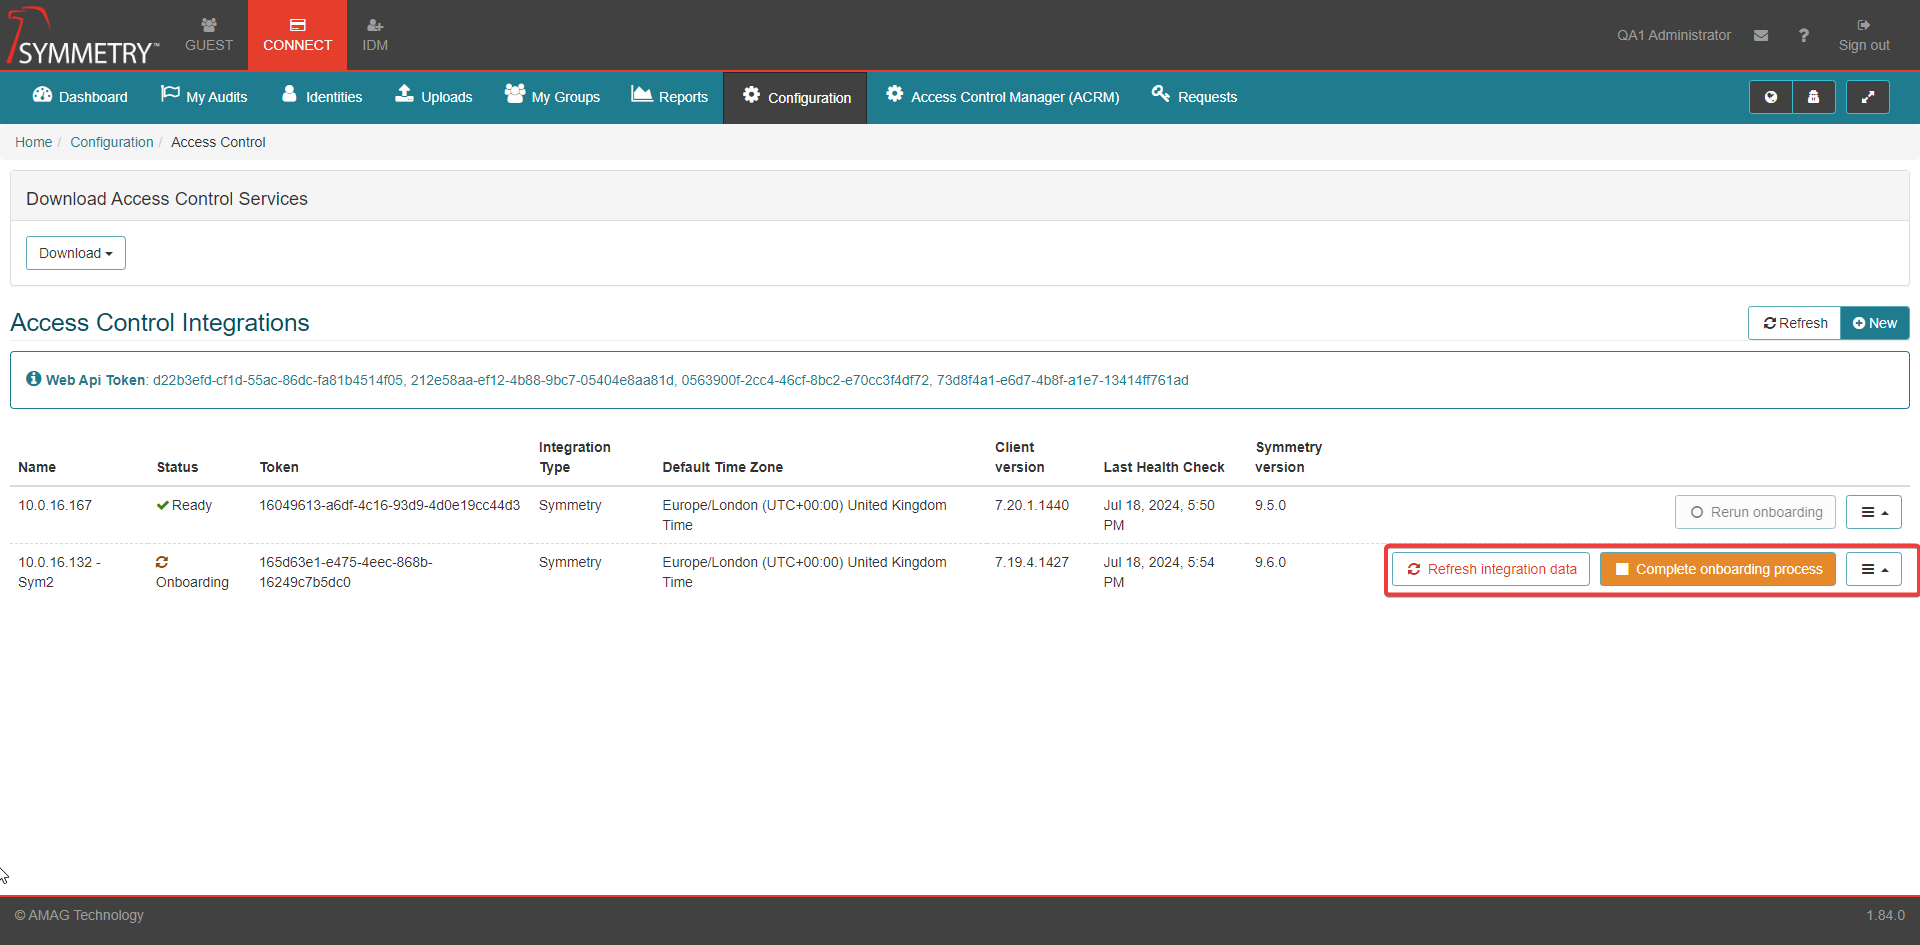
Access Control Integrations Screen
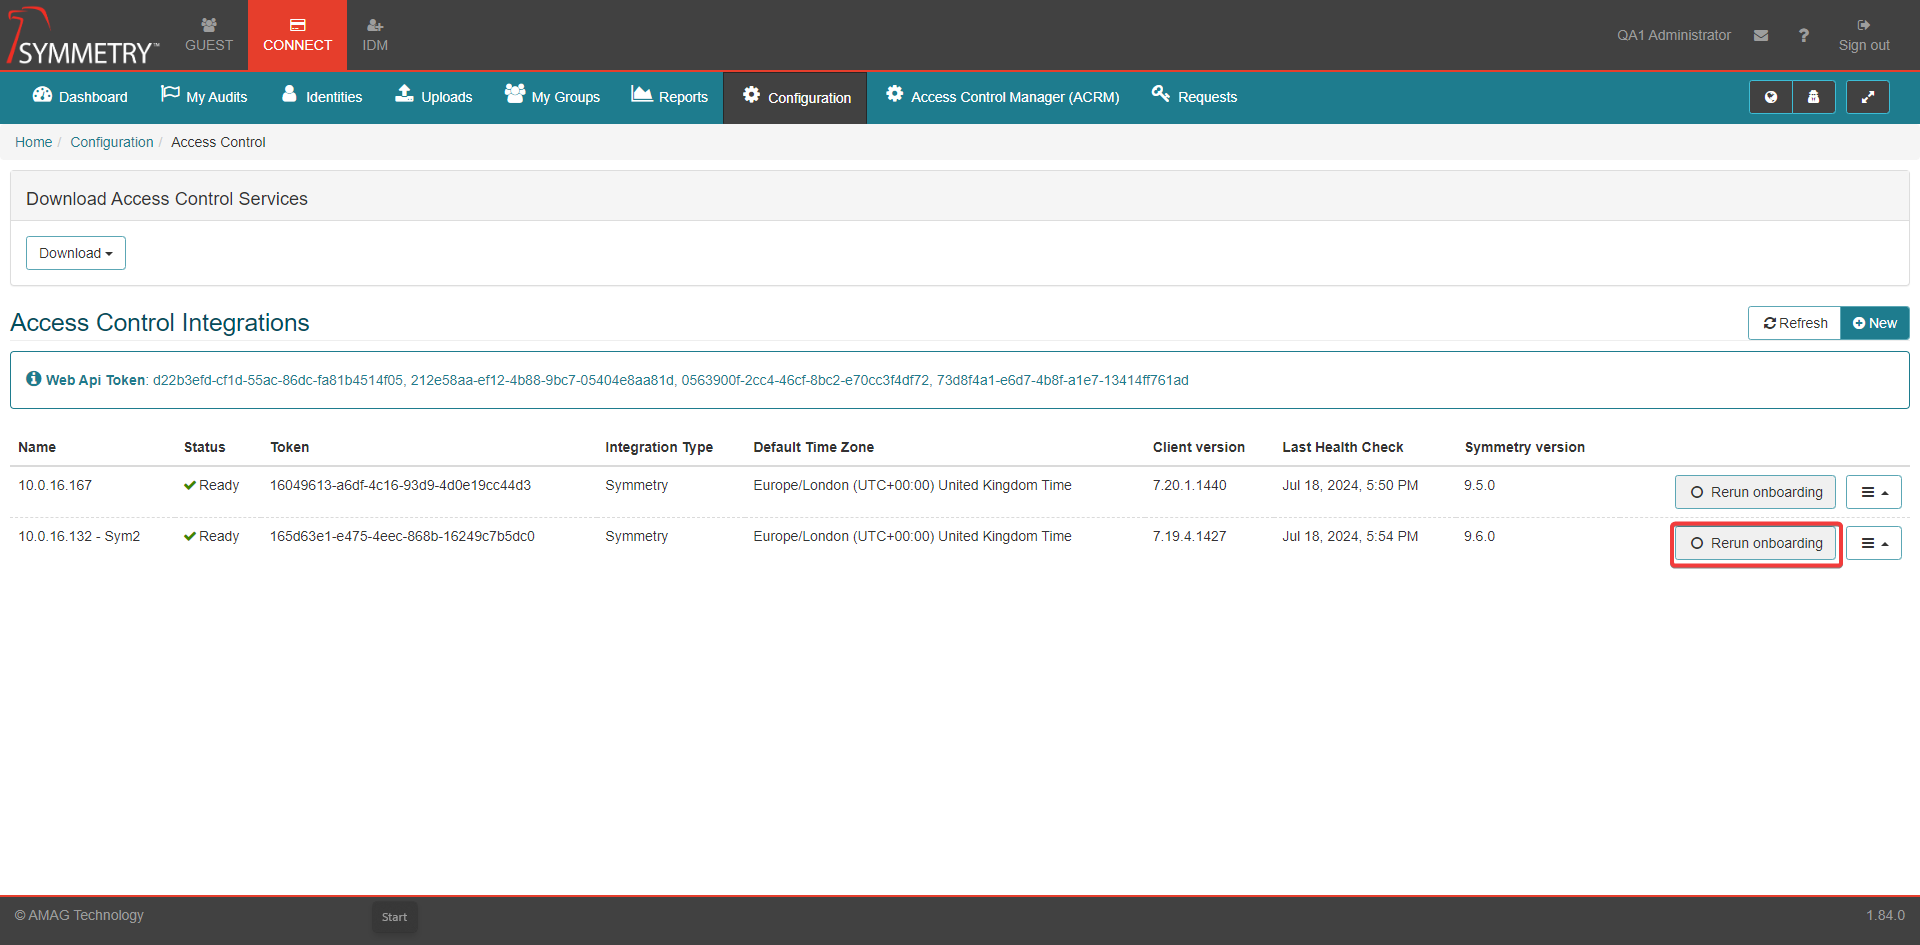
The image below displays an overview of the Access Control Integrations screen.

Download Access Control Services
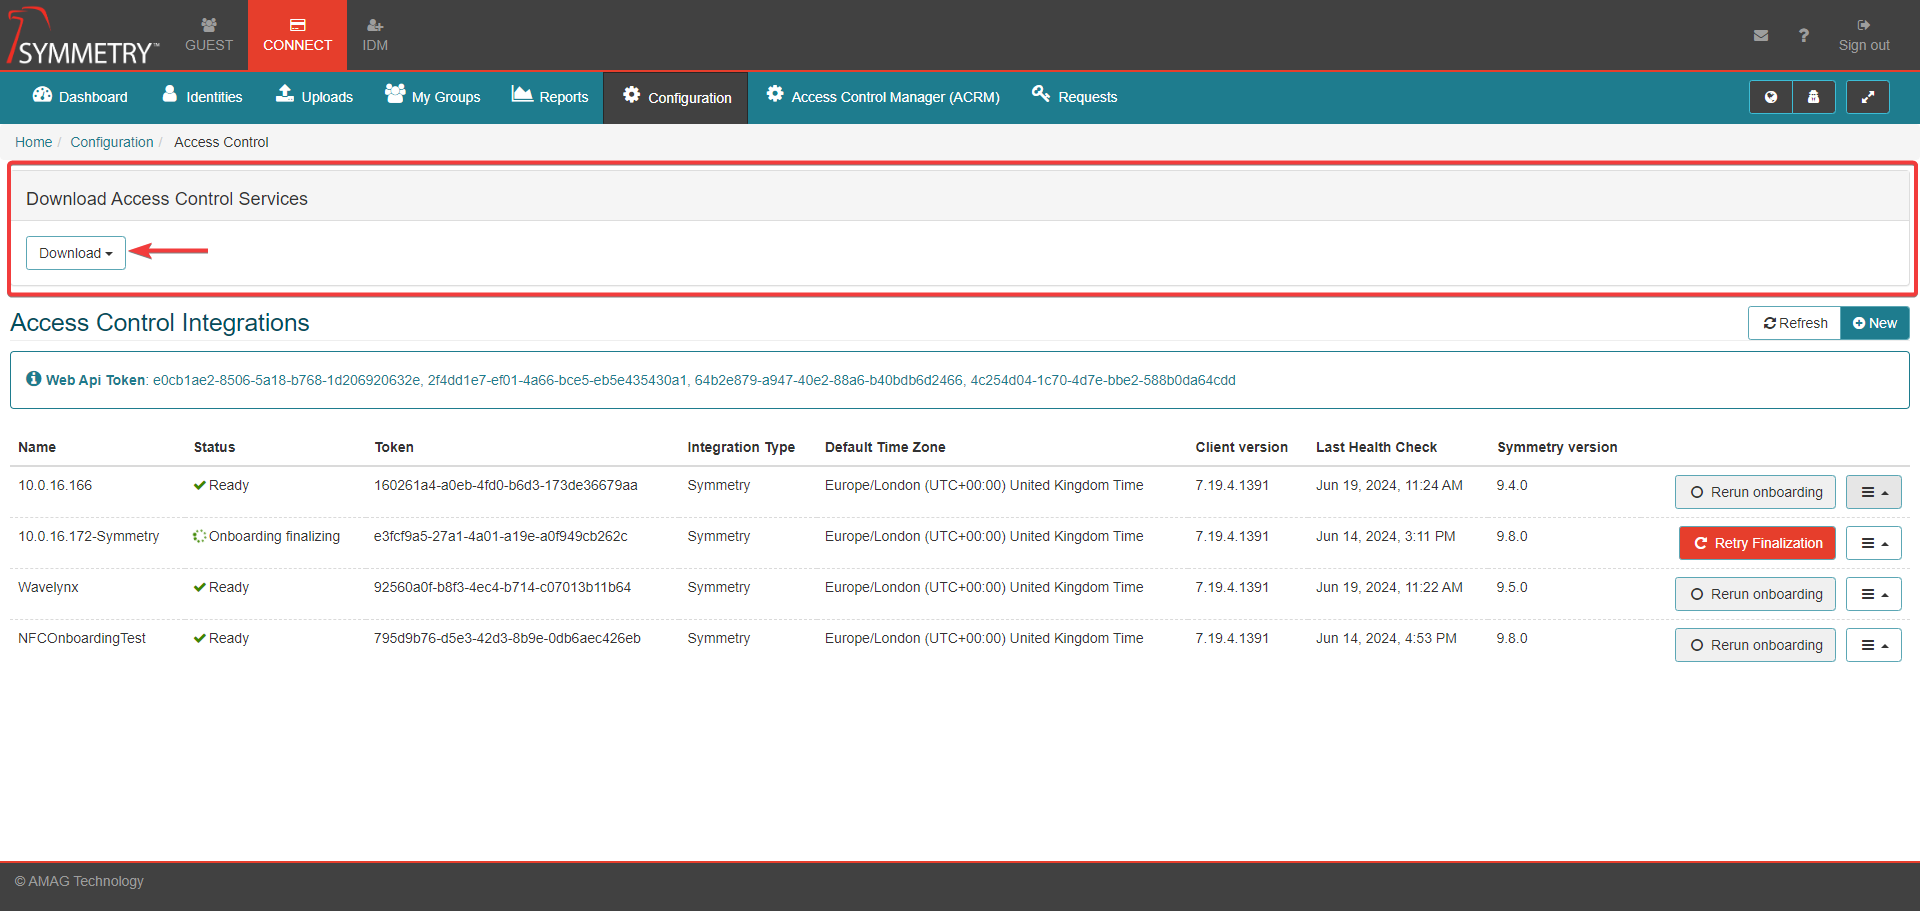
User can use the dropdown list displayed when clicking the Download button to download the latest version of their PACS of choice (Symmetry or Gallagher) as a executable file.
This section displays information about each configured access control integration. Information available includes:
Web API Token: This is required when installing the integration utility.
Name: The name given to the integration.
Status: The current state of the integration. Possibilities include:
Waiting to Sync: The integration has been configured but not yet connected.
Onboarding: The integration is currently being onboarded.
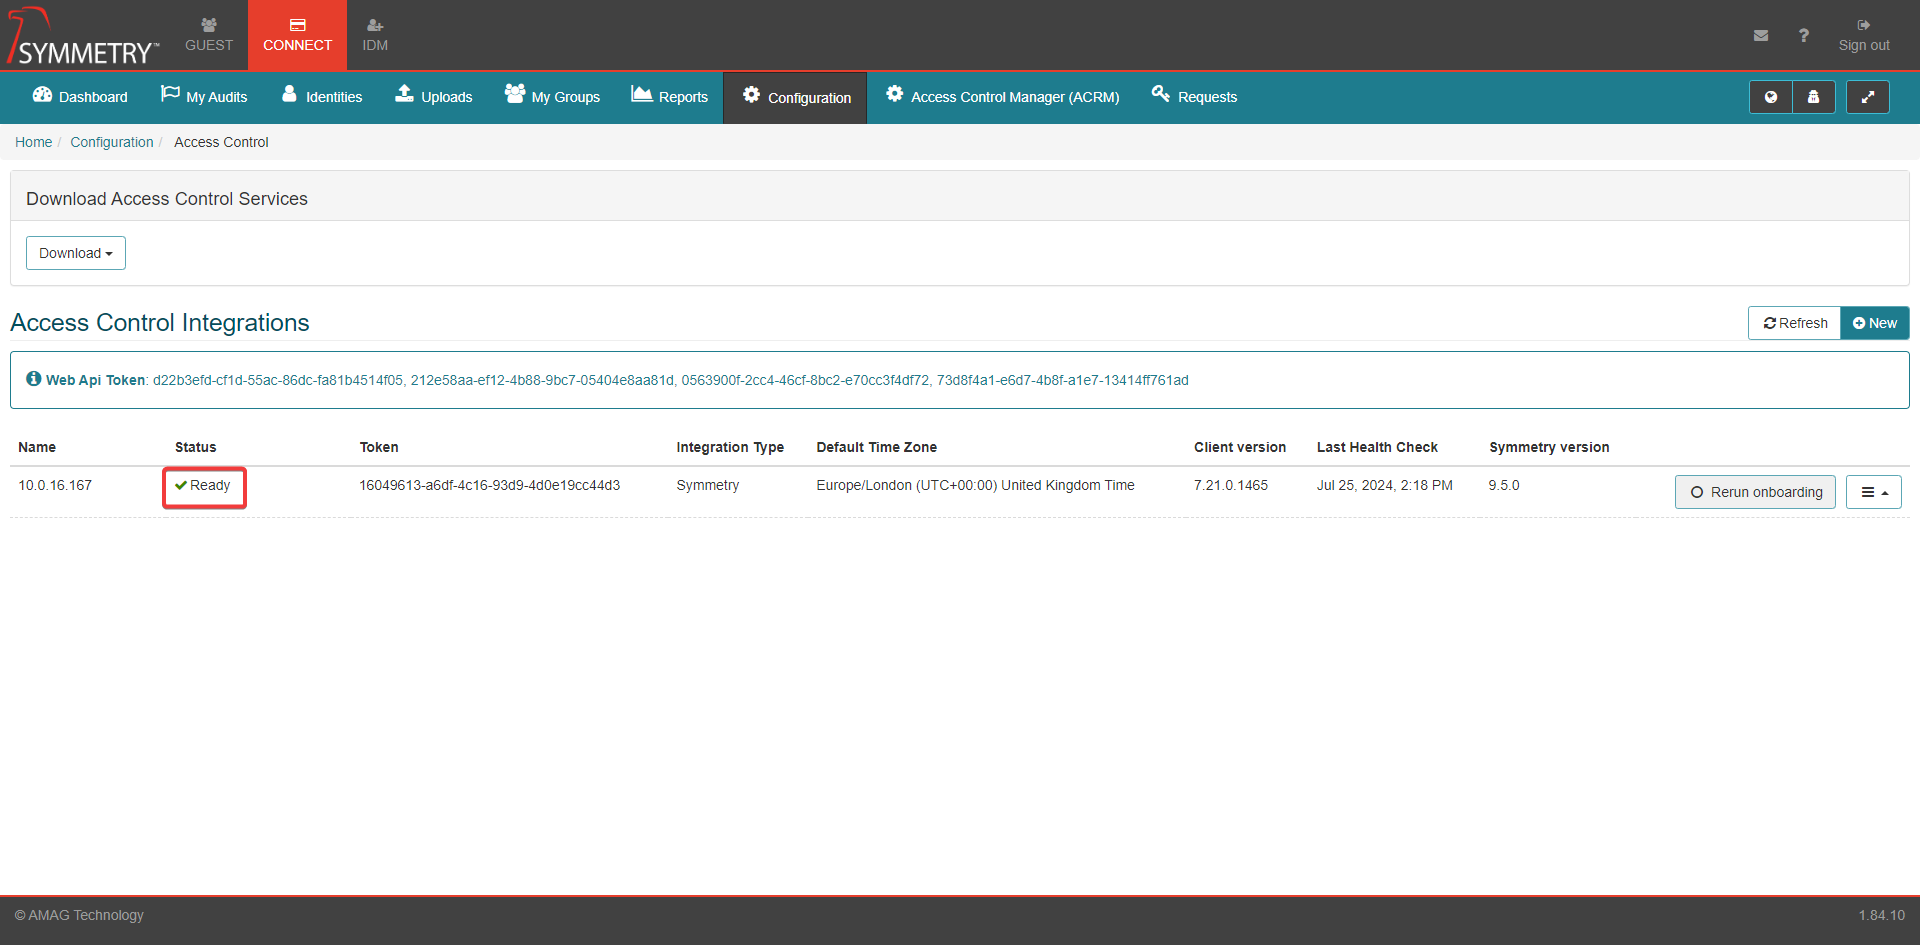
Ready: The integration has been onboarded and is ready to be used.
Lost Connection: The integration has been onboarded but is not currently able to establish a connection.
Integration Token: This is required when installing the integration utility.
Integration Type: The integration client type being used for the integration.
Default Time Zone: The default time zone of the integration. Each access group will receive this time zone, unless directly updated.
Client version: The version (number) of the client.
Last Health Check: The time and date that the last health check was completed.
Symmetry version: The version of Symmetry associated with the system.
Creating a New Access Control Integration
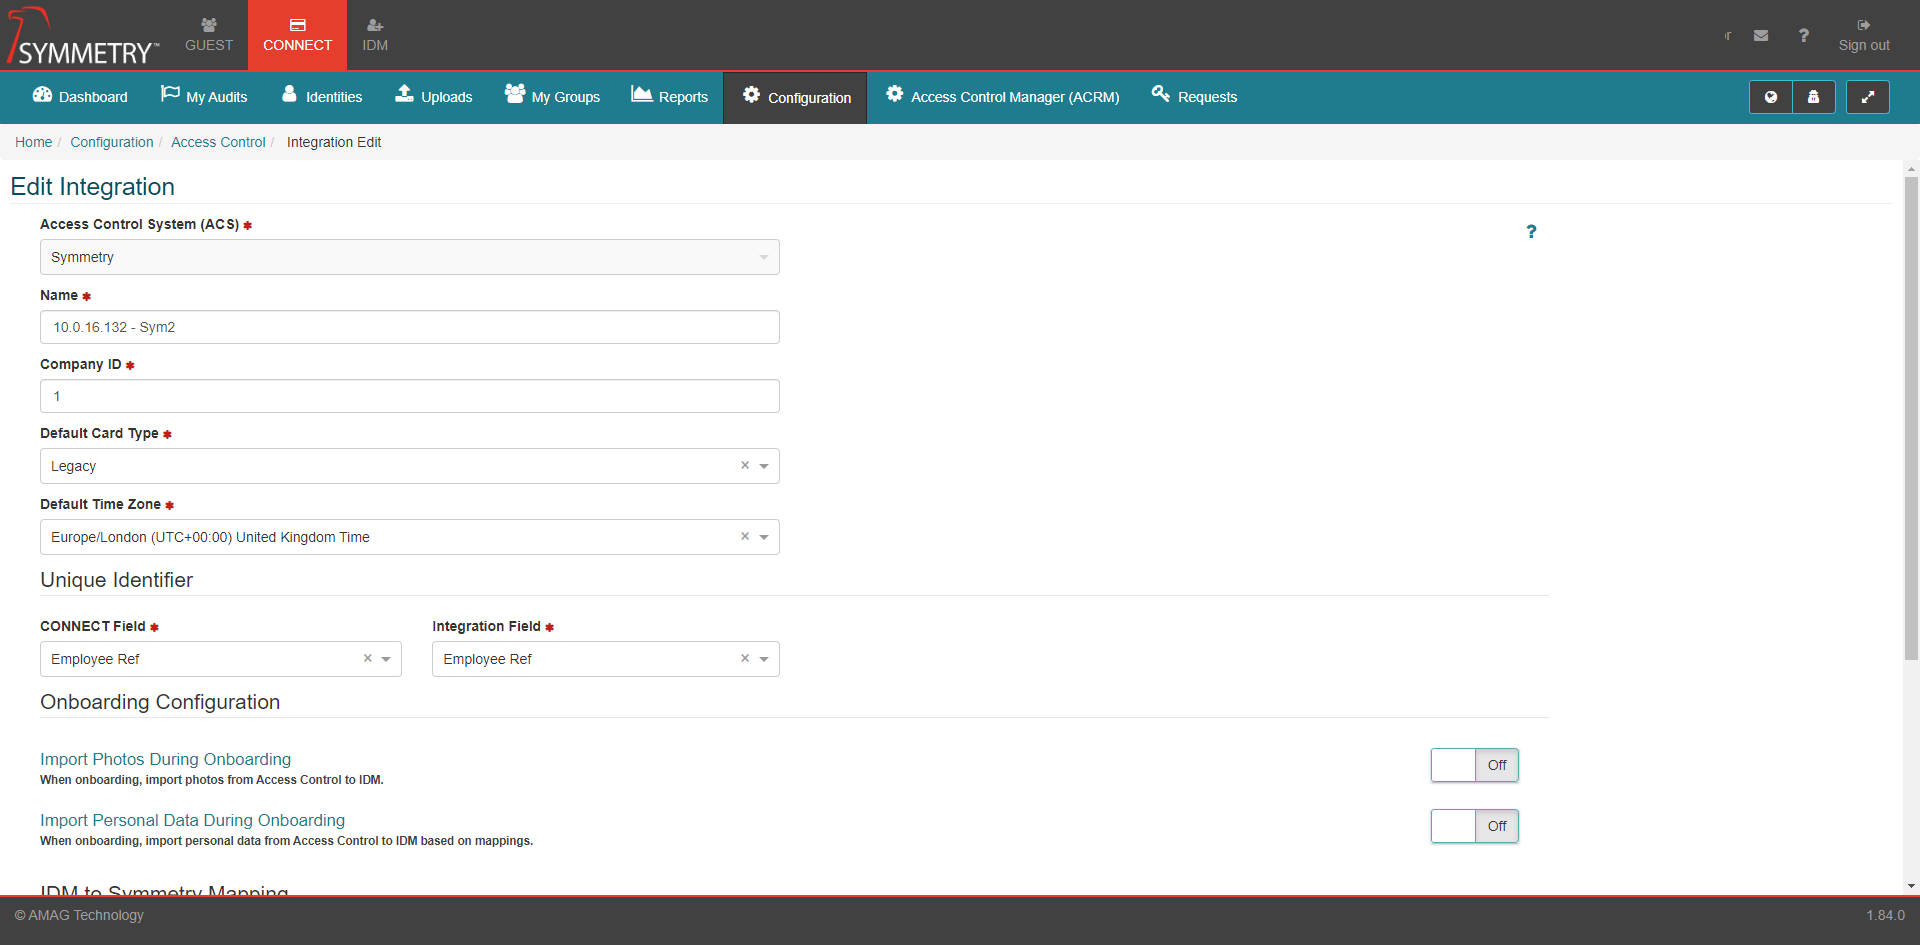
To create a new integration to a access control system an administrator is able to create and configure a new Integration by clicking the New button. When the user clicks the New button. They will then need to enter the following details about the integration.
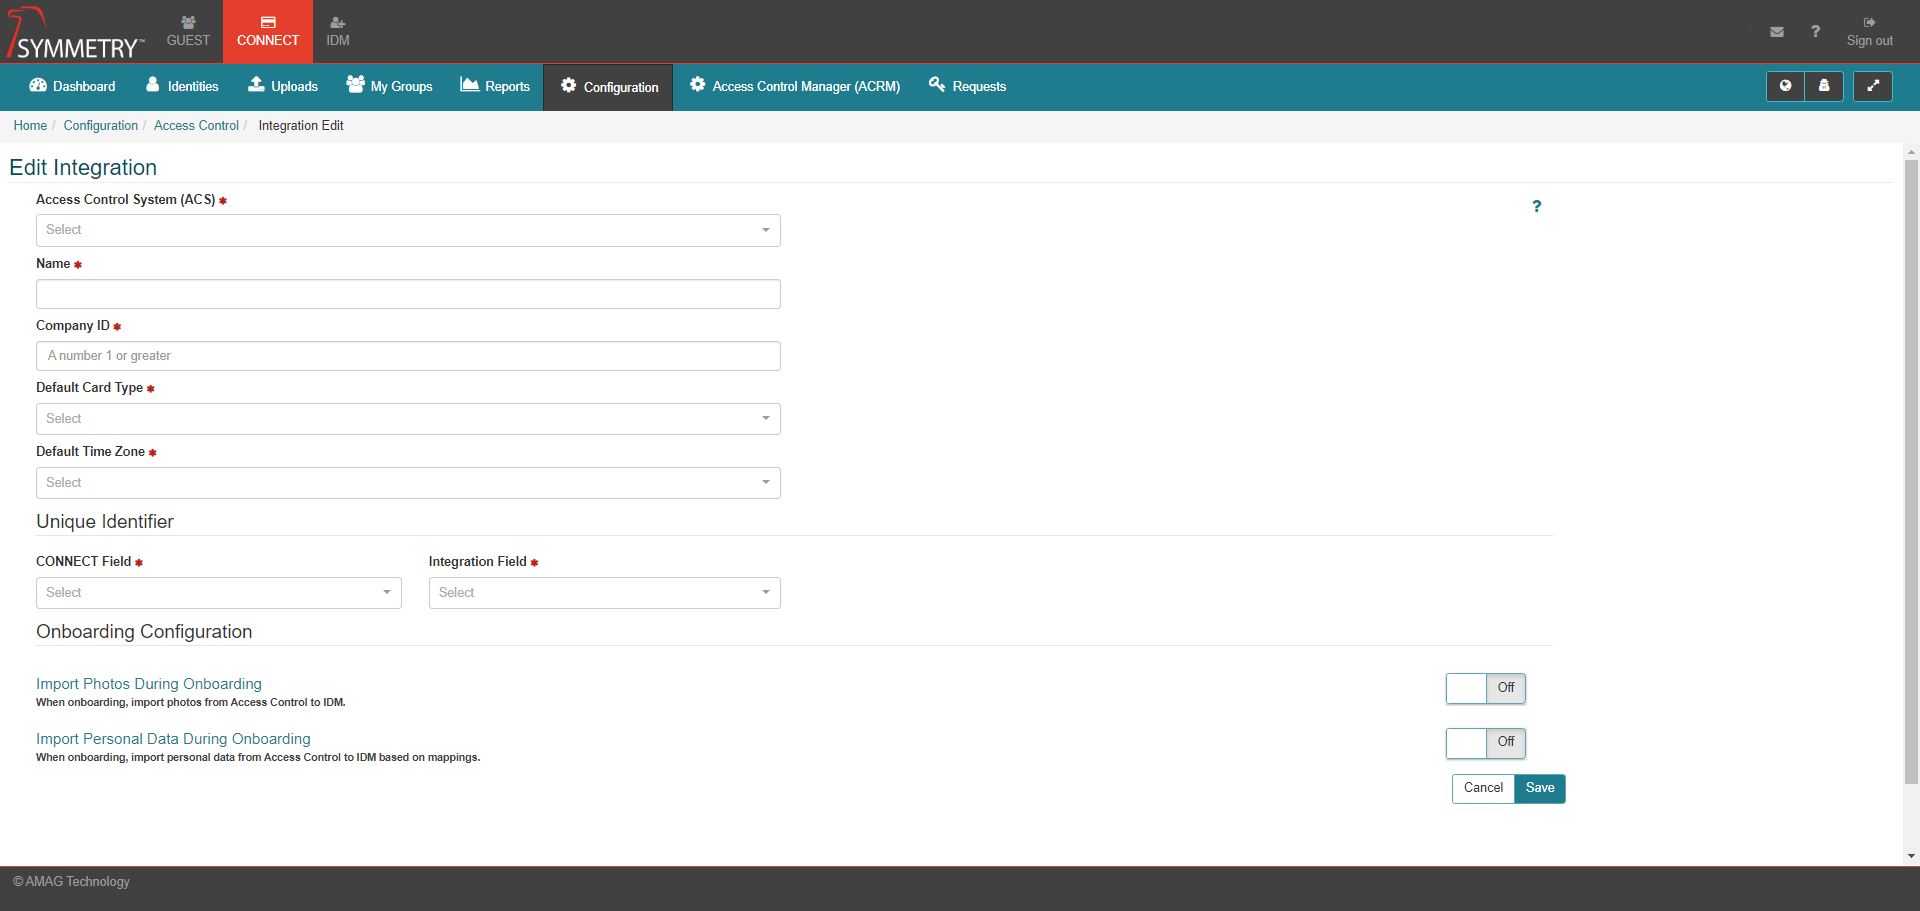
Access Control System (ACS): (Required) - The type of access control system being configured (current options are Symmetry, Lenel and Gallagher).
Name: (Required) - The name used to identify the integration.
Company ID: (Required) - The Symmetry CompanyID that identities will be sent down to (Default is 1).
Default Card Type: (Required) - The default card type that the Access Control integration will use (user can select from any of the Card Types already configured on the system).
Default Time Zone (Required) - The time zone of the Symmetry Application Server, this value will be used as the default value of access codes added from the integration.
Unique Identifier:
CONNECT Field: (Required) - The CONNECT field that will be used to match against the Symmetry field. Options include Employee Ref and Email.
Integration Field: (Required) - The Symmetry field that will be used to match against CONNECT Identities. Options include Employee Ref and PersonalData1 - PersonalData47

Onboarding Configuration:
Import Photos During Onboarding: Enable or disable the import of photos from Access Control to IDM when onboarding.
Import Personal Data During Onboarding: Enable or disable the import of personal data from Access Control to IDM based on mappings when onboarding.

IDM to Symmetry Mapping: - This section allows you select IDM Fields that will be mapped to Symmetry Fields when updated in IDM.
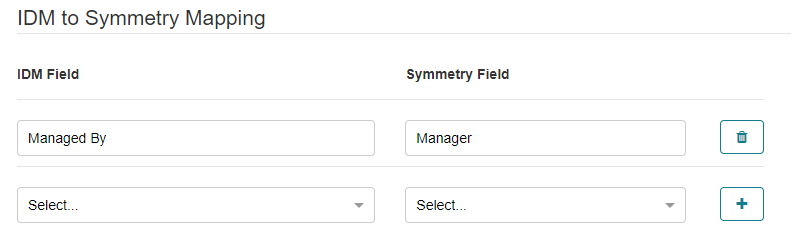
Note
Typically Employee Number in CONNECT (visible on the IDM tab) maps to Employee Ref in Symmetry Access Control as the unique identifier.
Click the Save button to confirm the edits made. Click the Cancel button to disregard and cancel the edits made.
Onboarding
Warning
Onboarding is a relatively complex process that is typically managed by AMAG Professional Services. Onboarding is covered within a separate setup documentation.
Note
If Symmetry Access Control is a new system, and/or does not have any Cardholders stored, then the onboarding process may not be necessary.
The onboarding process is used to map the existing Cardholders that are in Symmetry Access Control to the identities that are located in CONNECT. This reconciles the data sets in each system and prevents the system from creating duplicate Cardholders in Symmetry Access Control.
Onboarding involves two primary processes:
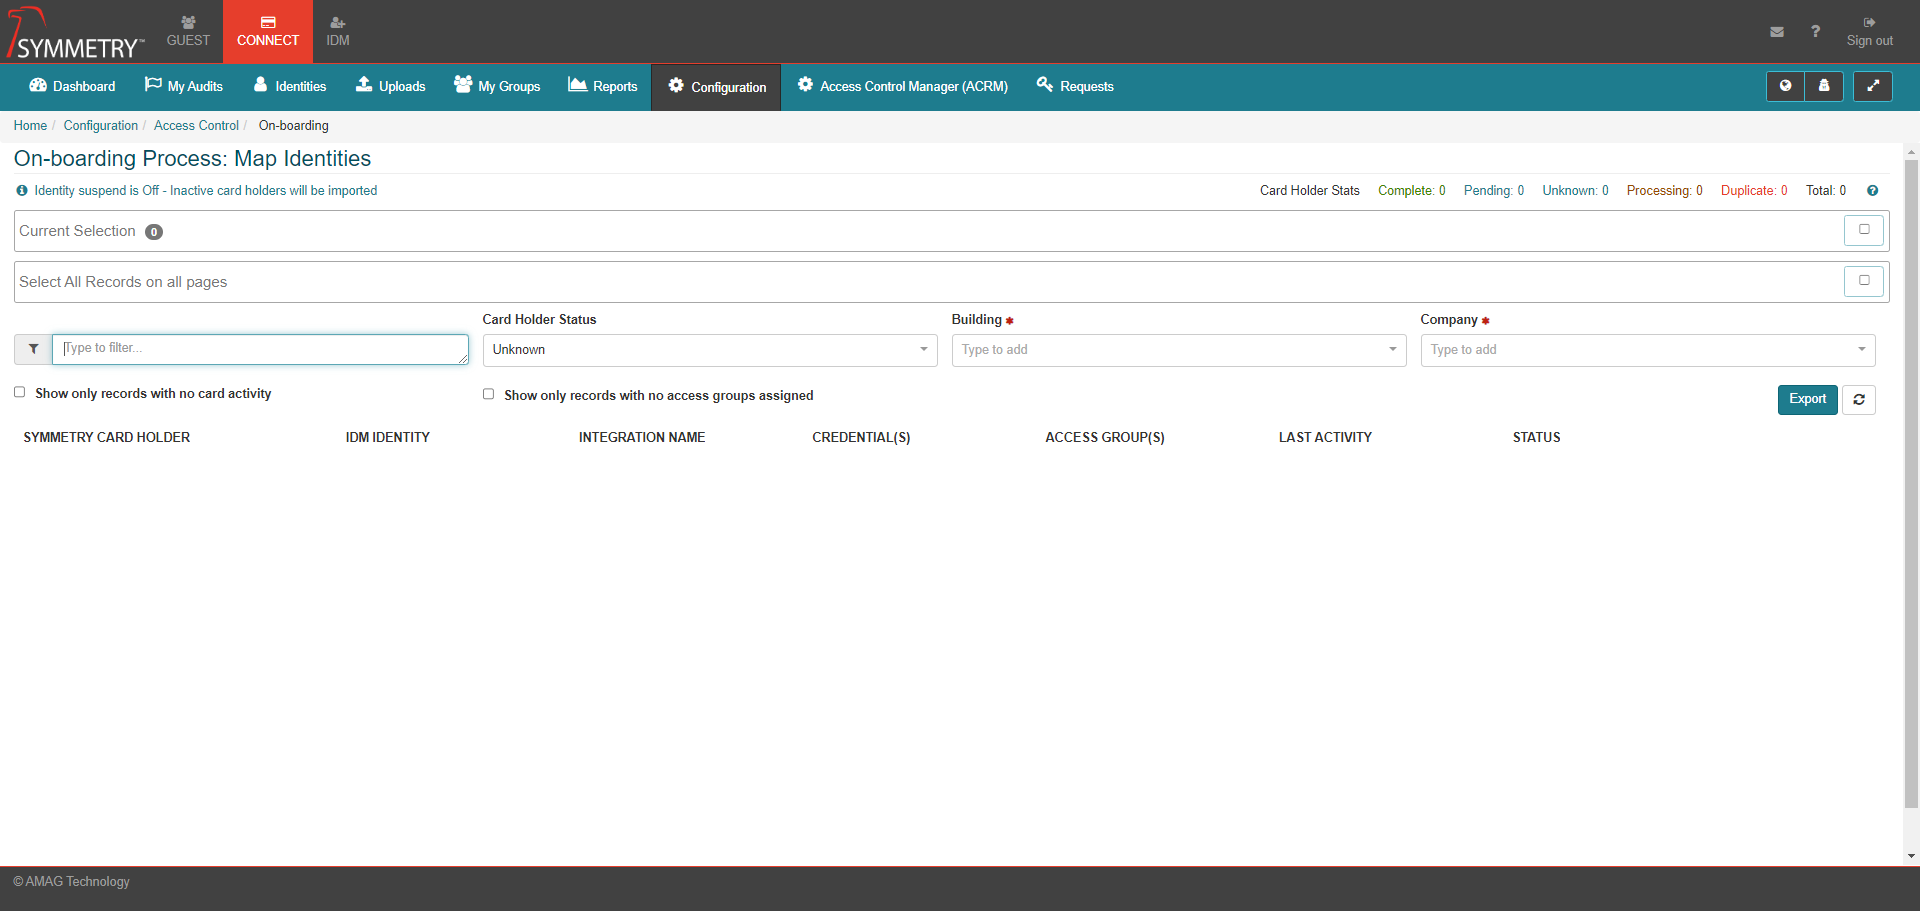
Identity to Cardholder Mapping: CONNECT identities are mapped to the records in the access control system being onboarded.
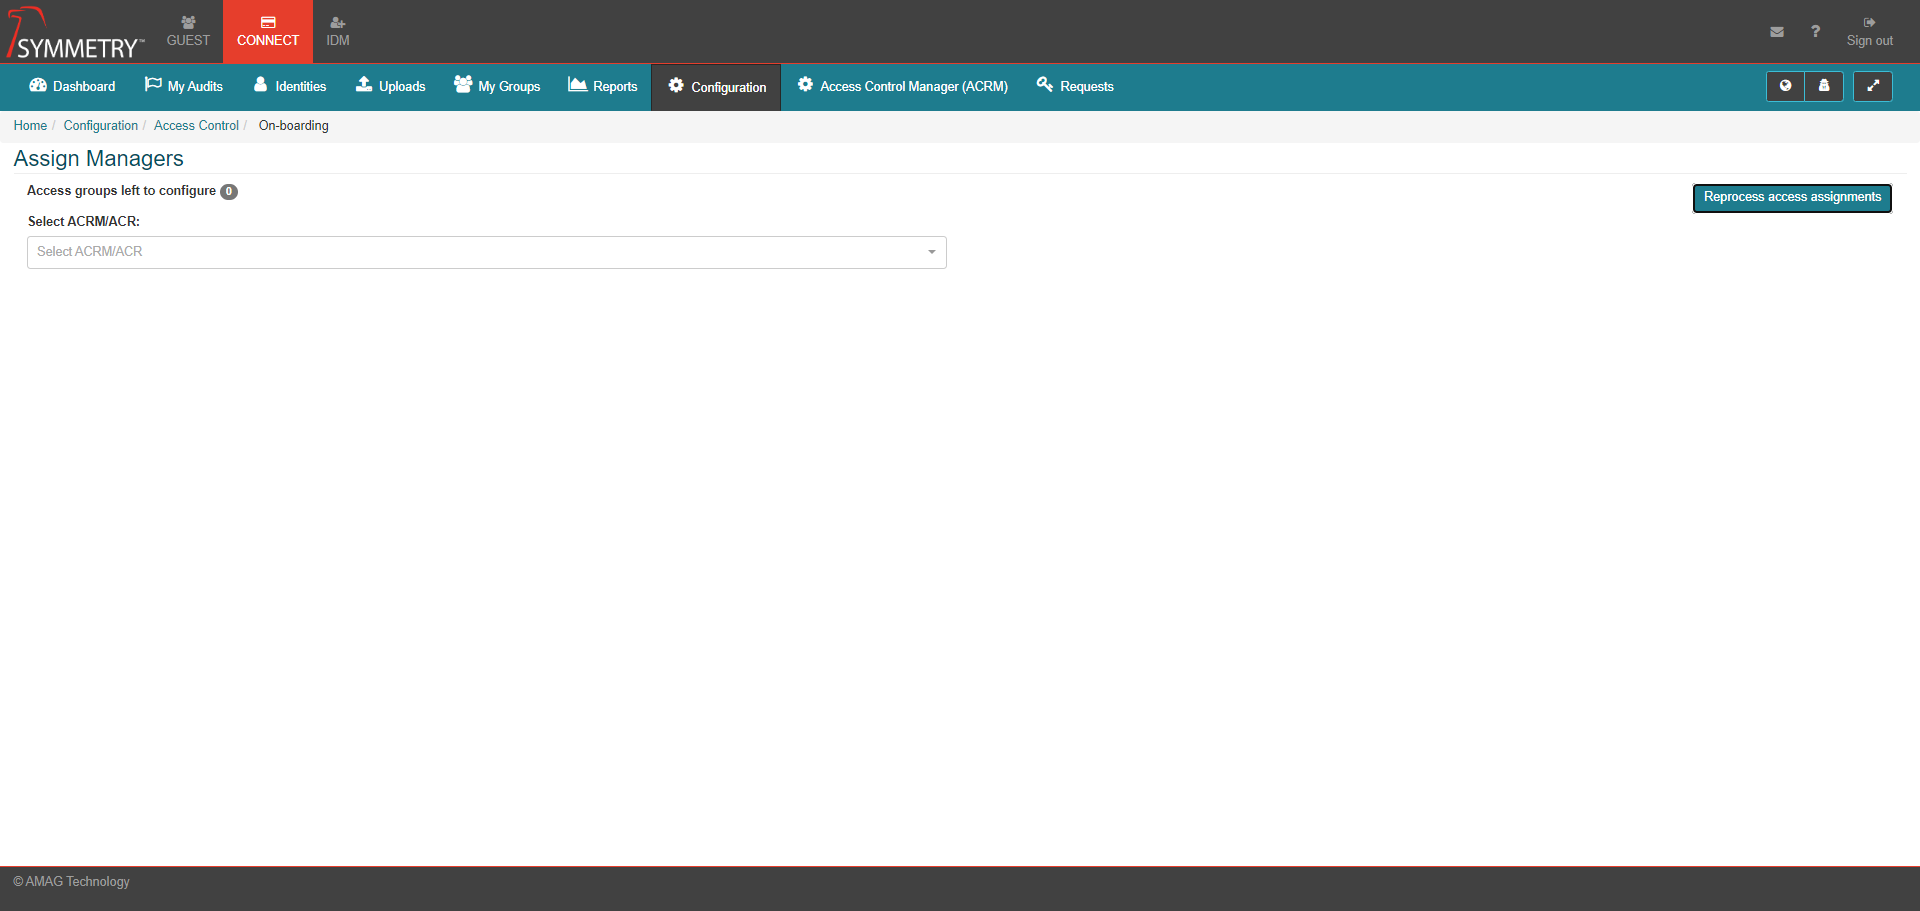
Access Assignment Mapping: Access groups that are currently assigned to cardholder in the access control system are mapped to an ACRM or ACR (Access Control Manager or Access Control Representative).
Click on the Start onboarding process button to continue the onboarding process.
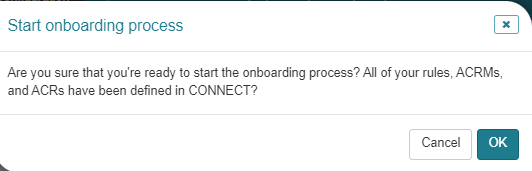
Confirm the Start onboarding process by clicking the OK button.
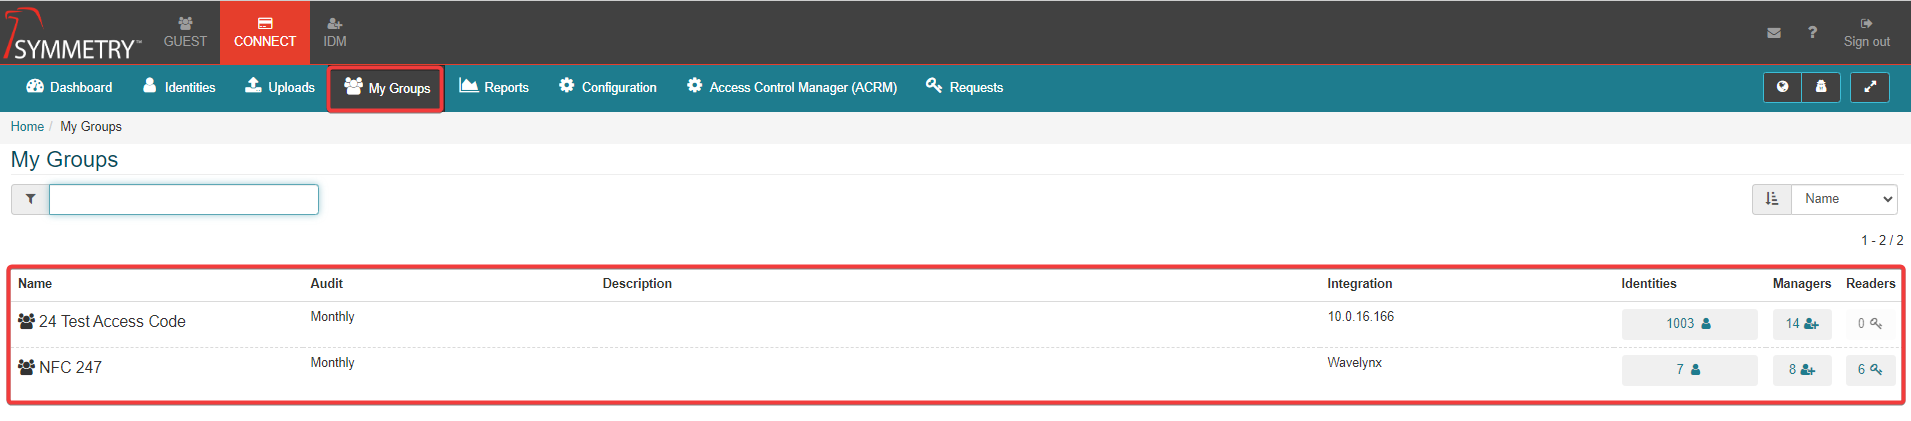
Once the integration services are running and the integration is configured correctly the Integration Status will show as Ready. The administrator can confirm that information is passing between the two systems by clicking on the My Groups tab. If Access Groups (Access Codes in Symmetry Access Control) are displayed, then information has been received from Symmetry Access Control.
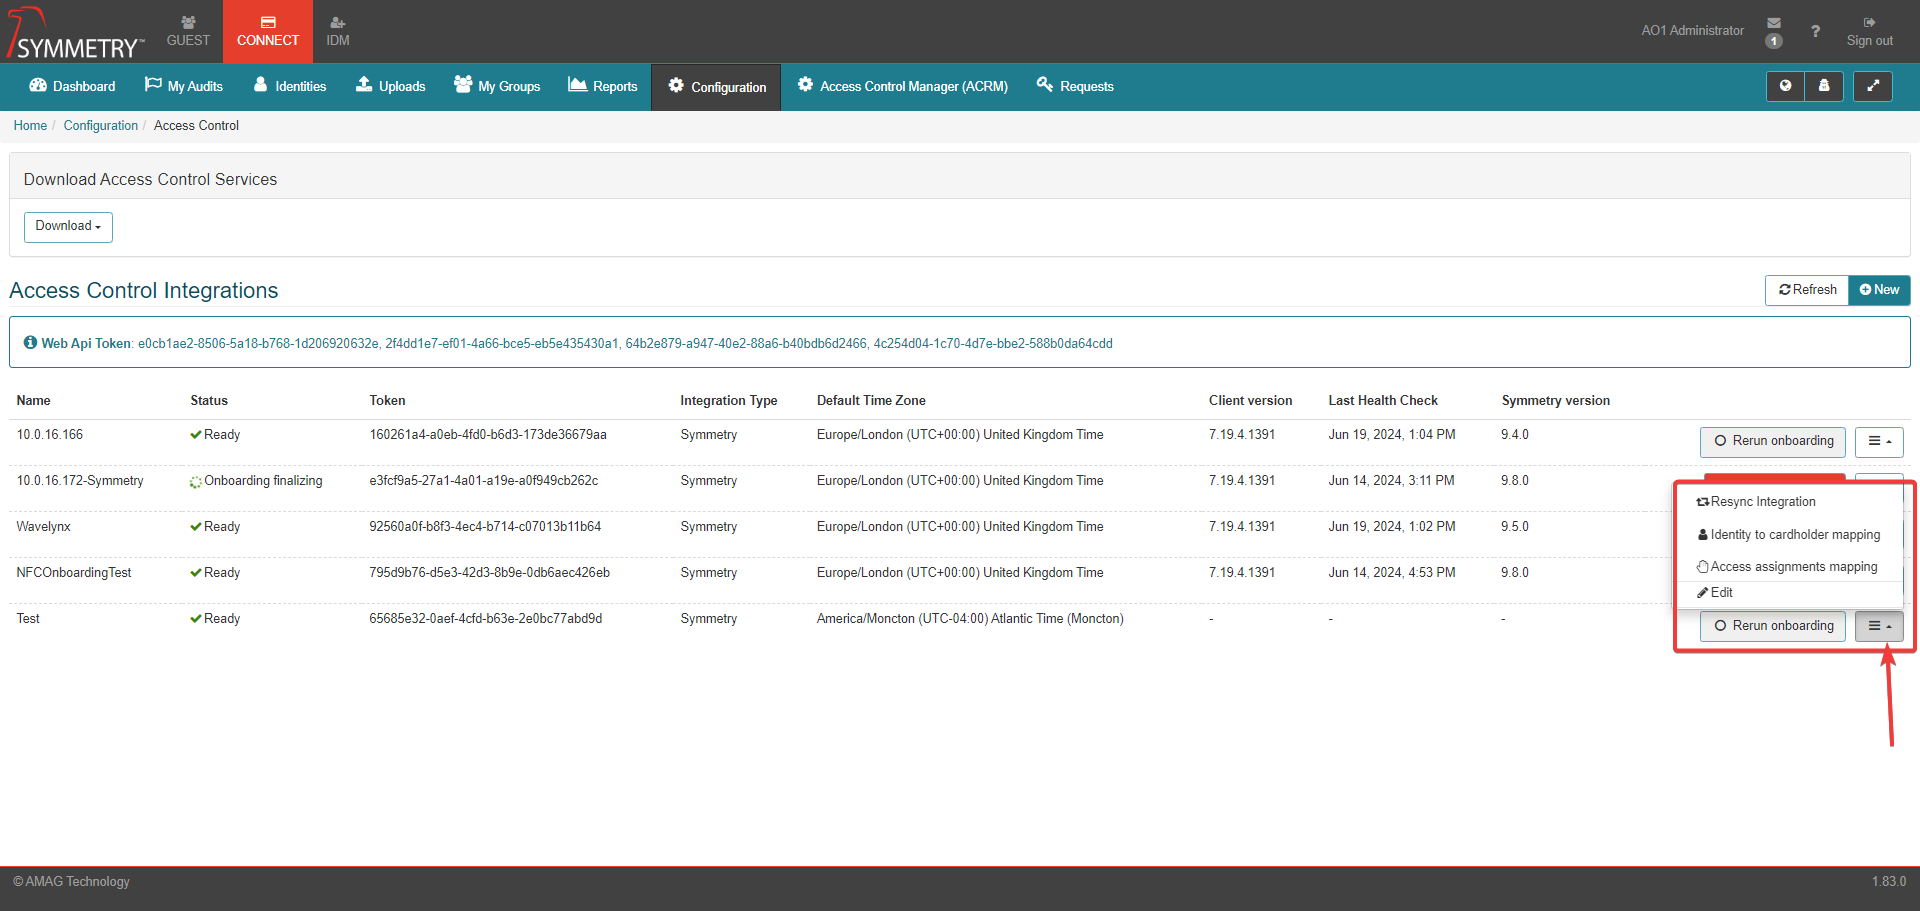
Each integration services that are displayed have the following options available:
Resync Integration
Identity to cardholder mapping
Access assignments mapping
Edit
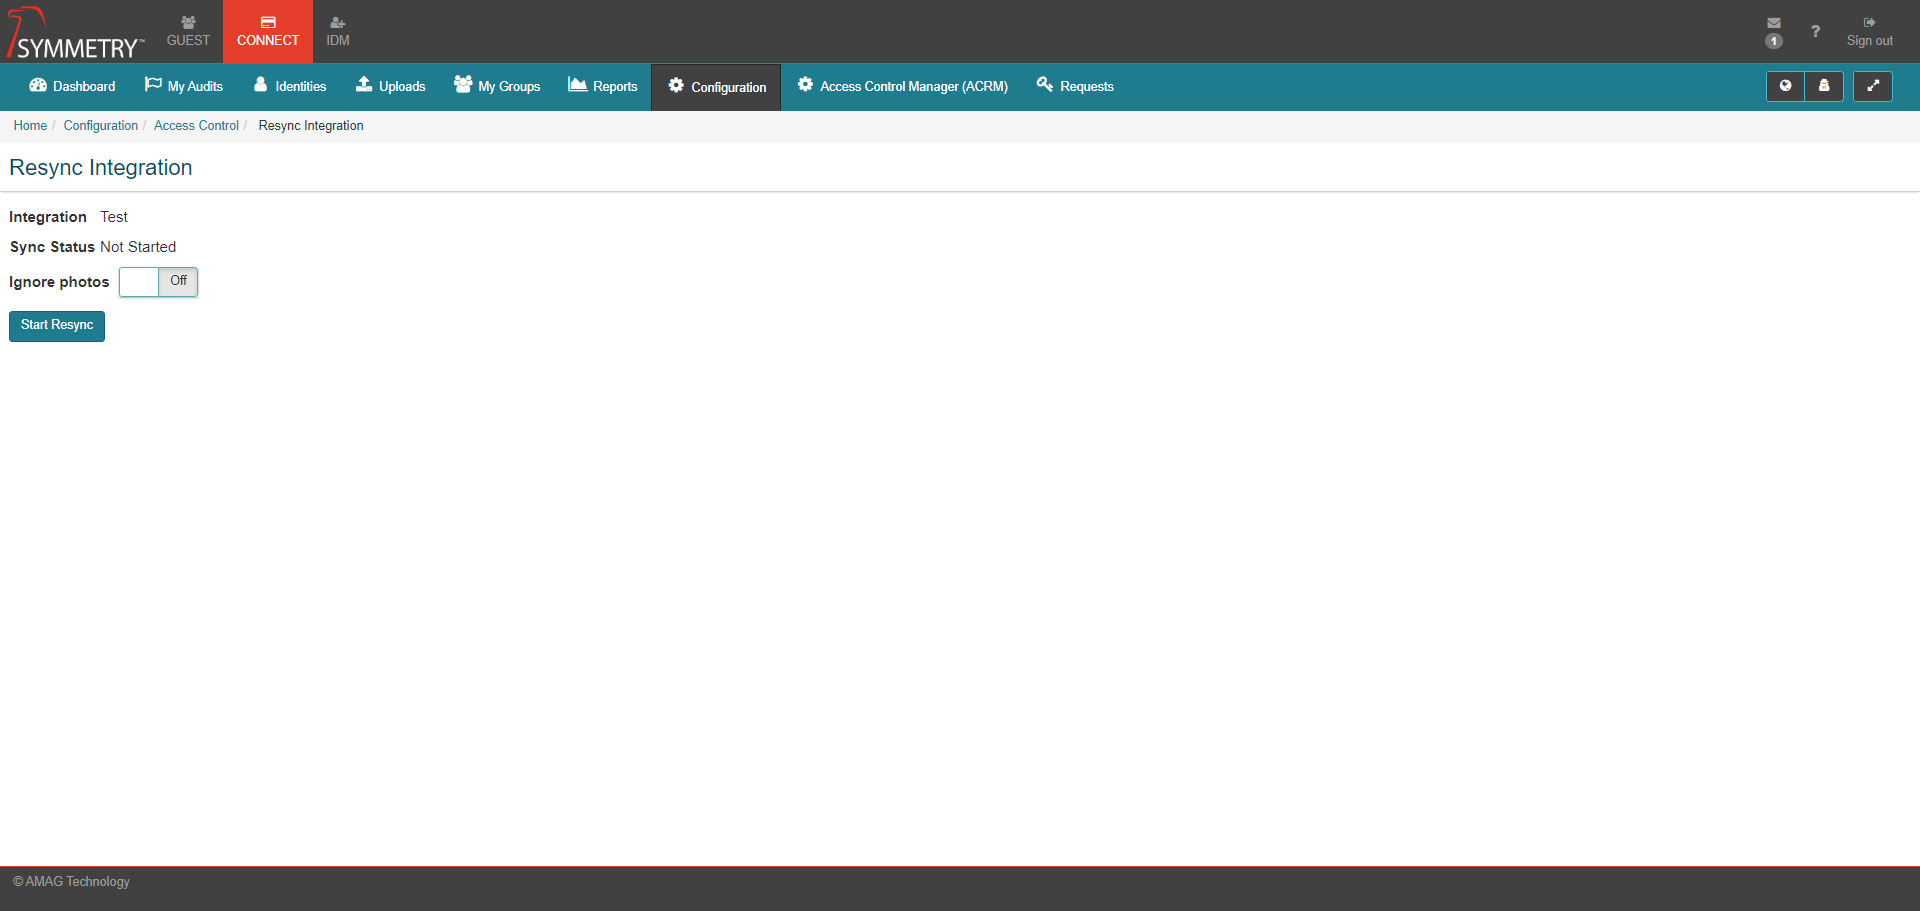
Resync Integration: This allows the integration between CONNECT and the Symmetry Access Control system to be manually resynced. Click the Start button to begin the Resync Integration process.
Integration - The name of the integration instance.
Sync Status - The status the Resync. for example, Not Started or In Progress.
Ignore Photos - Toggle between On or Off to ignore photos.
Identity to cardholder mapping: Allows CONNECT Identities to be mapped to the records in the access control system.
Access assignments mapping: Allows the user to select either an ACR or ACRM using the 'type to filter' box. The number of Access groups left to configure associated with the ACR or ACRM will be displayed. Click the Reprocess access assignments button to complete the access assignments mapping process. If the selected ACR or ACRMS does not have any access groups to configure, the system will provide the following useful message: "This manager has no access groups left to configure for this integration".
Edit Integration: Allows the user to edit the information that was allocated to the Access Control Integration when it was created. Refer to the Creating a New Access Control Integration section above for further information (Creating a New Access Control Integration).
The user can Rerun the onboarding process of the Access Control Integration.
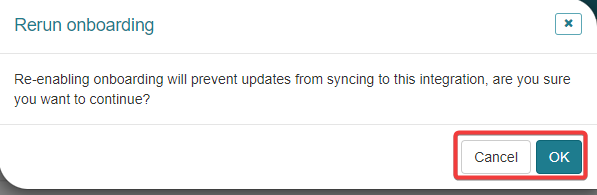
Click the Rerun onboarding button to begin the process.
A pop up up message will appear, see image below for details. Click the OK button to agree and proceed. Clicking the Cancel button stops the process and cancels the request.
The user will then have 2 options to choose from to proceed. Refresh integration data process can be completed out before Complete onboarding process is selected. Click the Refresh integration data to start the refresh integration data procedure if required. If refresh integration data is not required miss the next step.
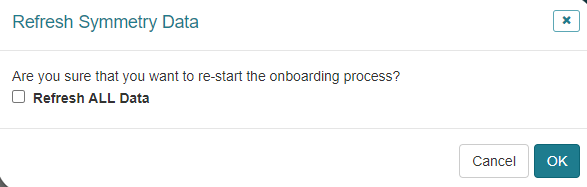
A pop up up message will appear, see image below for details. Click the OK button to agree and proceed. Clicking the Cancel button stops the process and cancels the request. If the Refresh ALL Data option is selected, the message Refreshing all integration data will include mapped identities and may take a long time, are you sure you want to continue? Will appear before the user can proceed.
A pop up up message will appear, see image below for details. Click the OK button to agree and proceed. Clicking the Cancel button stops the process and cancels the request.
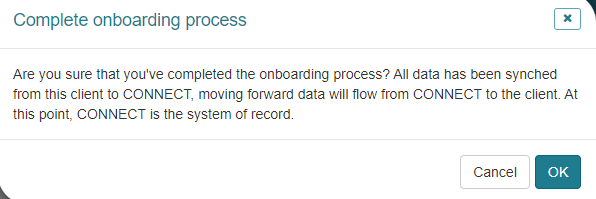
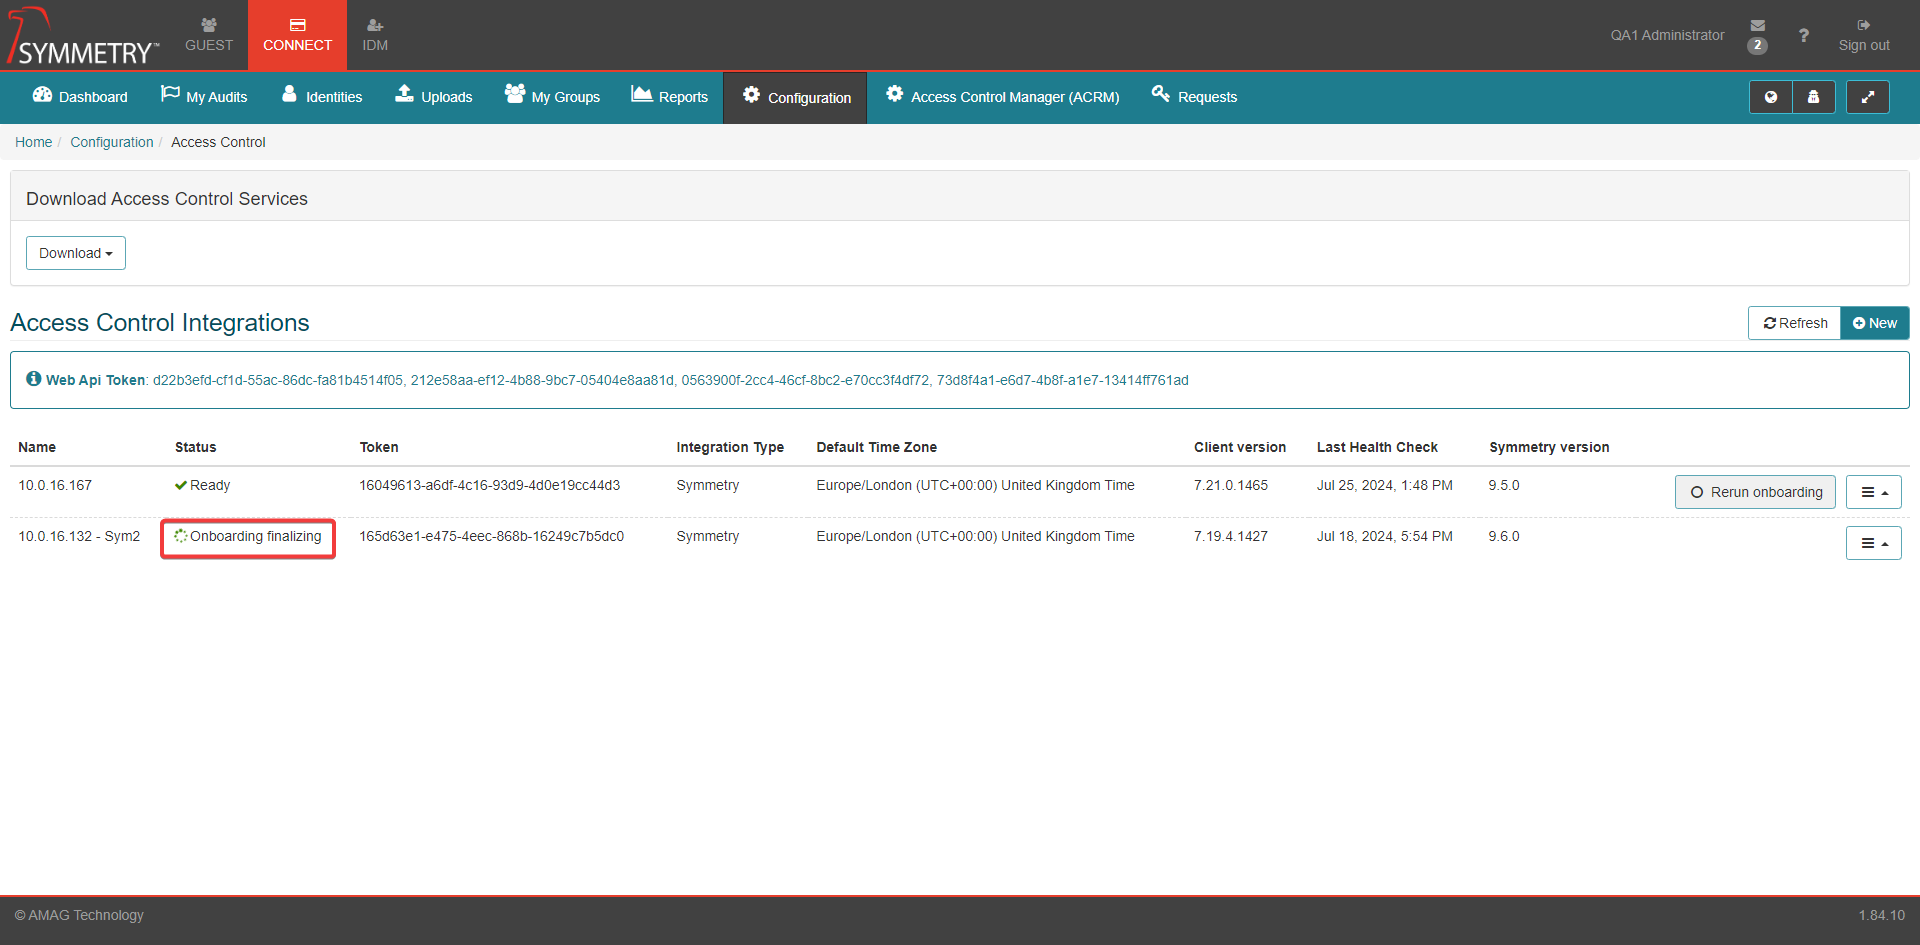
The status of the Access Control Integration will be displayed, Onboard finalizing will be displayed during the process. This will update to showing the status as Ready once the Rerun onboarding process have been completed.