Uploads
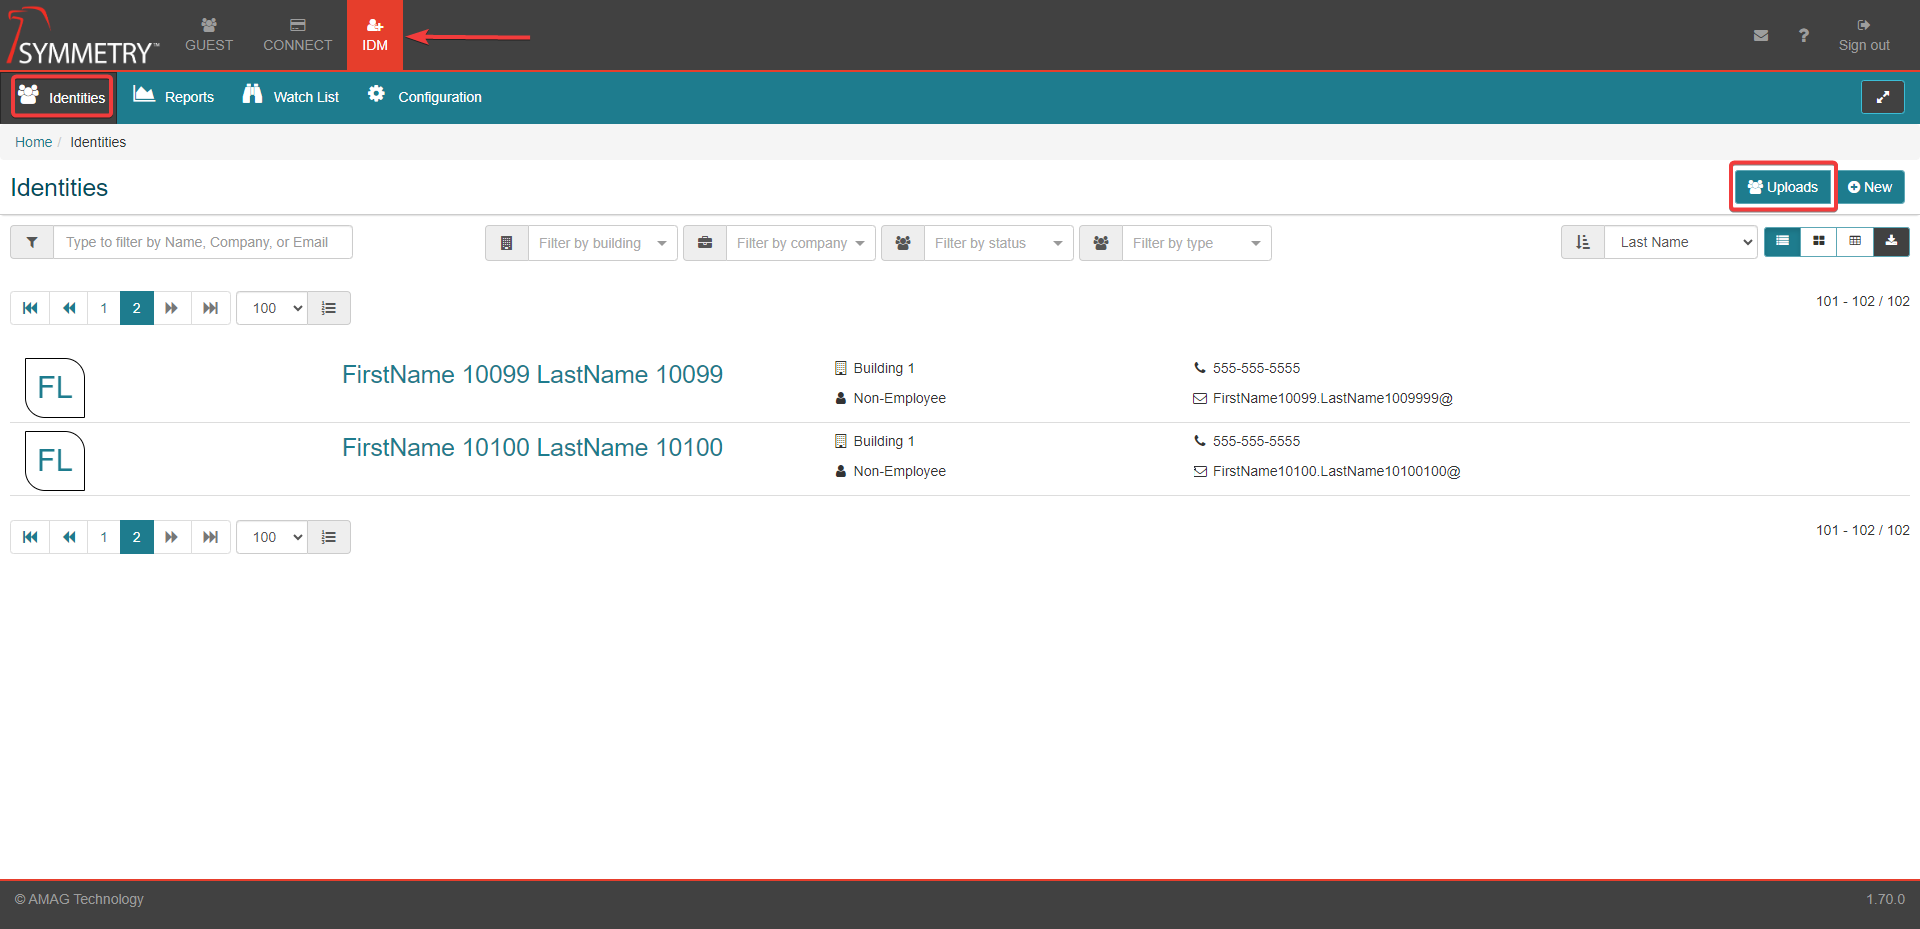
This section allows a user to upload a list of identities via a .CSV file. The process of utilizing the upload function is explained in the Adding Identities via Spreadsheet Upload section.
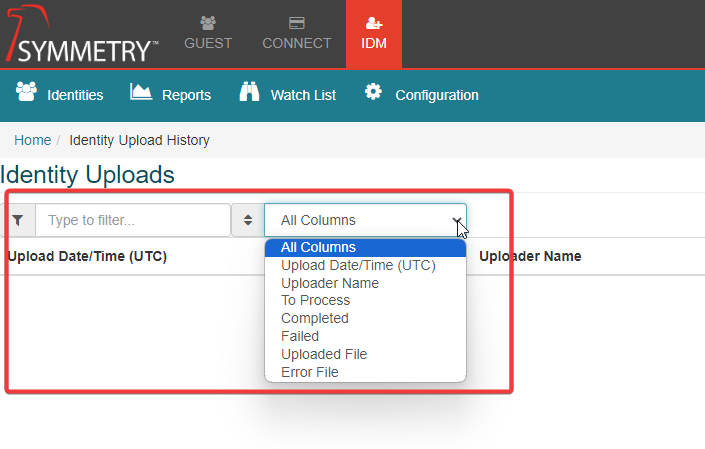
When the upload tab opens, the Identity Upload History tab is displayed showing:
Upload Date/Time value is in UTC (Universal Time Coordinated)
Uploader Name The name of the user that uploaded the file
To Process The number of records in the list
Completed The number of records uploaded
Failed The number of records that failed to upload
Uploaded File A link to the records that successfully uploaded
Error File A link to the records that failed to upload
The User has the ability to filter the list. To filter the Uploads list, the user selects a field in the Columns box and then enters a parameter in the filter box.
Users also have the ability to download the upload data. Click the download icon to allow the user to export the contents of the Uploads page to a .csv file.
Also displayed is Last Updated which show the date and time the table was last refreshed. This can be refreshed manually by clicking the Reload button.

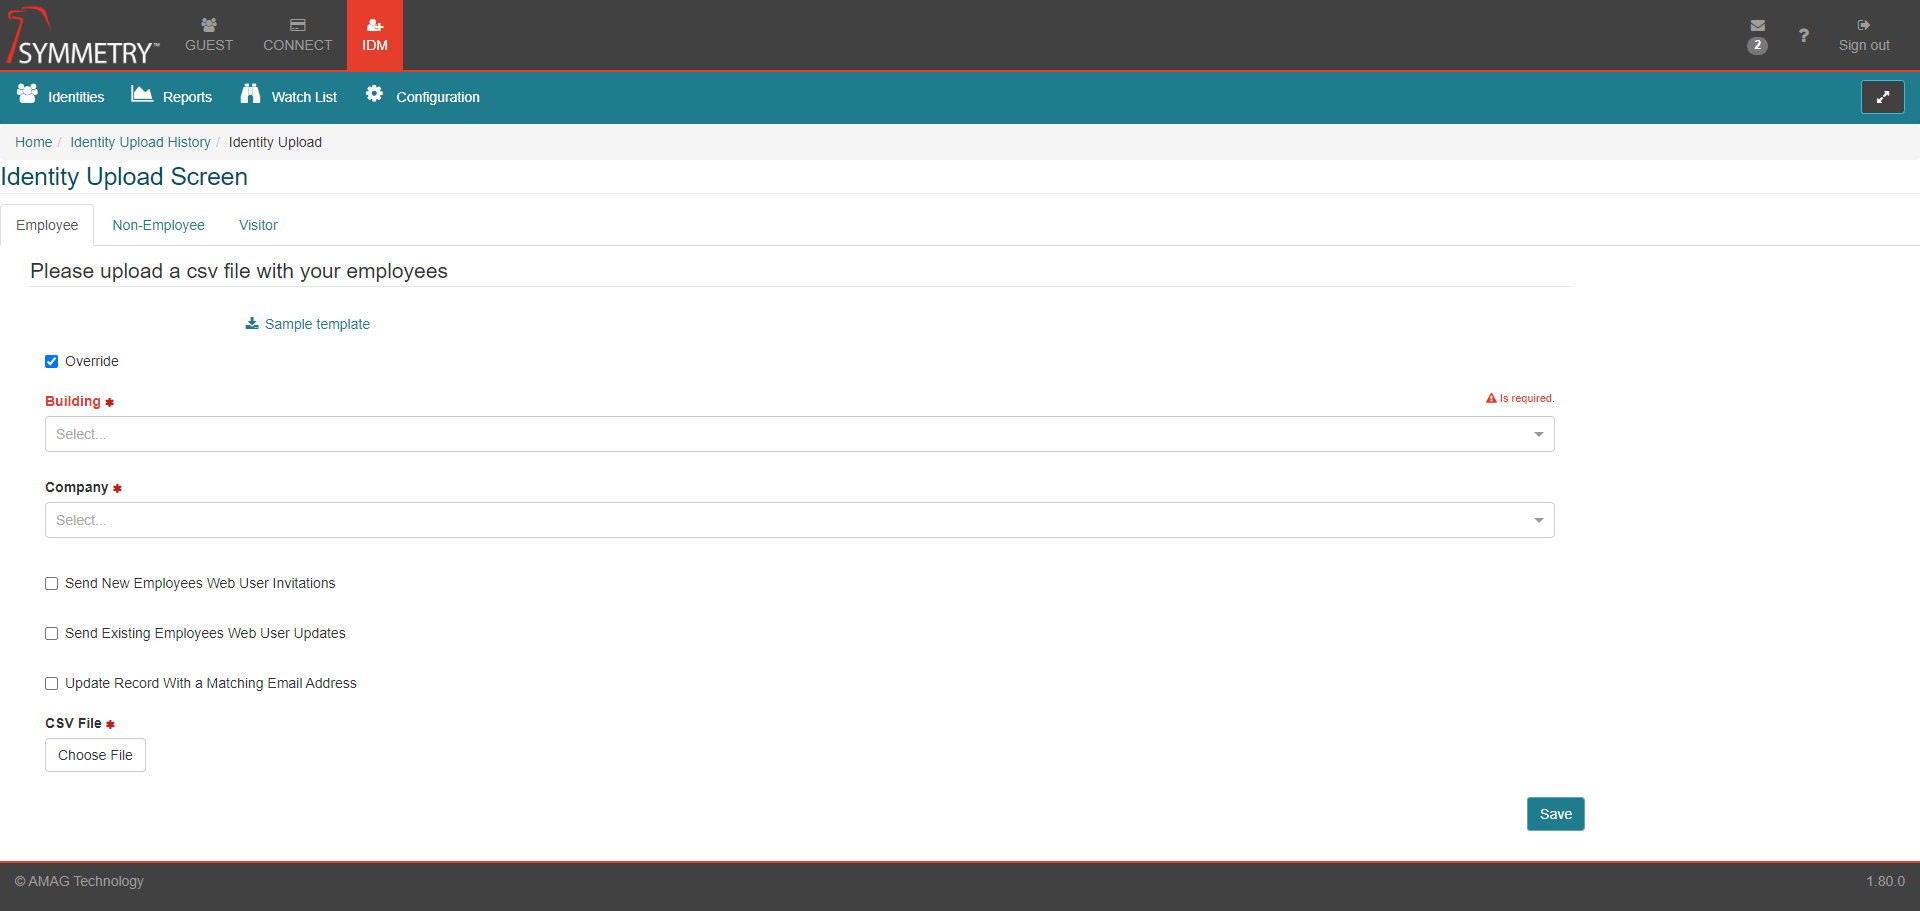
Identity Upload Screen
When a user clicks the New button on the identities screen they are brought to the Identity Upload Screen. Here the user will have the ability to choose a file to upload. The file will be uploaded when the Save button is clicked. Additional options available to the user are:
Override: By default the identities will be associated with the Building and Company associated with the user uploading the list. Selecting this will allow you to override these defaults.
Send New Identities Web User Invitations: When selected, new identities added via the file will be sent a email notification to setup the username and password.
Send Existing Identities Web User Updates: When selected, existing identities updated via the file will be sent an email notification to setup the username and password.
Update Record With a Matching Email Address: When selected, existing identities with a matching email address will be updated via the file.
CSV Fields
The CSV file must have the following fields in the following order:
First Name (Required) [FirstName]
Last Name (Required) [LastName]
Primary Email (Required) [PrimaryEmail]
Department (Optional) [Department]
idm.EmployeeCategory (Optional) [EmployeeCategory]
Employee Number (Required) [EmployeeNumber]
Expiration Date (Optional) (YYYY-MM-DD) [ExpirationDate]
Floor (Optional) [Floor]
Location (Optional) [Location]
Manager 1 (Optional) [Manager1]
Manager 2 (Optional) [Manager2]
Manager 3 (Optional) [Manager3]
Primary Phone (Optional) [PrimaryPhone]
Start Date (Optional) (YYYY-MM-DD) [StartDate]
Title (Optional) [Title]