Dashboard
The GUEST Dashboard page is only viewable by users with GUEST Admin and / or Reception roles. It provides a variety of information including visitor traffic metrics, information of My upcoming visits, favorite visitors and information related to configuration of the dashboard. This section describes all of the information provided in the various sub-sections of the dashboard.
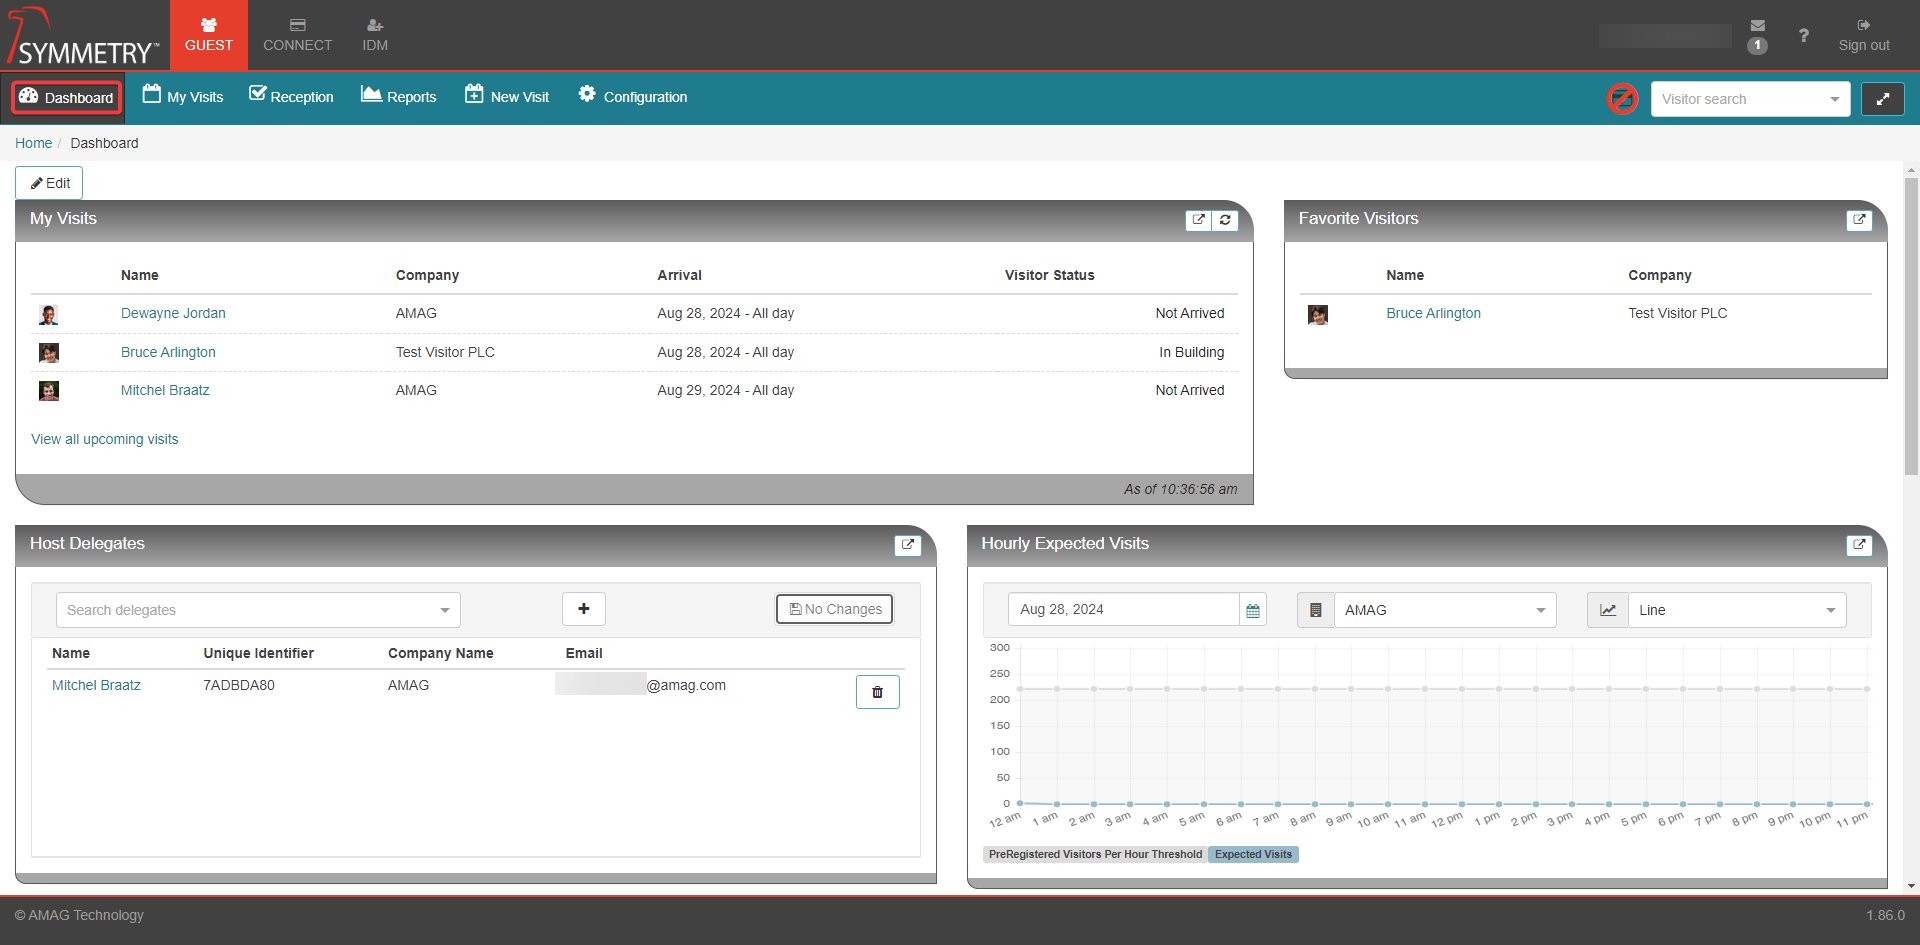
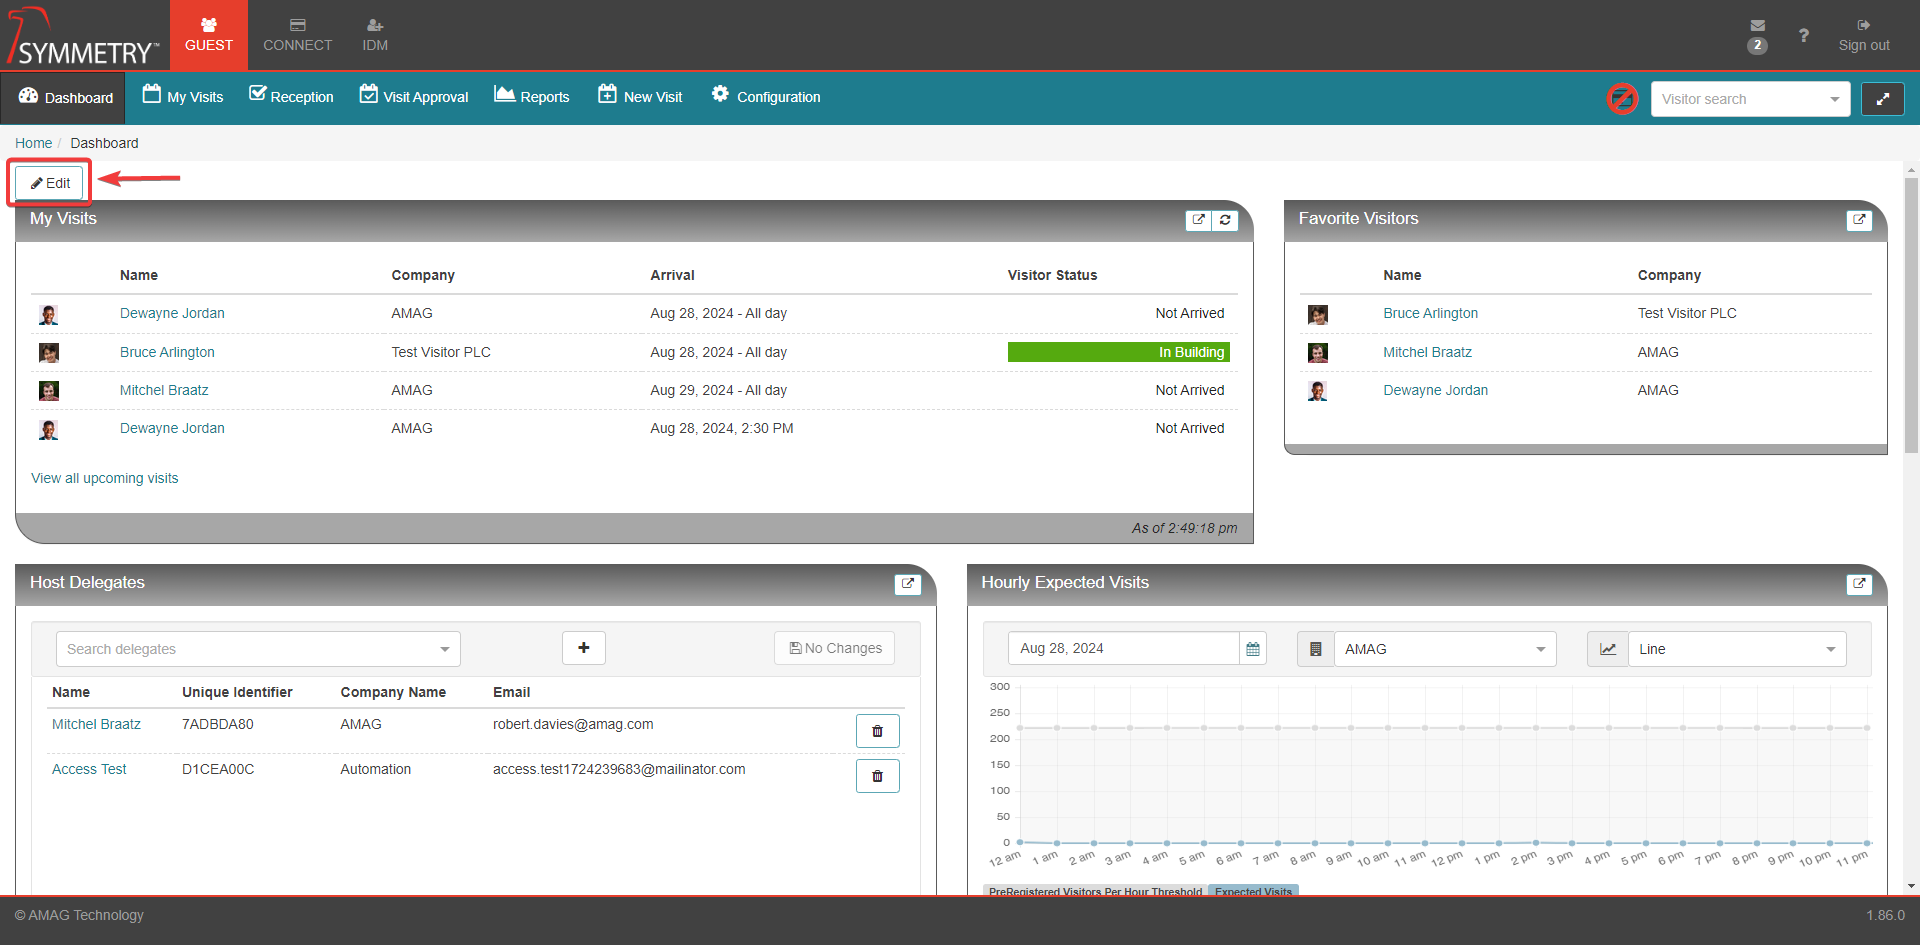
The image below is an overview of the GUEST dashboard.
Note
This Dashboard view will only be seen if GUEST Admin and/or Receptionist is also assigned the Role of Host or Host Delegate.
My Visits
This widget is only available to GUEST Admins and / or Reception users who also hold the role of Host and / or Host Delegate. It shows any current/upcoming visits for the current user.
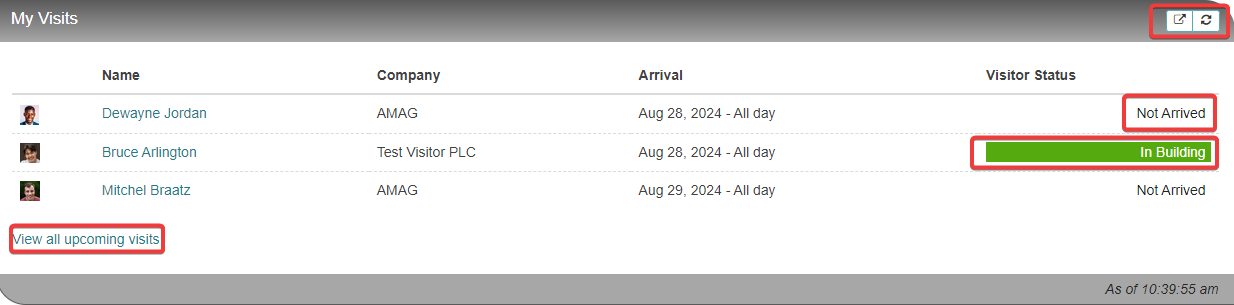
The user can quickly view the name of the visitor, the company associated with the visitor, expected arrival time and the visitor status. A profile/ID picture will also be displayed (if provided when the visit was created).
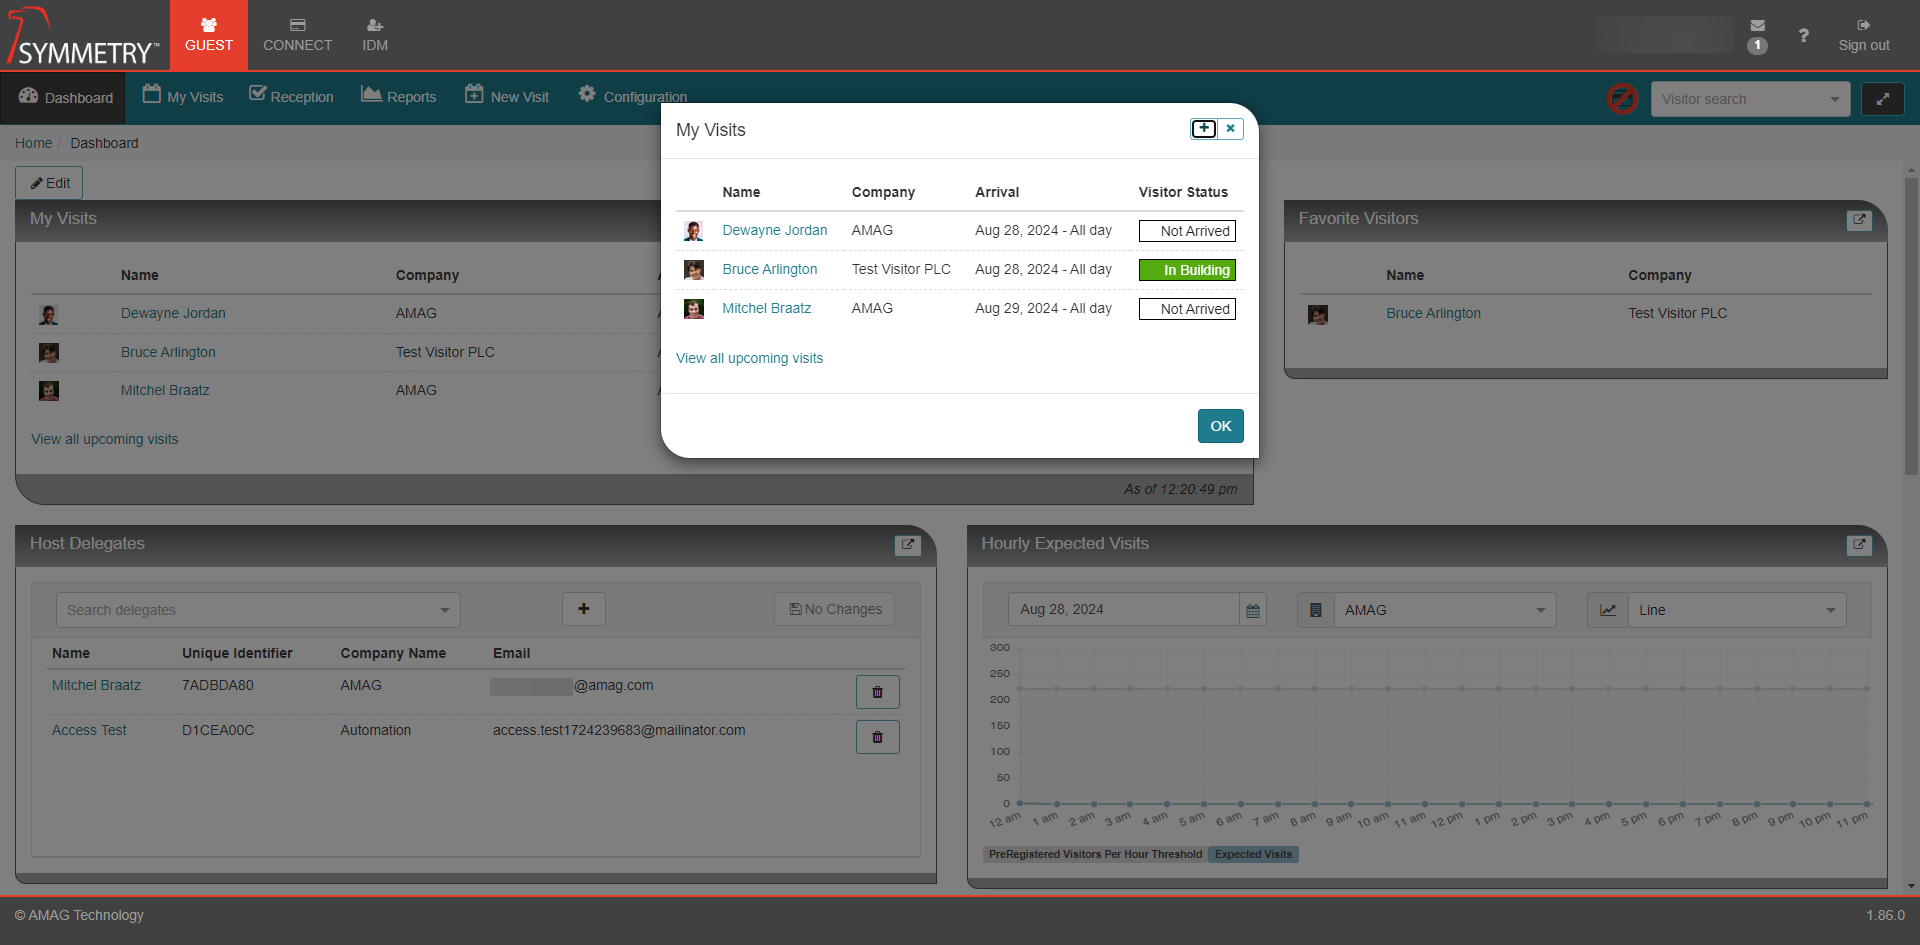
In the top right corner of the My Visits widget, there is a refresh button, if clicked, it refreshes the My Visits widget. There is also a pop up icon, which if clicked, allows the My Visits information to be displayed as a pop up box. This box can then be enlarged or minimized by clicking the addition/subtraction (+/-) button. The pop up box is closed by clicking the exit button (X).
Note
The screenshot below is for a GUEST Admin user who has also been assigned the roles of Reception user and Host / Host Delegate.
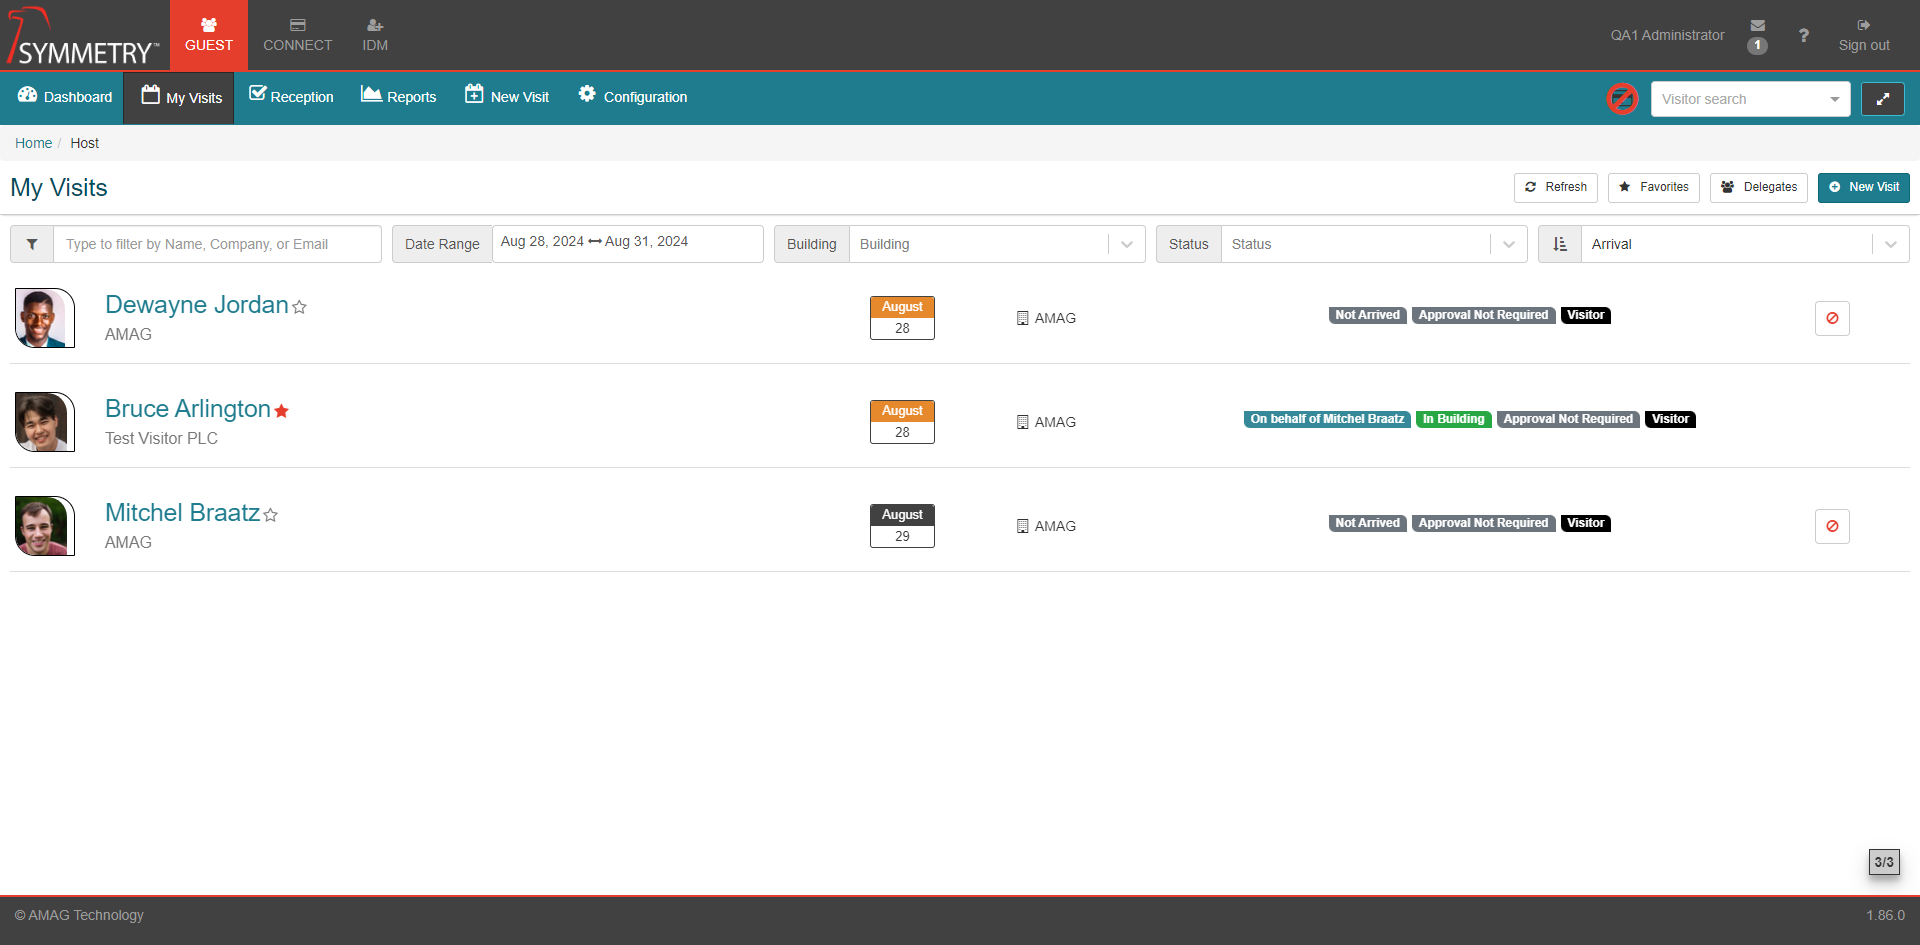
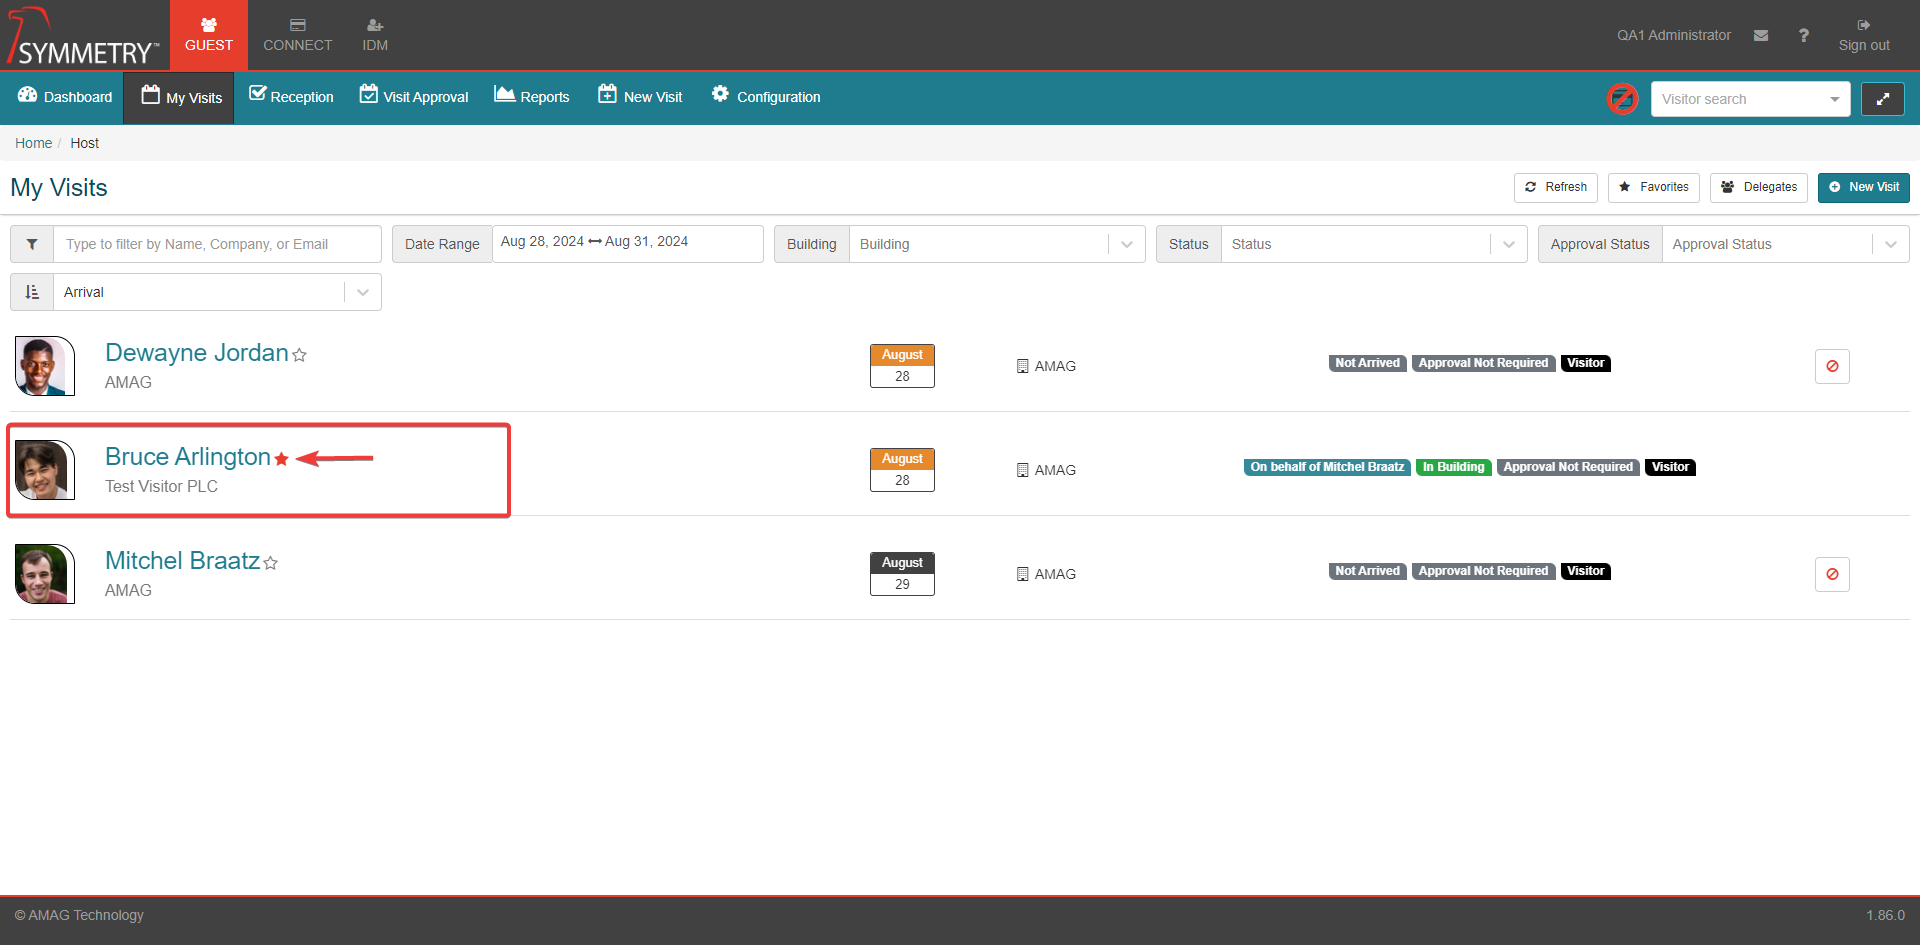
Clicking the View all upcoming visits button, extends the My Visits widget and automatically opens up the My Visits tab (refer to the My Visits section of this guide for further details). The user can now filter the visits by using the type to filter search function to filter by Name, Company or Email. The user can search by Date Range, selecting the date range from the calendar. Search by Building by selecting the building from the drop down box. Search by Status by selecting the status of the visit (awaiting checkout, checked out, in building, not arrived or on premise) from the drop down box. Search by Approval Status by selecting the status of the approval (approval not required approved, denied, expired or pending approval) from the drop down box. The My Visits can also be sorted (ascending or descending order) by First Name, Last Name, Company, Arrival, Departure or Visitor Status.
The user can quickly select an identity as a favorite by clicking the star to the right of the identity. This will set the favorite status, confirmed by the star icon now displaying as a red star.
The user can Refresh this page by clicking the Refresh button. View all Favorites by clicking the Favorites button. This will then open up the favorites section in a larger screen. From this screen the user can clearly see the identities that have the favorite selected status. Clicking the Delete icon will remove the status from the identities if desired.
Note
The screenshot below is for a GUEST Admin user who has also been assigned the roles of Reception user and Host / Host Delegate.
Favorite Visitors:
This widget is only available to GUEST Admins and / or Reception users who also hold the role of Host and / or Host Delegate. It allows the user to specify favorite visitors that can easily be registered at any time.
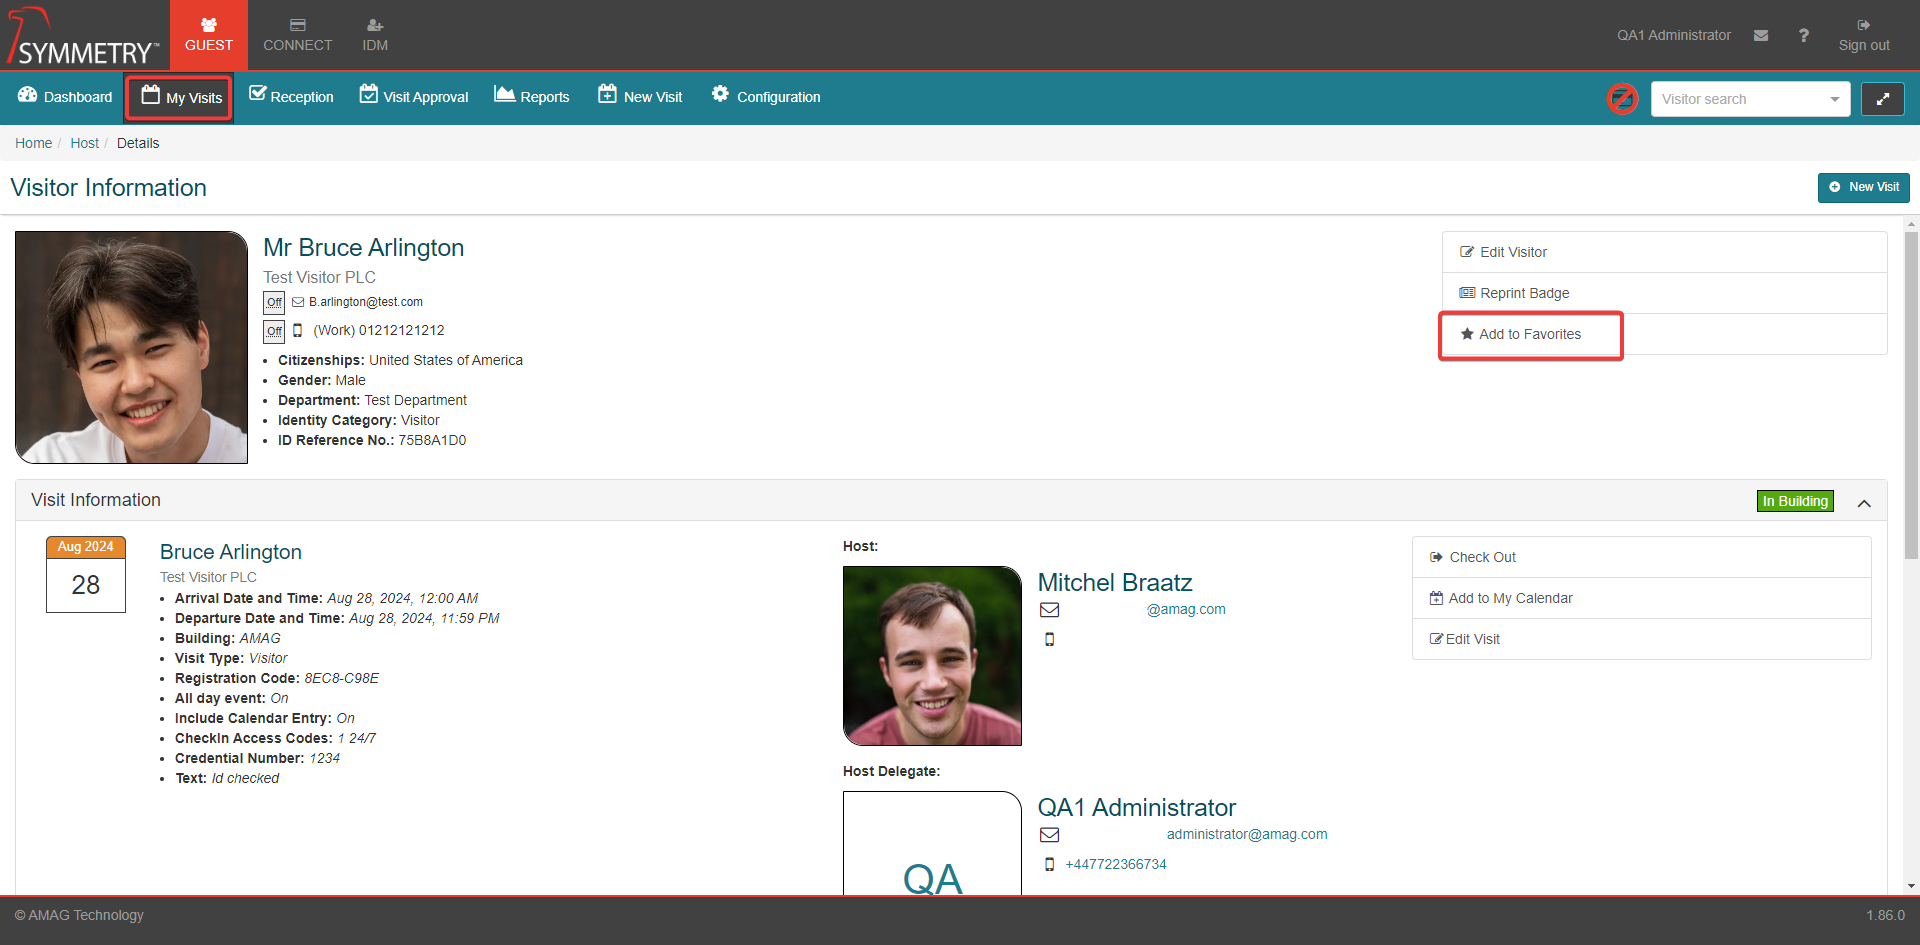
To mark a visitor as Favorite, select the visitor (either from the My Visits sub-section on the dashboard, or from the My Visits tab) and click the Add to Favorites button. Alternatively, the user can quickly select an identity as a favorite by clicking the star to the right of the identity. This will select the favorite status, confirmed by the star icon now displaying as a colored star.
Note
The color of the star is based on the theme configured for the system. This is the Third Color in Theme Settings in IDM > Configuration.
Once the visitor is on the favorites list, they appear in the Favorite Visitors sub-section on the dashboard, and can be registered for a new visit with a single click.
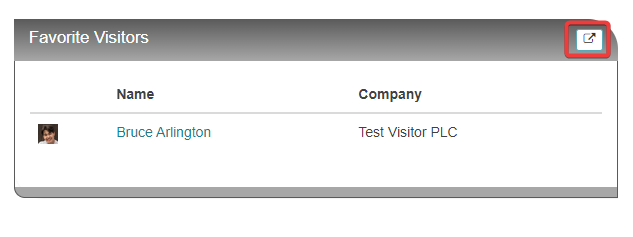
In the top right corner of the Favorite Visitors widget, there is also a pop up icon, which if clicked, allows the information to be displayed as a pop up box. This box can then be enlarged or minimized by clicking the addition/subtraction (+/-) button. The pop up box is closed by clicking the exit button (X).
Selecting the identity from this widget will automatically open the New Visit tab. Refer to the New Visit section of this guide for further information.
Host Delegates:
This widget is only available to GUEST Admins and / or Reception users who also hold the role of Host and / or Host Delegate.
The user is able to specify their delegates within the Host Delegates sub-section of the dashboard. Delegates are active users with the Host Delegate user role assigned to them in the system. If a user is selected as my delegate, that user is able to register visits on my behalf.
To add a delegate use the type to search function to search for the identity that is to be selected as the host delegate. Then Click the Addition button (+) to add the identity as the host delegate. Click the Save Changes button to confirm the action. Please note that the delegate must have the Host Delegate user role assigned to them.
Note
Only users who have already been assigned the role of Host Delegate will appear in the dropdown list.

Once the delegate has been selected, they will be able to register visits on behalf of the original user.
In the top right corner of the Host Delegates widget, there is also a pop up icon, which if clicked, allows the information to be displayed as a pop up box. This box can then be enlarged or minimized by clicking the addition/subtraction (+/-) button. The pop up box is closed by clicking the exit button (X).
Hourly Expected Visits:
This widget is available to Reception and Admin users only, as it shows upcoming (registered) visitor traffic by hour.
The Hourly Expected Visits sub-section shows the expected visitor traffic for a specific Building for each hour of a specific day. The user is able to select a specific date (today’s date is the default start date) and Building in order to review the expected traffic by hour. The type of graph can be changed too (line, bar or radar options available). Graphic shown below is the line graph option.
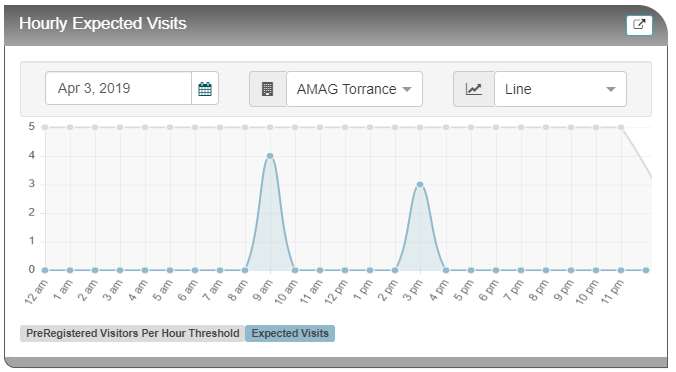
In the top right corner of the Hourly Expected Visits widget, there is also a pop up icon, which if clicked, allows the information to be displayed as a pop up box. This box can then be enlarged or minimized by clicking the addition/subtraction (+/-) button. The pop up box is closed by clicking the exit button (X).
Daily Expected Visits:
This widget is available to Reception and Admin users only, as it shows upcoming (registered) visitor traffic by day.
The Daily Expected Visits sub-section shows the expected visitor traffic for a specific Building for seven consecutive days (today’s date is the default start date). The user is able to select a specific start date and Building in order to review the expected upcoming visitor traffic. The type of graph can be changed too (line, bar or radar options available). Graphic shown below is the line graph option.
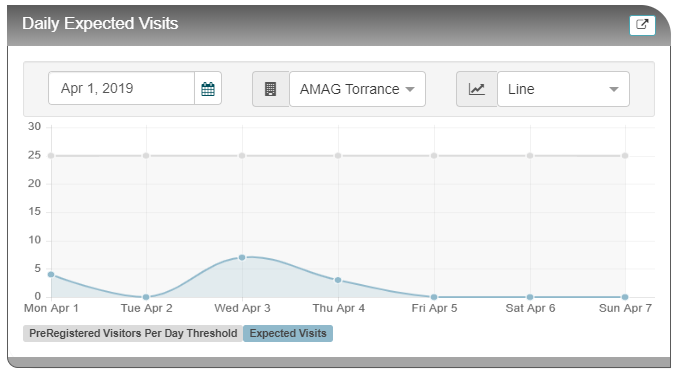
In the top right corner of the Daily Expected Visits widget, there is also a pop up icon, which if clicked, allows the information to be displayed as a pop up box. This box can then be enlarged or minimized by clicking the addition/subtraction (+/-) button. The pop up box is closed by clicking the exit button (X).
Information:
The Information section provides technical information related to the GUEST calendar integration, setting up an ID Scanner and/or Printer, and provides the URL’s and Generate Token buttons for the Guard Assist Portal and Self-Registration kiosk (if enabled).
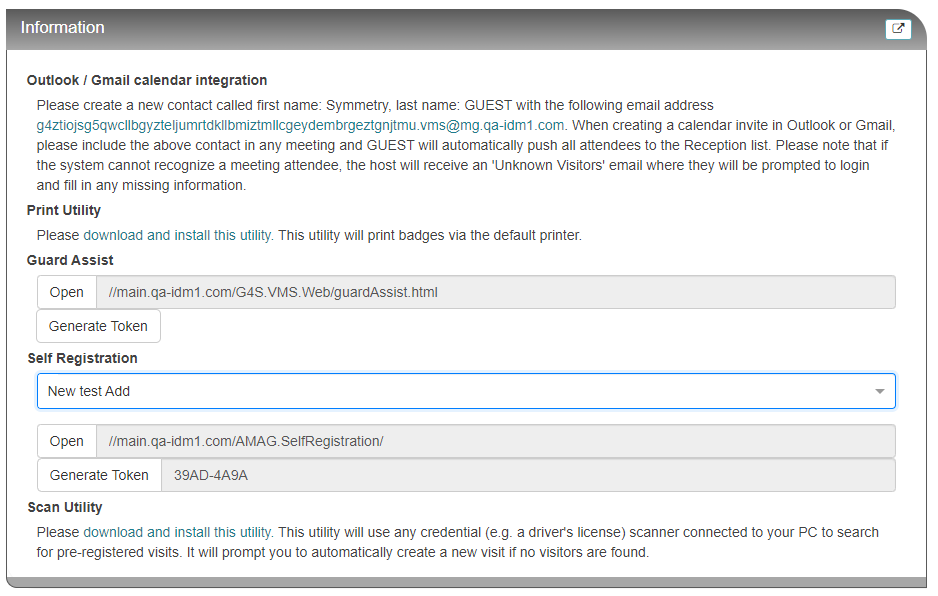
GUEST Calendar Integration:
GUEST allows a user to register visitors directly from a calendar application, such as Google Mail (Gmail), or Outlook. For more information on how the calendar integration works, refer to the Calendar Integration within the Integrations section of this guide for further information.
Print Utility Configuration:
Note
Installation and configuration of the Print Utility can be found in the Print Utility page of the Utilities section.
The GUEST Print Utility allows for visitor badges to be printed automatically via the default printer connected to the local workstation. GUEST supports badge printing via the standard print functionality within the browser, or the utility can be used to automate printing to the default printer.
The Print Utility also has a Tablet Mode function, whereby mobile tablets (e.g. for use with GUEST Kiosk) can print using the badge printer synced into a remote workstation, via Tablet Mode. This allows a GUEST kiosk to print badges using the badge printer at the reception desk (for example).
A Reception User is able to download the Print Utility via the link on the dashboard.

Guard Assist Portal and Self Registration Kiosk URL’s:
The web address (URL) for the Guard Assist Portal and/or Self-Registration Kiosk Portal can be found on the dashboard along with Generate Token buttons (provided Guard Assist and Self Registration have been set to ON in GUEST > Configuration).
For details regarding the setup of Guard Assist or Self-Registration , please refer to the relevant sections in this guide.
Scan Utility Configuration:
Note
Installation and configuration of the ID Scan Utility found on the Scan Utility page in Utilities section.
The GUEST Scan Utility is installed onto local workstations where ID scanning (e.g. Driver’s licenses) takes place. The utility is designed to interact with the local ID Scanner in order to retrieve the visitor’s information from the ID.

Saved Reports:
Note
This widget is only available to GUEST Admins (and to Reception users if they have also been granted the role of GUEST Report Viewer).
Note
For more information regarding Reports, please review the Reports section of this guide.
This sub-section of the dashboard displays reports that have been saved for easy access in the future. Any report in GUEST can be configured and saved for future use. Once a report has been saved by a user, it is available to that user on the Saved Reports widget/sub-section of the Dashboard.
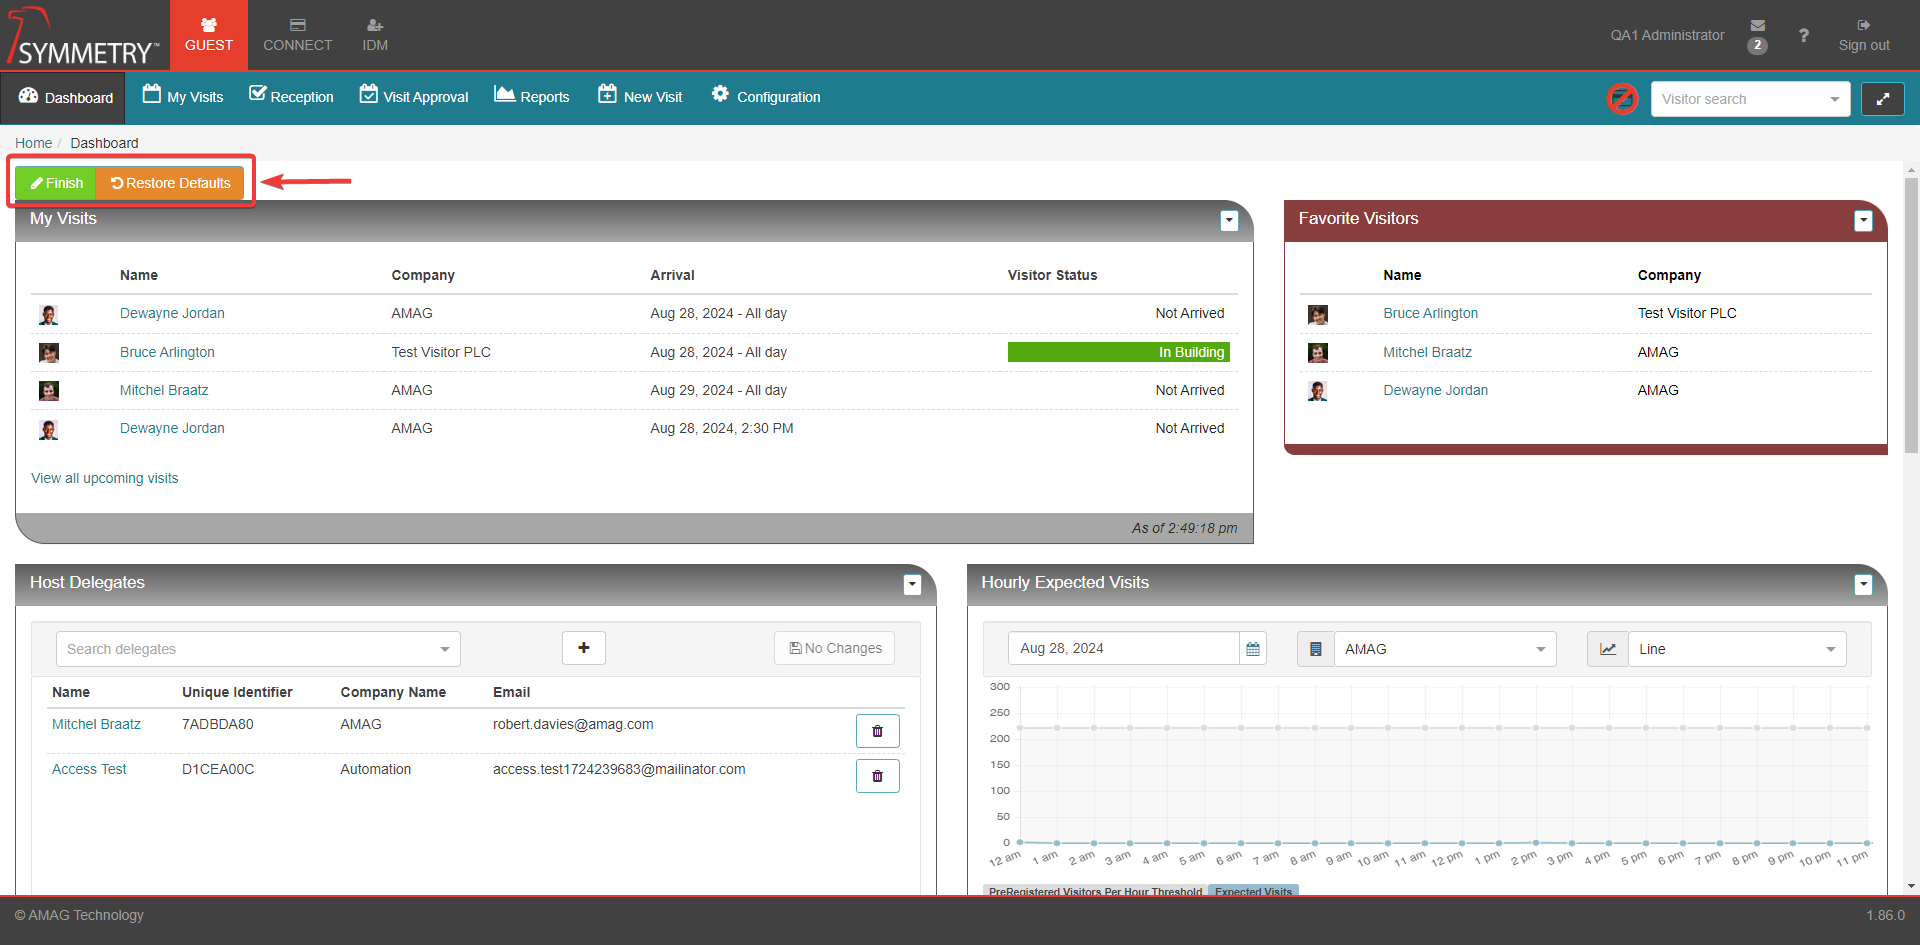
Dashboard Layout:
It is possible for an administrator user to modify the default layout of the GUEST Dashboard by clicking the Edit button at the top of the page.
Note
The screenshot below is for a GUEST Admin user who has also been assigned the roles of Reception user and Host / Host Delegate.
Clicking the Edit button allows the user to move the sub-sections of the dashboard into different locations as required. The user can drag and drop the sub-section, or click the menu icon and select Move Left, or Move Right.

As can be seen in the image above, each sub-section can be removed if required. By clicking on the Remove Widget button. the widget will then be removed from the dashboard. the widget can be reinstated by clicking the Restore Defaults button.
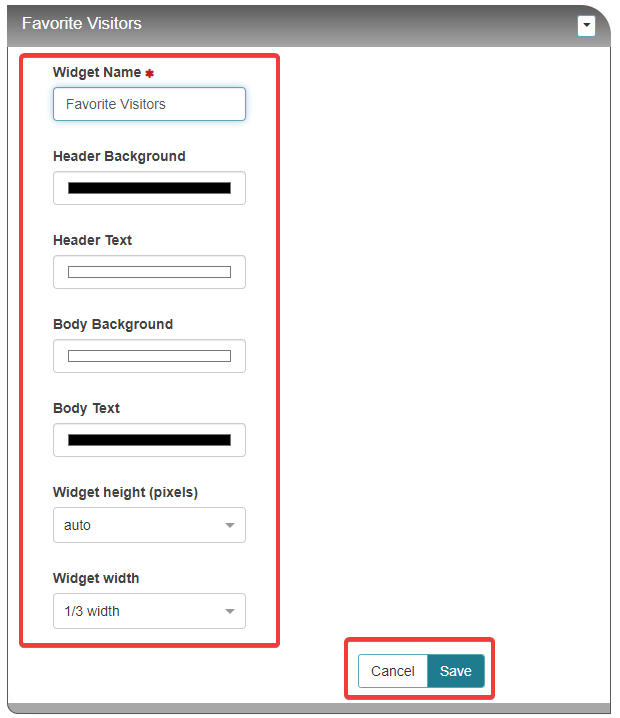
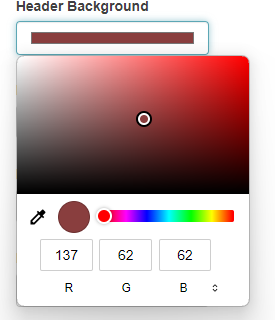
Clicking the Settings button from the menu above allows the user to change the name, general color scheme (color can be selected from the pallet, via the color selecting tool or by using the RGB code), height (in pixels) and width of the widget. These changes can be saved by clicking the Save button or cancelled by clicking the Cancel button.
Click Finish to confirm all changes are complete and accepted, or click Restore Defaults to roll-back any changes that were made.