Settings
Note
Required fields are indicated with a red Asterisk.
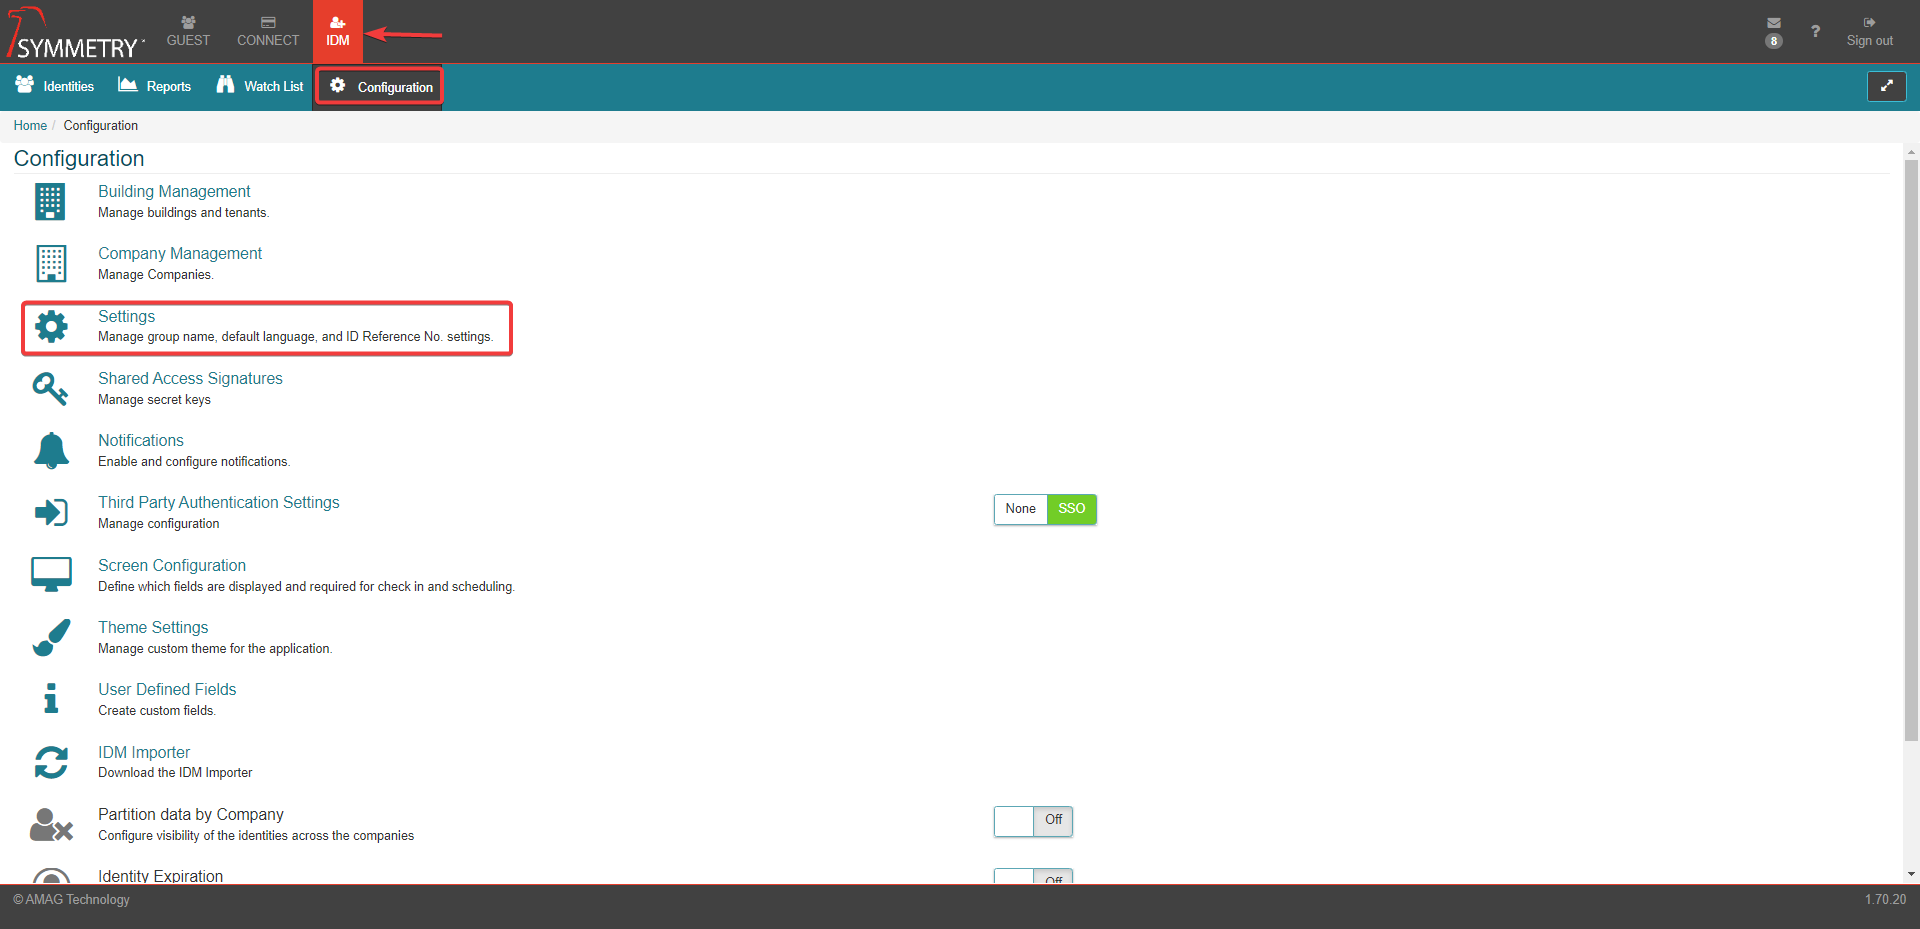
The IDM configuration settings tab, allows the user to make generic system changes to the IDM settings within the following areas:
Group Settings
ID Reference No. Settings
Other settings
Managers
Authentication Policy
Any changes made to the settings fields will only be confirmed if the Save button is pressed.
Group Settings:
Group Settings is a section where miscellaneous configuration options for the account are available, These include:
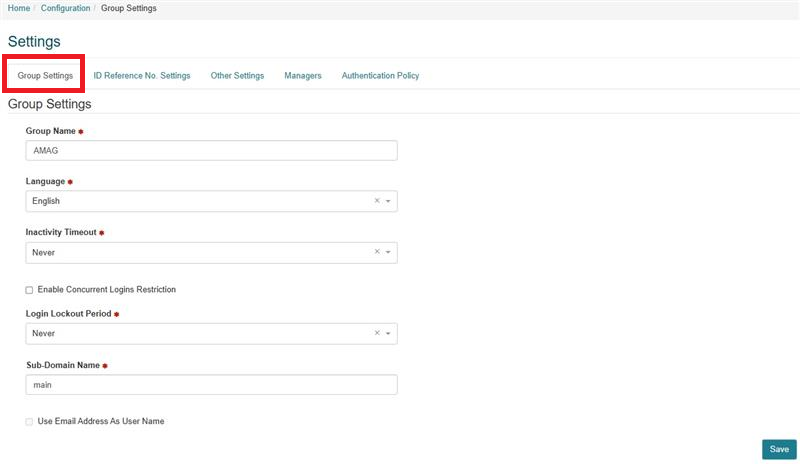
Group Name: This is the account name initially entered by AMAG Technology when the group/account was created. This field should not be changed.
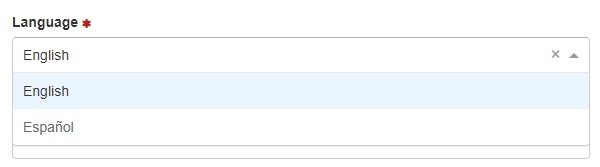
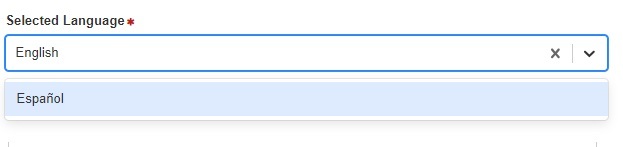
Default Language: Default language for the system, either 'English' or 'Español'. Other languages can be added if required by contacting your local support agent.
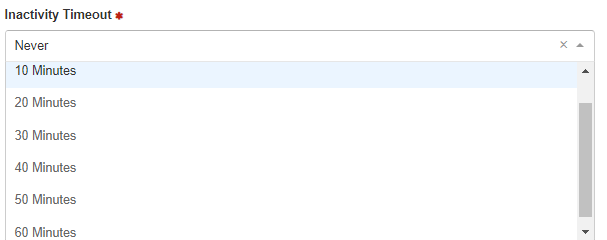
Inactivity Timeout: A user is logged out after "x" minutes of inactivity. This setting can be set to none if not required.
Enable Concurrent Logins Restriction: When this is un-selected, the same user is able to log in to the application more than once without any restrictions.
When this is selected, the user will be prevented from logging in more than once with the message: 'There was another login attempt. Please wait before trying again.'
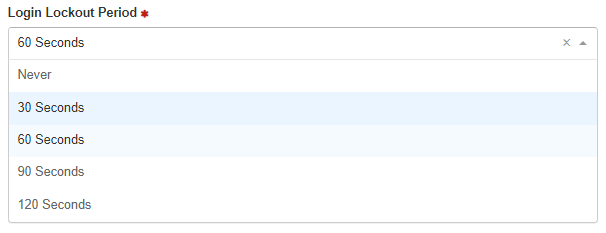
Login Lockout Period: When Enable Concurrent Logins Restriction box is selected, this is the period of time a user has to wait before they can attempt to log in concurrently..
Sub-Domain Name: The sub-domain is the customer-specific component of the web address (or URL) for the system. The default URL is: https://registration.symmetry.net/ In this example “registration” is the default sub-domain. Each customer is required to enter their own unique sub-domain. The example in the screen below is training”. In this example the URL for the system would be: https://training.symmetry.net/
Note
If a user tries to log into the application via the old URL, they will be automatically directed to the new URL with the new sub-domain.
Use Email Address As User Name: When checked an identity will be able to use their email address as their user name. All primary email addresses must be unique for this setting to be able to be selected.
Note
Selecting (ticking) Use Email Address As User Name from a prior unselected (unticked) status will result in all existing user names to be overwritten. The user will receive a warning message prior to clicking the save button to highlight the implications of the status change.
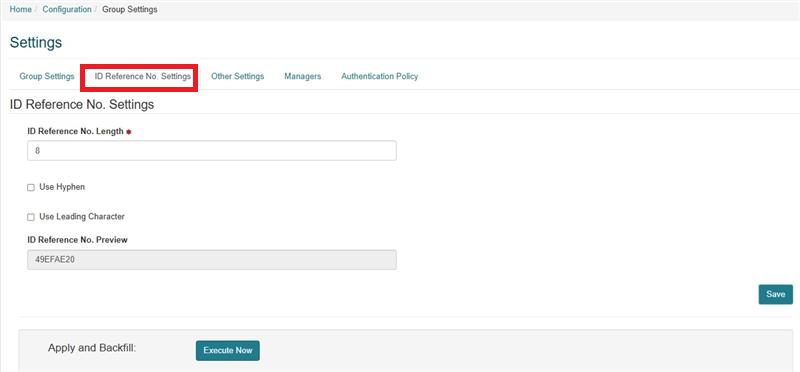
ID Reference No. Settings:
ID Reference No. Settings allows an administrator to configure a unique ID Reference No. which will be applied automatically to all Identities that are entered into the system. The ID Reference No. is separate from an employee number and allows a unique identifier to be applied to everyone, regardless of whether or not they are an employee. Some customers prefer to keep their employee number hidden from the general public, thus a generic “ID Reference No.” may be preferred.
Note
It is not recommended to change the settings below once the account is configured and a large number of existing Identities already have a reference number assigned to them. These settings should only be changed after careful consideration and analysis of the existing identity data set.
ID Reference No. Length: This is the length of the unique identifier. The default is 8 alphanumeric digits.
Use Hyphen: Selecting this check box adds a hyphen in the middle of the reference number.
Use Leading Character: Adds a customer-specific character to the front of the reference number.
ID Reference No. Preview: This is a preview of what the ID Reference No. will look like with the current configuration settings.
Apply and Backfill: Clicking Execute Now will apply the current settings to all EXISTING Identities in the system. Simply clicking the save button (without executing a backfill) will ensure that the settings only apply to NEW Identities that are added to the system in future.
Note
An ID Reference No. is assigned to all Identities regardless of whether they were added to the system manually, via spreadsheet upload, IDM Importer, or via the API.
Other Settings
Other Settings is a section where specific configuration options for the account are available, These include:
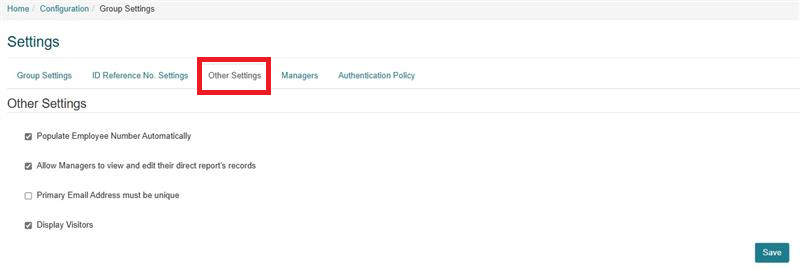
Populate Employee Number Automatically: If this check box is selected, the Employee Number can be left empty when creating a new Identity and it will be automatically populated by the system.
Allow Managers to view and edit their direct report’s records: If this check box is selected, Identity Managers will be able to view and edit the fields on the Identities page of the Identities they manage.
Primary Email Address must be unique: If this check box is selected then a error message will be shown if user tries to add an email address to a Identity that is already in use by another identity elsewhere in the system.
Display Visitors: This box needs to be checked in order for Identity Type = 'Visitor' to appear in the system. If unchecked, the Identities page will not display them, it will not be possible to create or upload them and Visitor will not appear in Screen Configuration.
Managers
This setting allows the user to configure the label names of the Manager fields in Add/Edit/View Identity. Default is Manager 1, Manager 2, Manager 3.
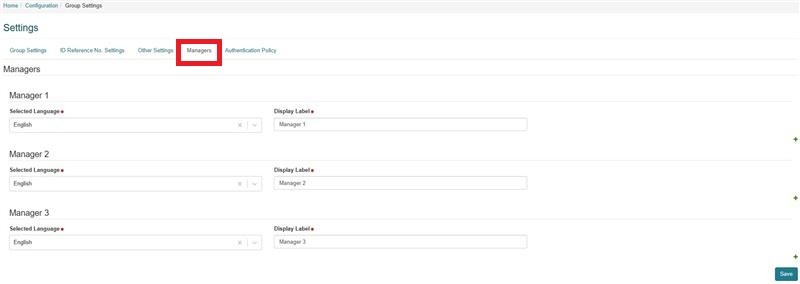
Selected language: Language for the display label, either 'English' or 'Español'. Other languages can be added if desired by speaking to your local support agent.
Display label: Content of the Display Label.
Note
Users can configure the Display Label in additional languages by selecting the Additional (+) button on the left side of the screen.

Authentication Policy
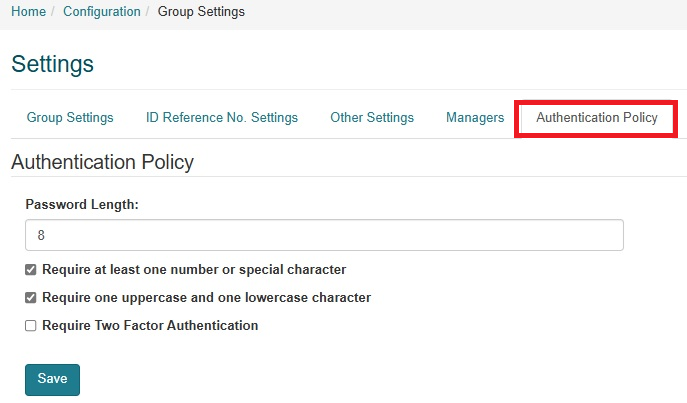
This section allows the user to configure the sign in and authentication policy settings.
Password length: The length of the password (default is 8). The length of the password can be edited by using the up and down arrows, or entering a number in the text box.
Require at least one number or special character: Updates the complexity of the password. Selecting this option will result in the password requiring at least one number or special character to be accepted.
Require one uppercase and one lowercase character: Updates the complexity of the password. Selecting this option will result in the password requiring at least one uppercase and one lower case character to be accepted.
Require Two Factor Authentication: Allows the user to enable or disable Multi Factor Authentication (MFA) (refer to the Multi Factor Authentication (MFA) section for further information). This functionality is only available if 2 Factor Authentication has been enabled in the Base Customer.