Badges
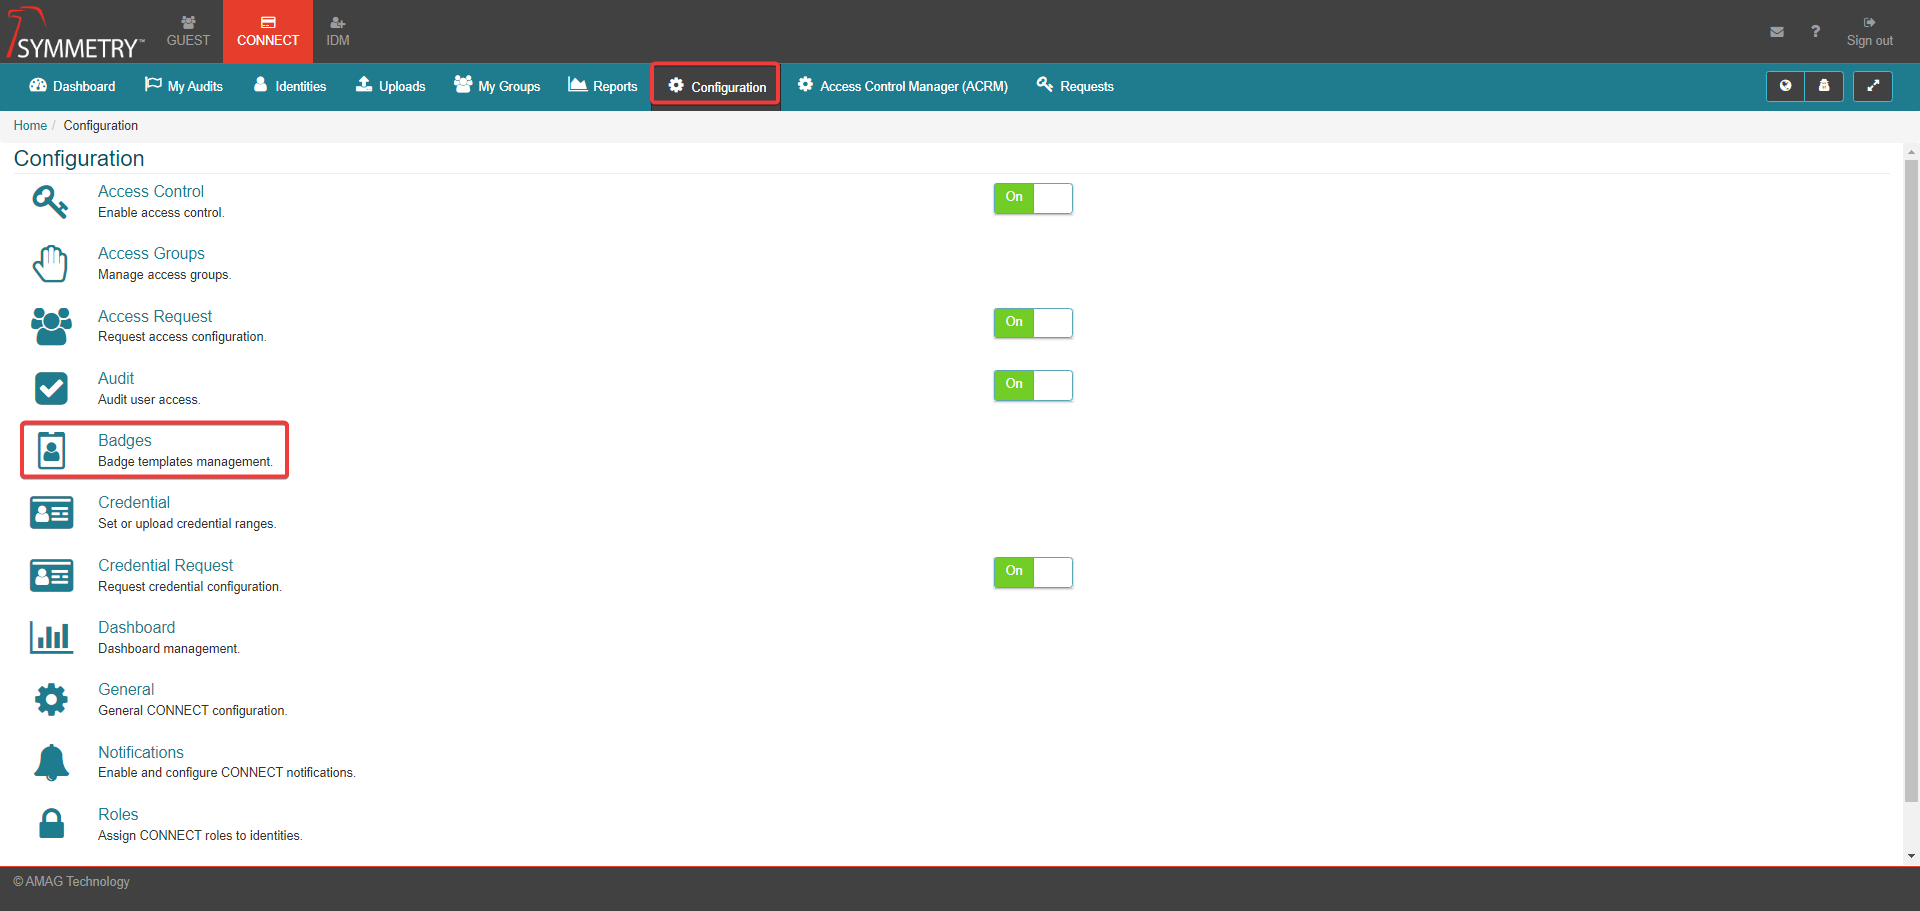
CONNECT > Configuration > Badges:
Badge Configuration provides all the tools needed to create a variety of different badge designs and allows the user to configure which Identities will receive which Badge Type.
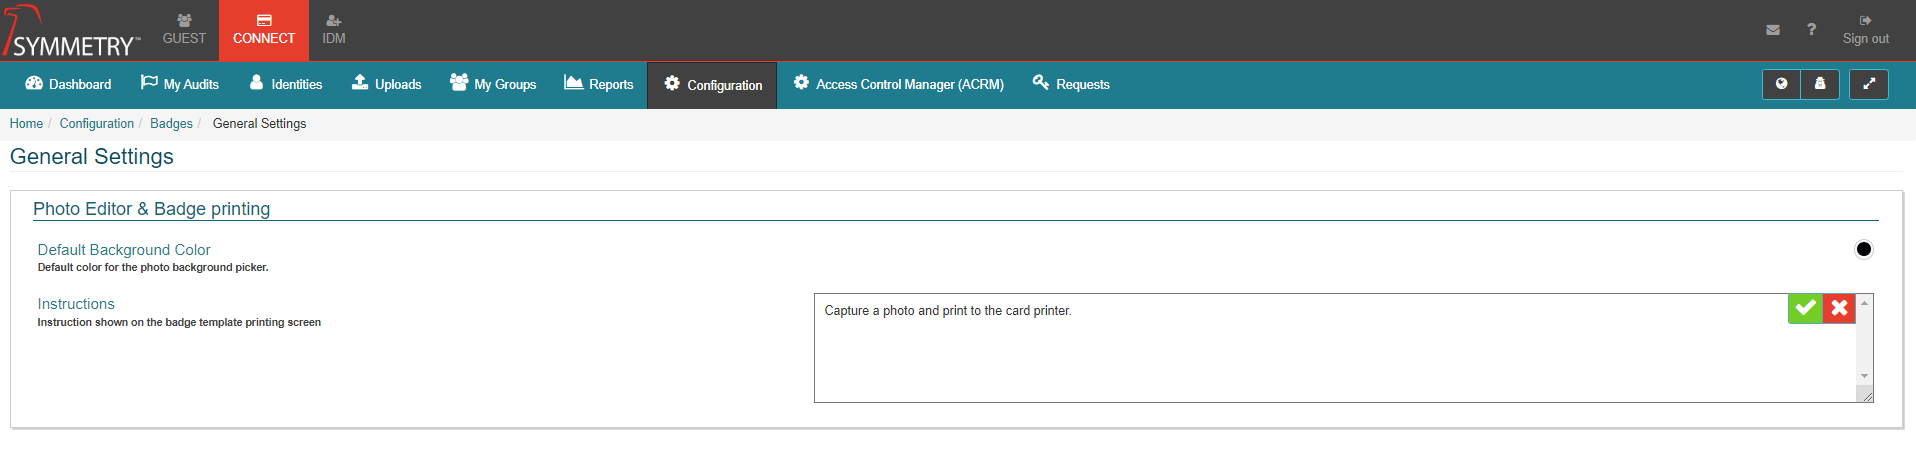
General Settings

This section allows for users to configure:
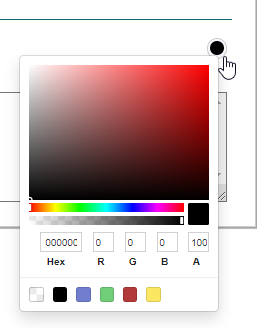
The Default Background Color for photo background picker.
The default background color can be adjusted by selecting the desired color on the palette. The HEX color code can be adjusted or the RGBA (red green blue alpha) color code can be selected.
Instructions for the badge administrators, to be shown on the badge template printing screen.
Templates
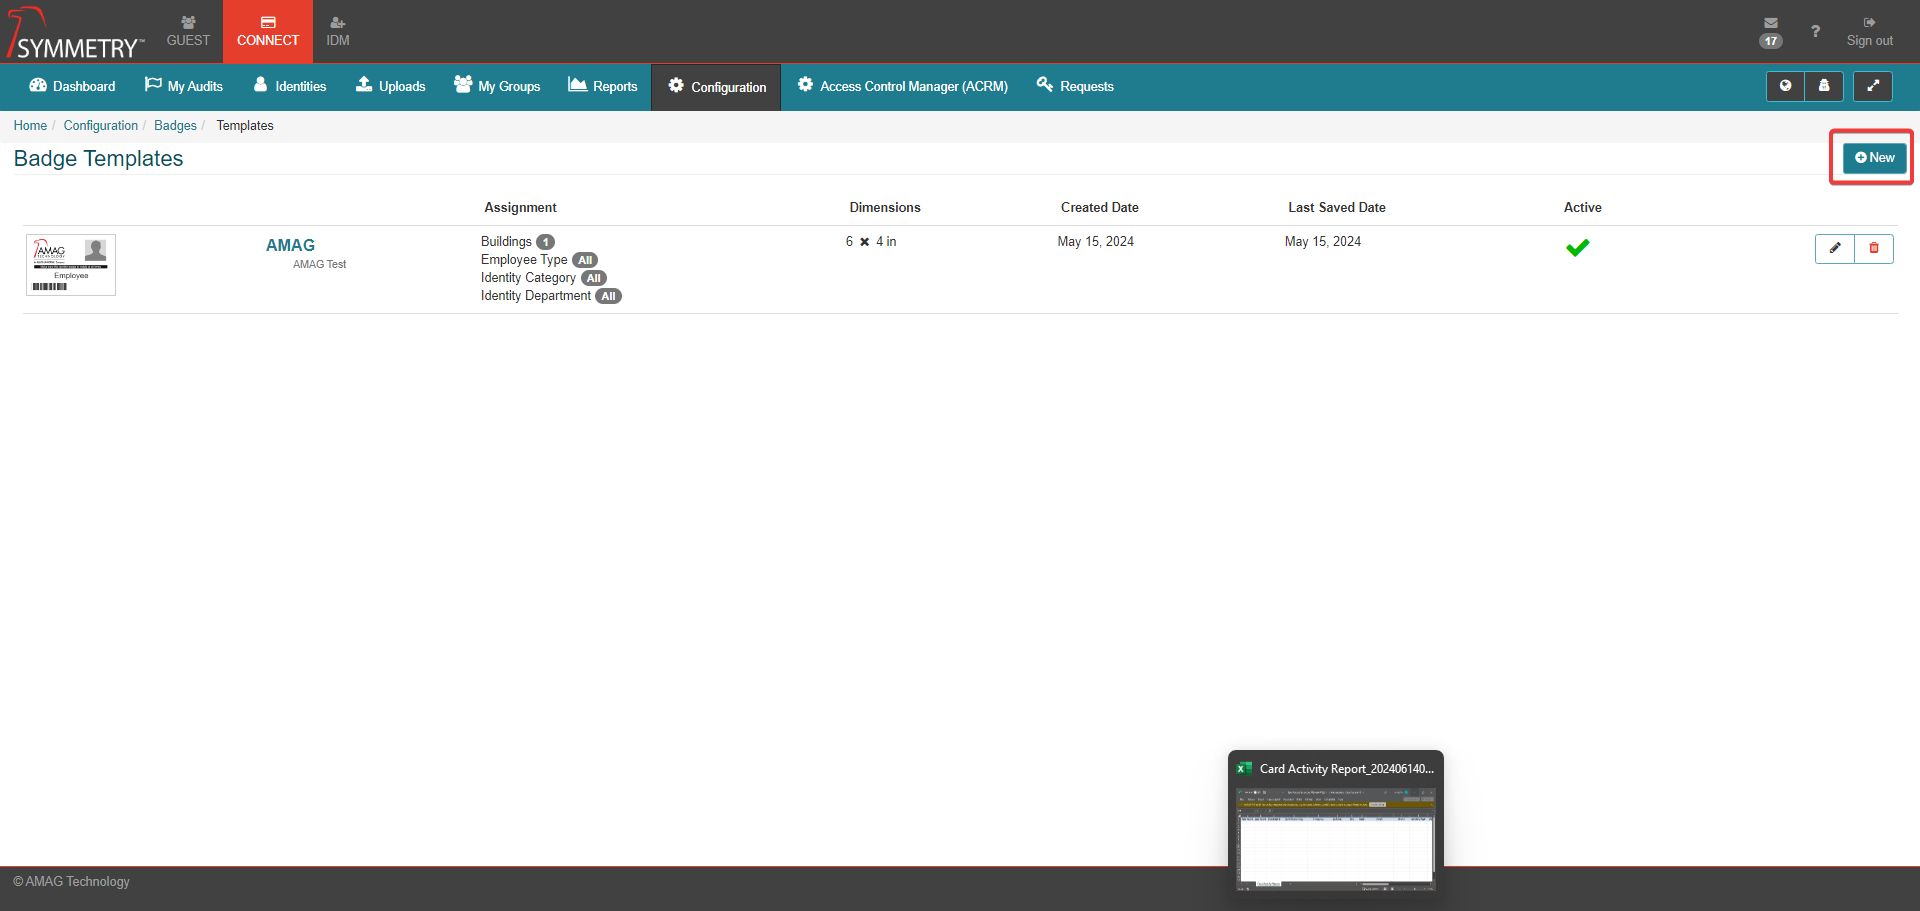
The Badge Templates page displays a list of existing Badge Templates along with a Preview, which Buildings / Employee Types / Identity Categories / Departments they are assigned to, their Dimensions, Date Created and Last Saved, and whether or not Template is Active.

To create a new template, click the New button.
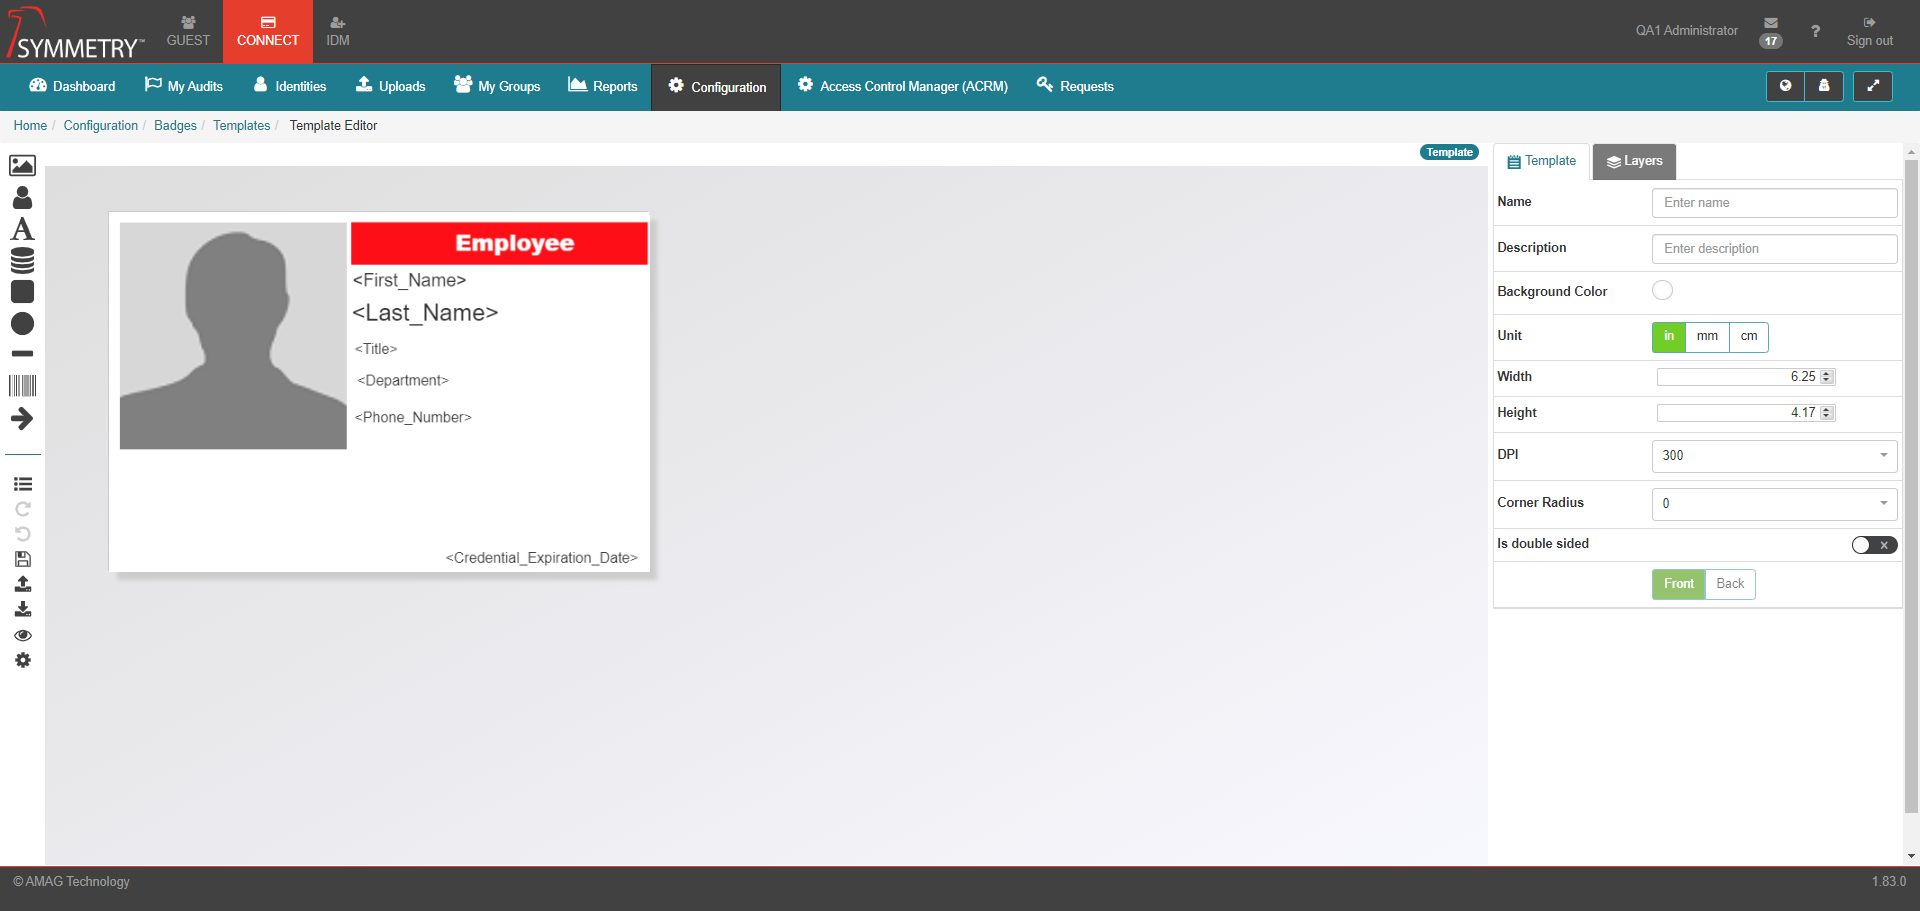
The graphic below shows the layout of an existing template in the system. Initial configuration includes:
Name: Enter a name for the template.
Description: Provide a description of the template.
Background Color: Add a background color if required.
Other types of configuration: Enter the unit of measurement, Width, Height, DPI (300 or 600) and desired Corner Radius for the template.
Is double sided: If enabled, allows the user to design a Back for the badge in addition to a Front.
Note
The standard size for a typical proximity card is 3.37 X 2.13 inches. Please ensure your badge template is sized correctly for the type of badge required.
The icons on the left side of the page can be clicked or dragged onto the badge template to create the desired badge design.
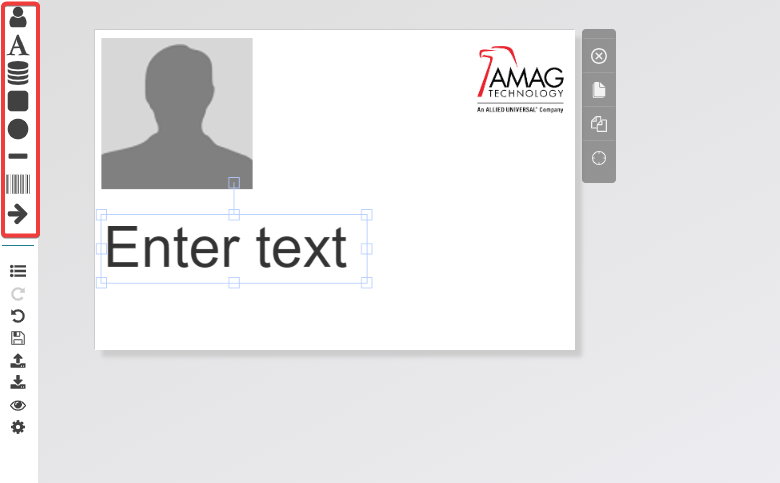
Icon
Description

Image from File: An image, such as a corporate logo, can be uploaded and placed on the badge template.

Identity Picture: The picture of the Identity from their record in CONNECT will be printed on the badge in the position where the picture icon is located.

Free Text: The user is able to enter specific text onto the badge template using the free text icon.

Database Field: The user can use multiple database fields to place Identity data onto the badge template. The database field can be used to add the Identity’s name, company, email address, and phone etc. onto the badge template.

Square: Places a configurable square shape onto the badge template.

Circle: Places a configurable circle shape onto the badge template.

Line: Places a configurable line shape onto the badge template.

Barcode: Places a barcode onto the badge template. Barcode 39 and QR Code (2D barcodes) are supported. The barcode is linked to a specific field from the database.

Arrow: Places a configurable arrow shape onto the badge template.
Once the badge design is complete the icons on the bottom-left of the screen provide additional options.
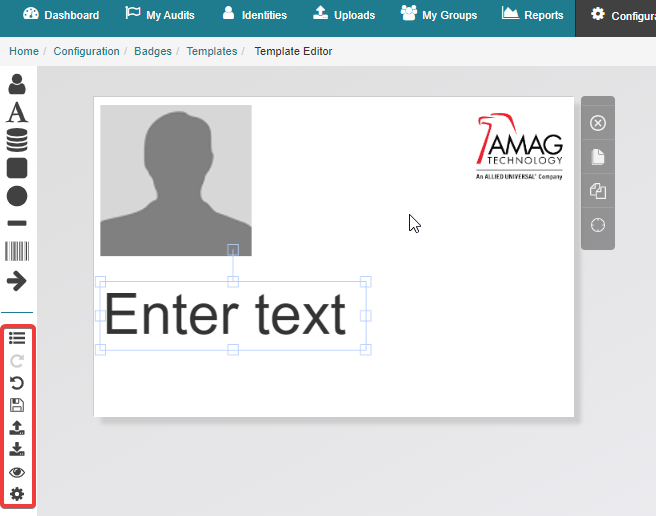
Icon
Description

Return to Badges List: The user is taken back to the main page with the list of available badge templates. User will be asked to save or discard any unsaved changes before leaving the Template page.

Undo or Redo: The user can undo / redo any unsaved changes they have made to the template.

Save: Allows the user to save the badge template.

Import: Badge templates can be imported into the system as required. Only templates that were created in CONNECT (.badge file format) are supported. This provides a means to “copy” badge template by exporting and importing the template with a new name.

Export: Allows the user to export the template to a file. This is useful for keeping a backup of the template, or making a copy to import as a new template.

Preview: Allows the user to preview the current badge design.

Settings: The user can make the template active/inactive and assign the template to specific Buildings, Employee Types , Identity categories and / or Departments
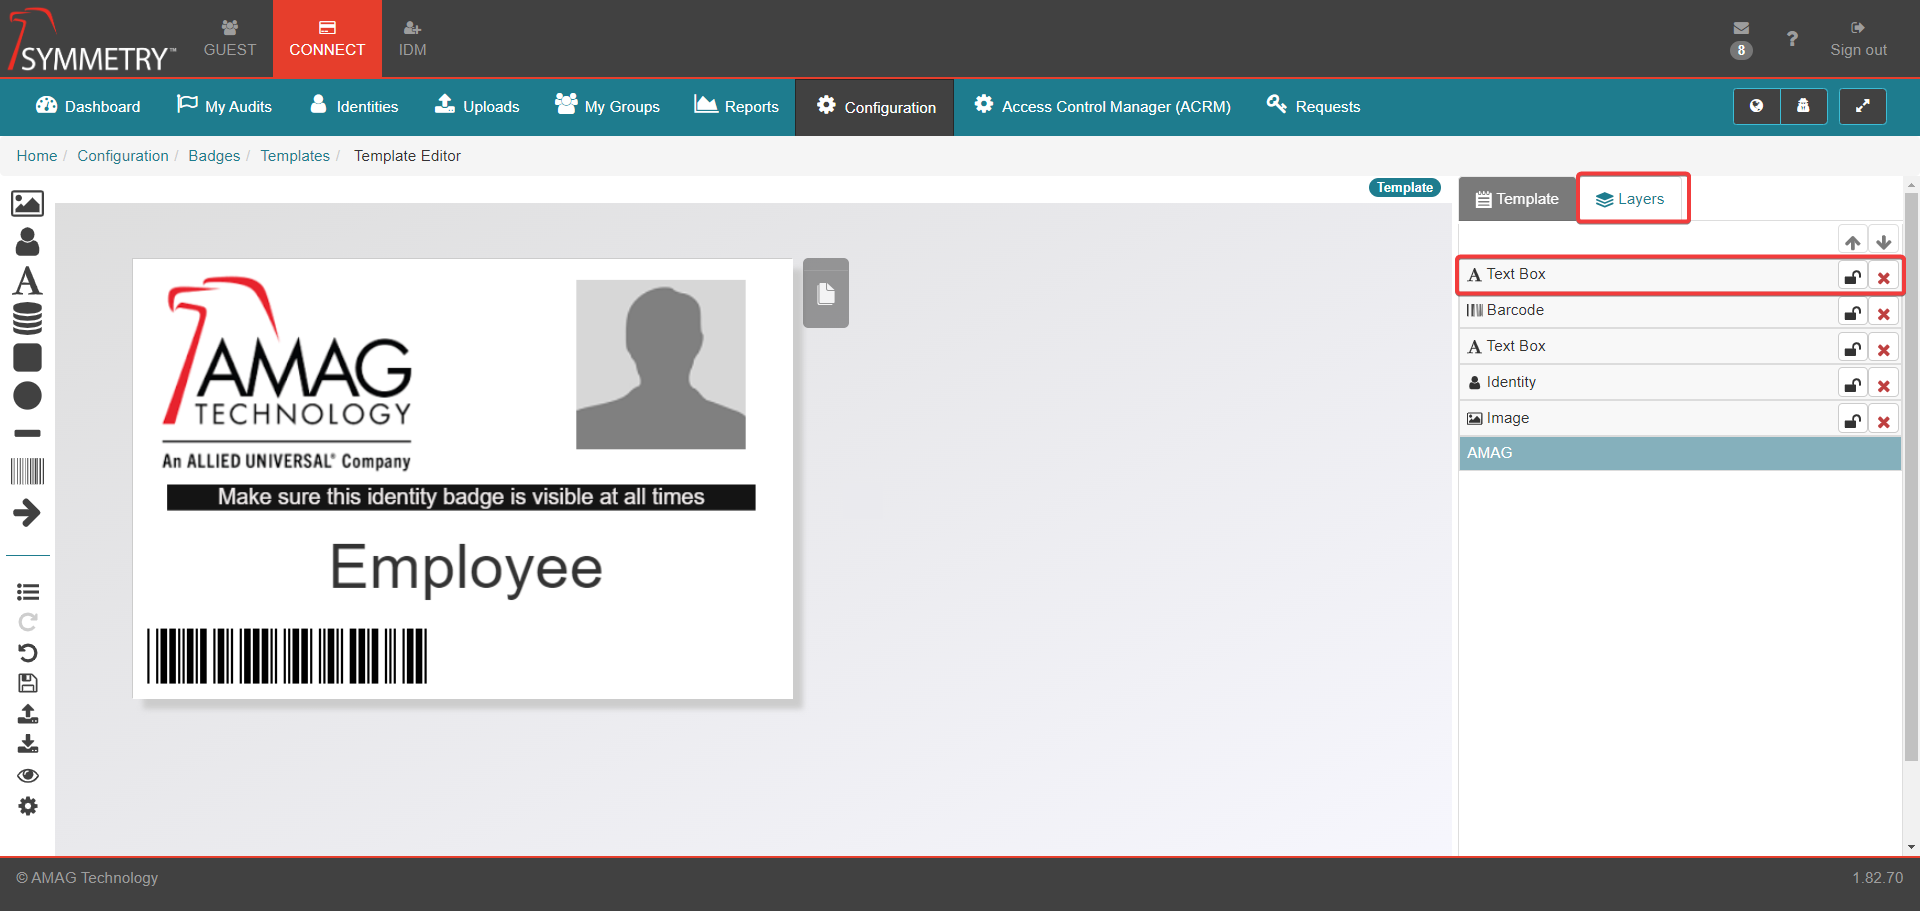
The Layers tab allows the user to see/edit each individual layer that has been added to the template. These layers can be locked or unlocked. If the layers are selected to be locked (clicking on the unlock/lock icon button) it prohibits the layer being edited or moved. Each layer can also be deleted by clicking on the Delete icon button.
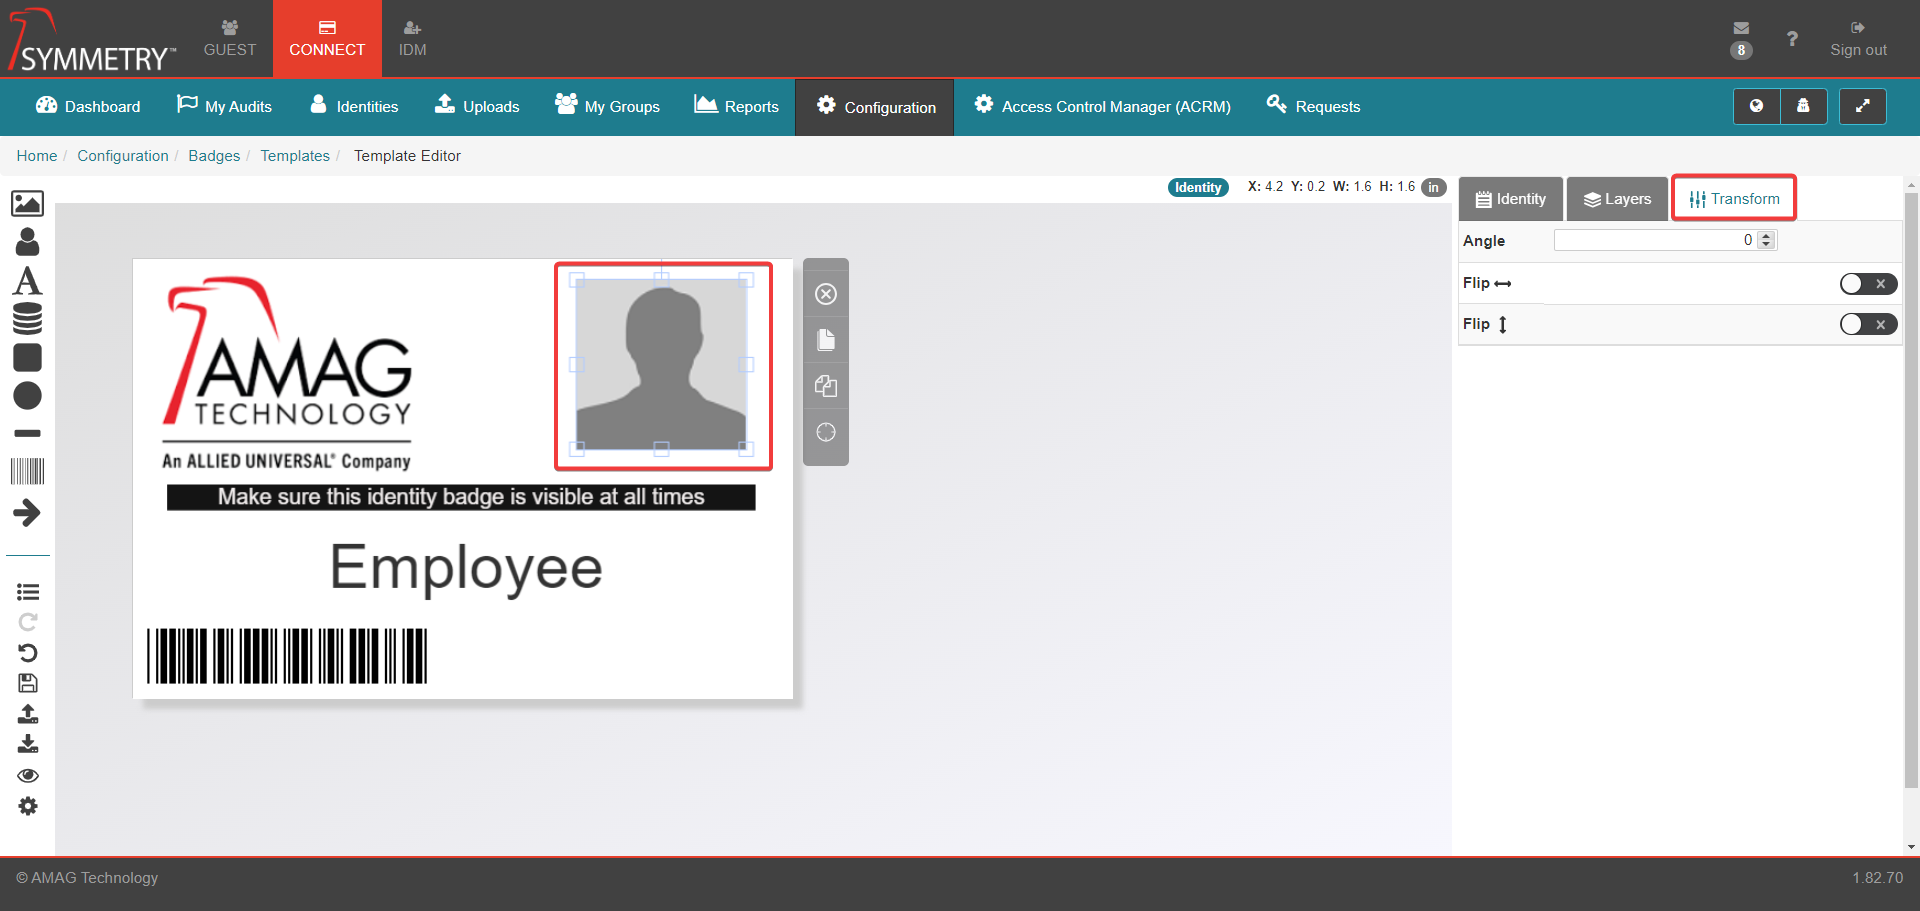
The Transform tab allows the selected icon/layer to be transformed within the template. the transform options are:
Angle: Change the angle of the item in Degrees (-)180° to (+)180°
Flip (sideways): Flip the item left or right (e.g. highlighting a arrow pointing right and turning 'Flip Sideways' ON will transform the arrow to point to the left)
Flip (up or down): Flip the item up or down (e.g. highlighting a Logo and turning 'Flip up / down' ON will transform the Logo to display it upside down)
To edit an existing template, click the Edit icon button to the right of the badge template. The badge template can also be deleted by clicking on the Delete icon button.
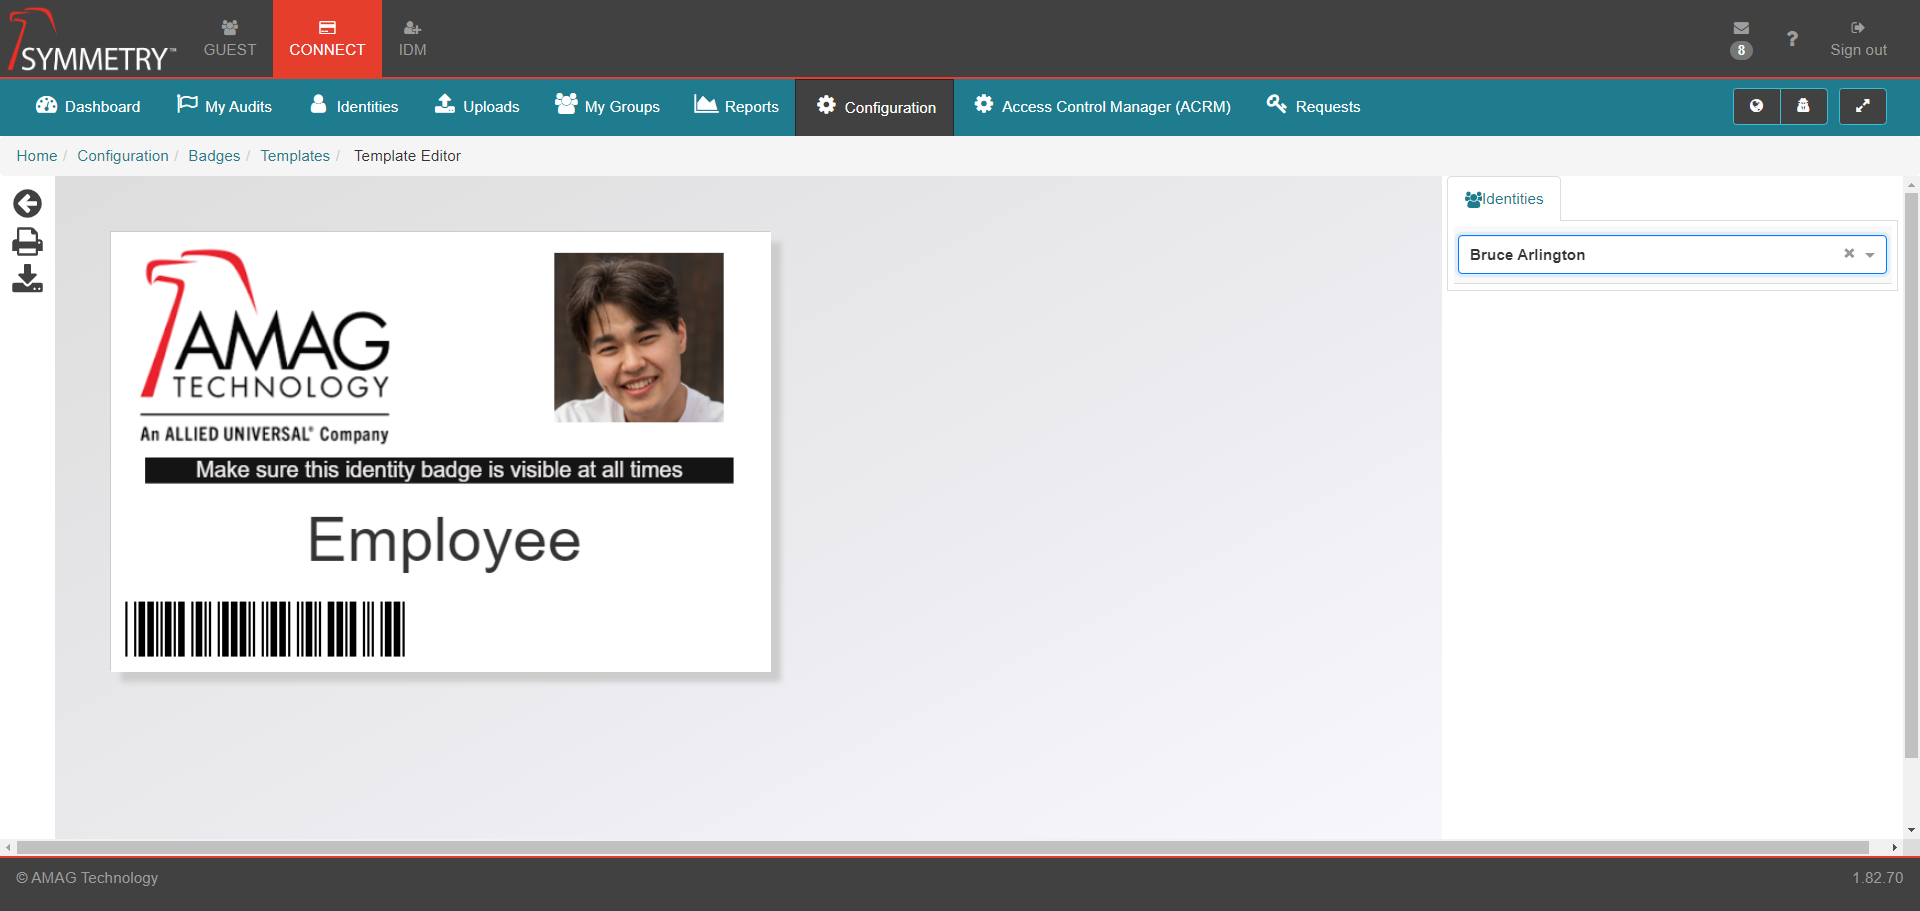
Badge Template Preview
As stated above, clicking Preview allows the user to see a preview of the badge design. The user must search for a specific Identity within the Identities section in order to see a preview of the badge template with the identity's picture used. The preview can be printed and/or exported from this screen by clicking either the Print Badge Template icon button or clicking the Download Badge Preview icon button.
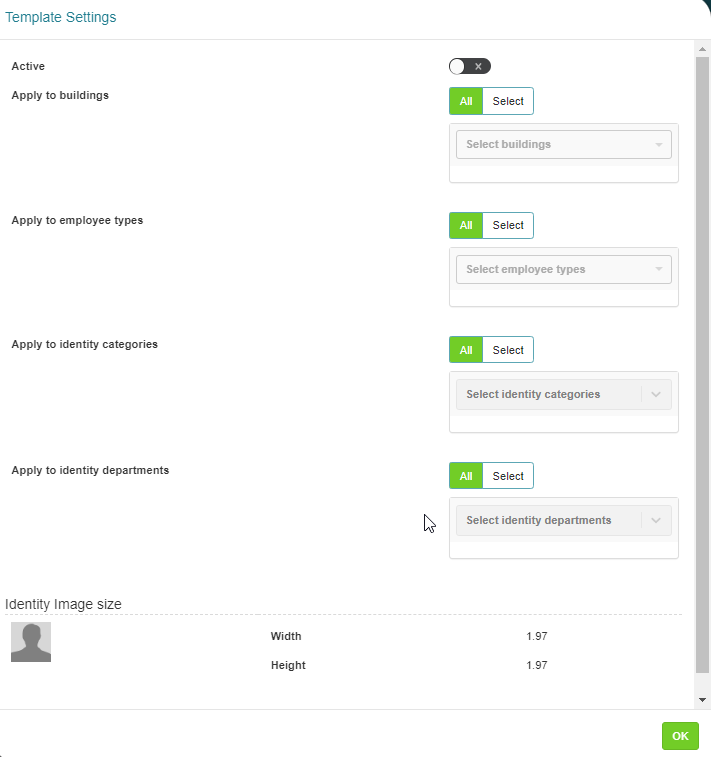
Badge Template Settings
Clicking the Settings icon will display a list of settings related to the badge template.
Note
Badge templates are inactive by default. Please ensure the template is set to active when creating a new badge template.
Set the badge template to Active.
Select the Buildings the template applies to (or select all buildings).
Select the employee types the template applies to (or select all employee types).
Select the Identity Categories that the template applies to (or select all).
Select the Identity Department that the template applies to (or select all).