Rules
CONNECT > Configuration > Rules:
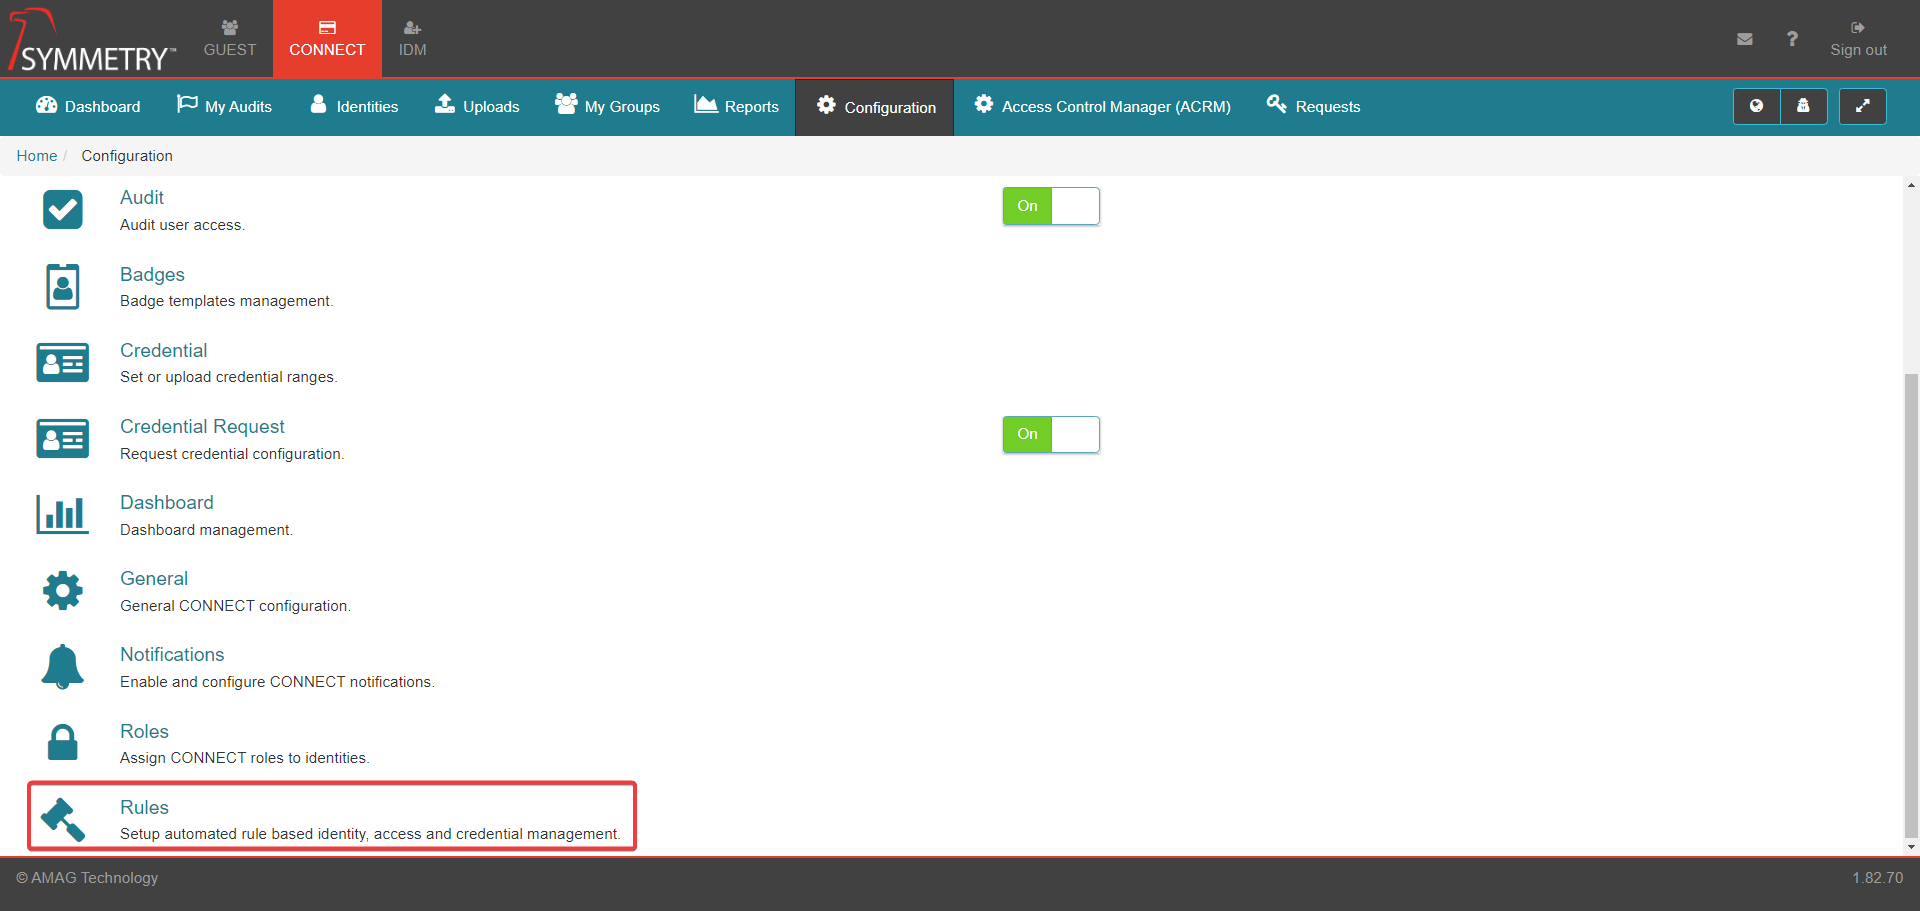
CONNECT Rules configuration allows the user to configure rules related to automatic Access Group assignment and expiration. Within this section a user is able to:
Create and manage Access Group Rules, which assign Access Groups to various Identities based on their attributes.
Configure specific Access Groups to be Auto Approved; if a user requests the Access Group, it is assigned without requiring any approval.
Configure rules to automatically suspend Credentials after a specified period of inactivity for specific Identity Types.
Configure rules to automatically expire Access Groups after a specified period of inactivity for specific Identity Types.
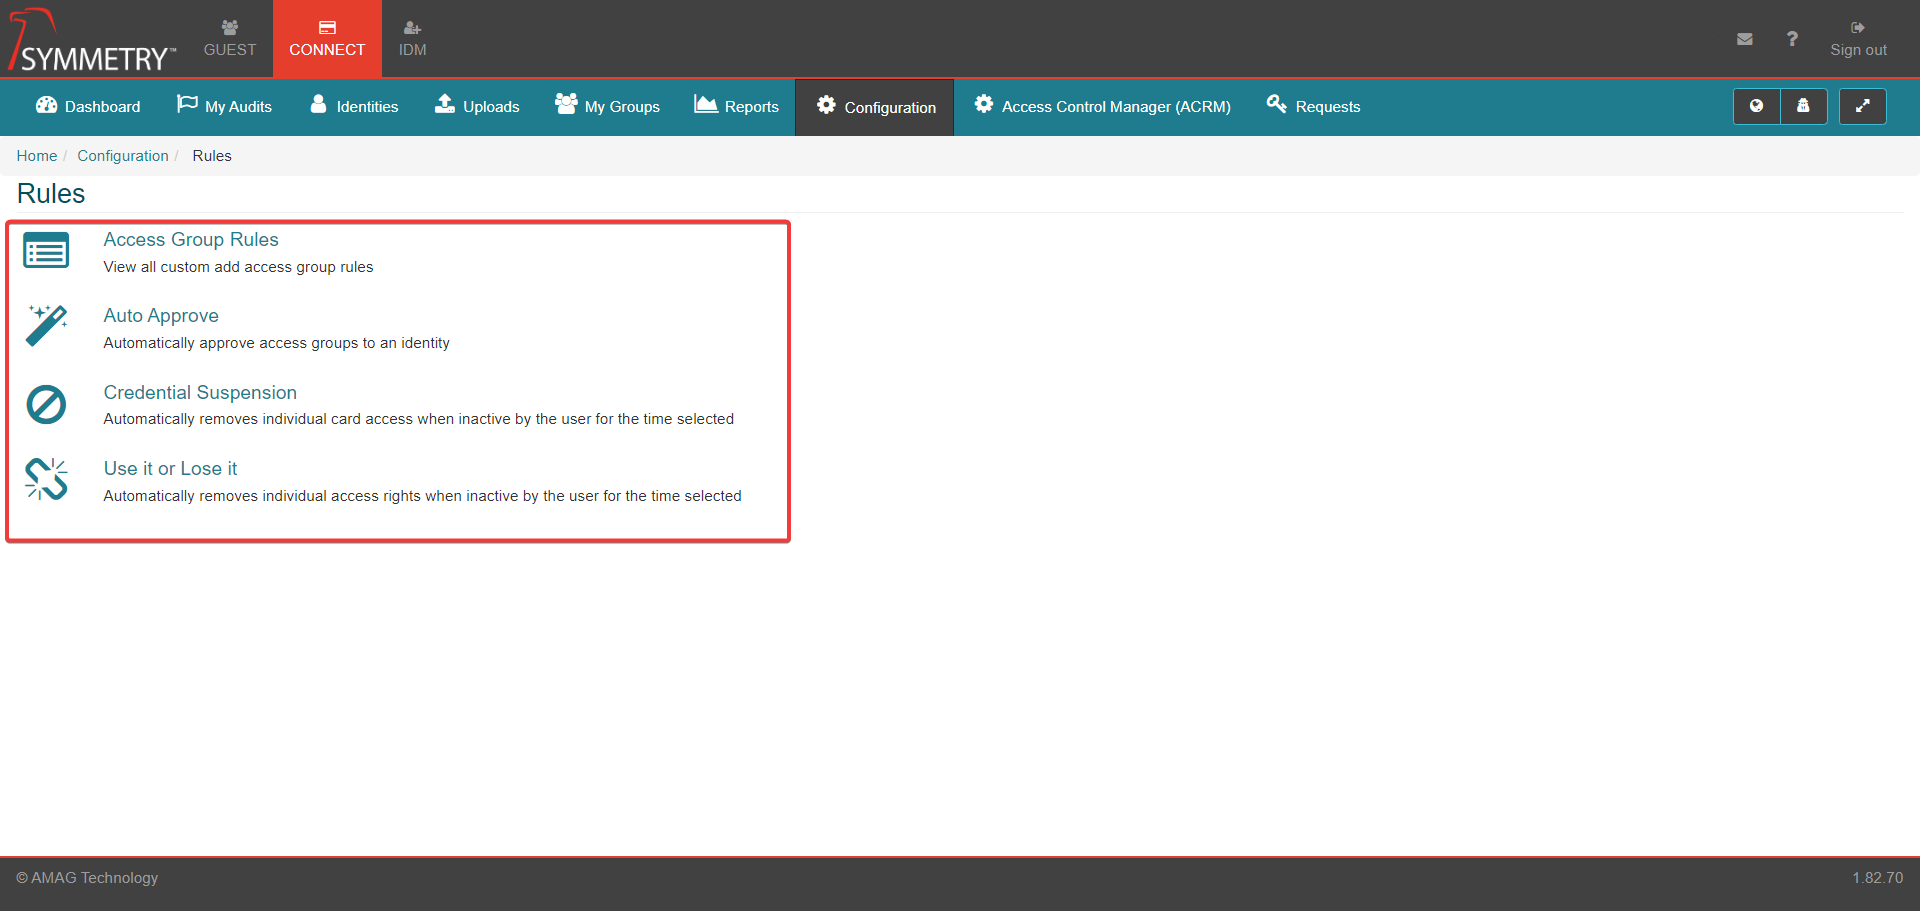
Access Group Rules
Access Group Rules allow the Administrator to configure parameters to determine whether or not a user should be able to have a specific Access Group added, should be able to request a specific Access Group or should be able to approve a request for a specific Access Group.
Selecting Access Group Rules will display a list of existing rules to the user (if existing rules have been created). The user is able to edit/delete the existing rules if required.
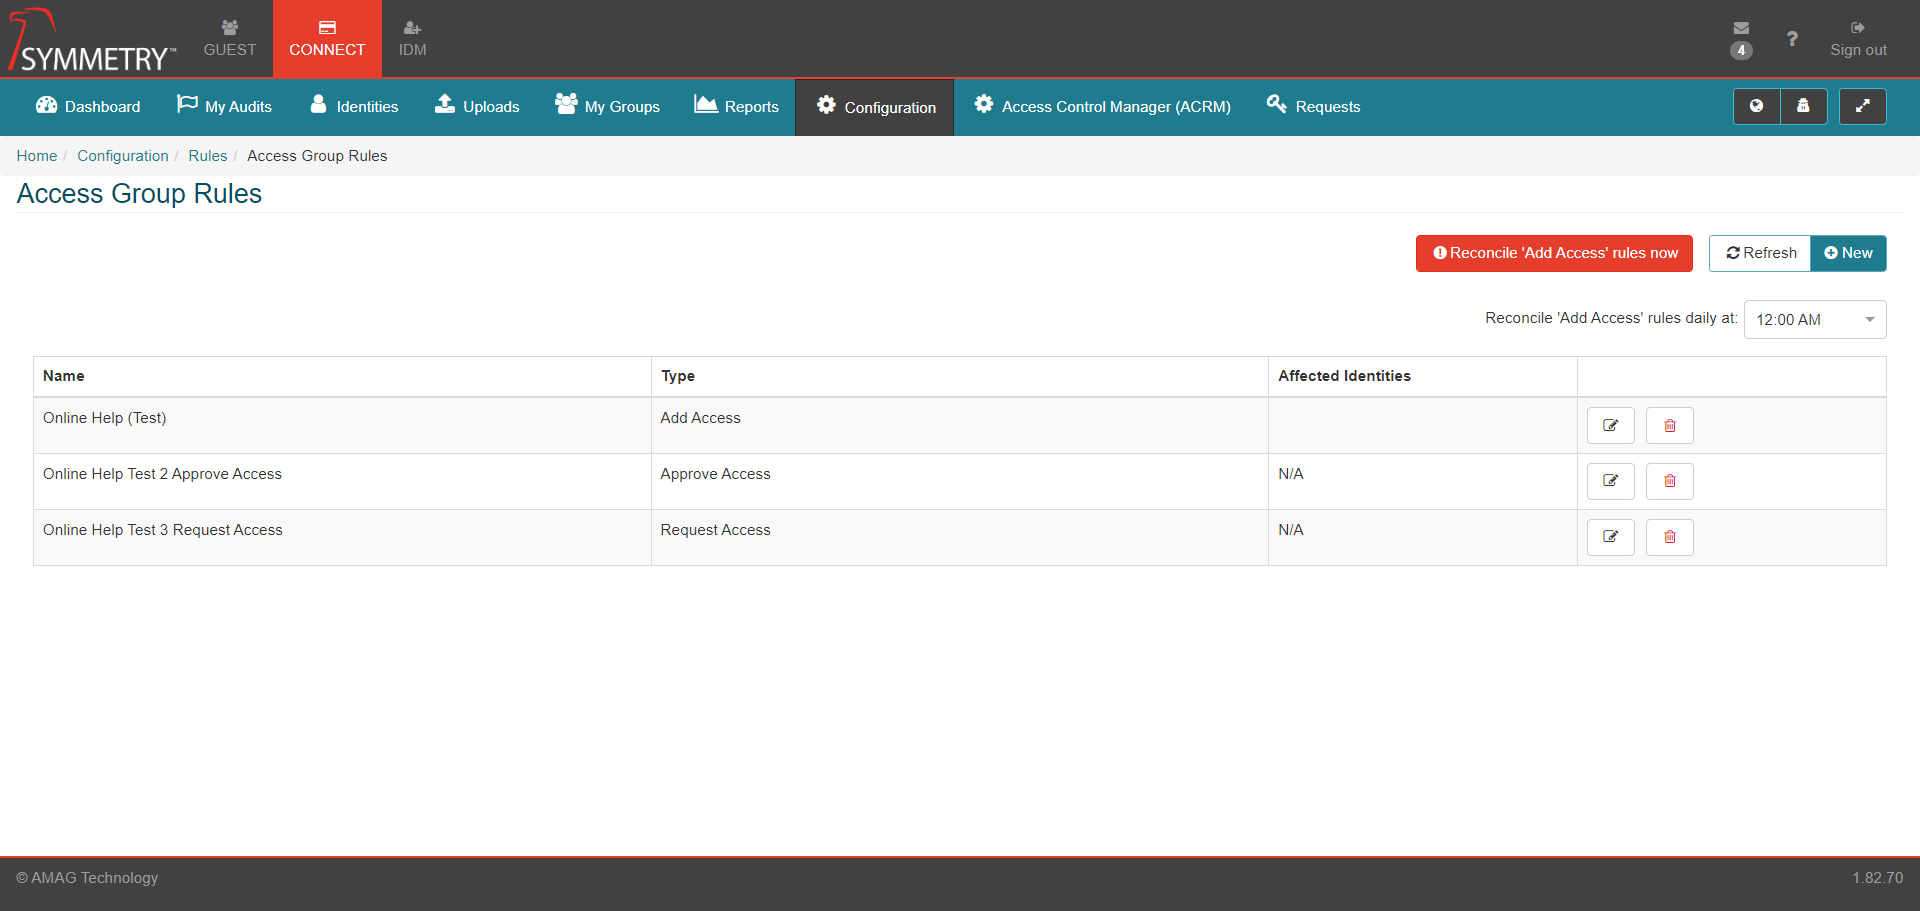
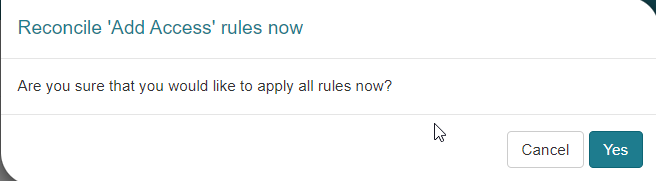
Clicking the Reconcile 'Add Access' rules now button will cause the system to review all existing identities and make sure they have the correct Access Groups assigned to them per the rules configuration of the system. The user will be asked to confirm to Reconcile 'Add Access' rules now by clicking the Yes button when prompted.
Note
There is an automated process that automatically reconciles all Add Access rules daily at the time configured in the system (in this example, the system has been configured to reconcile at midnight).
Click the New button to create a new rule.
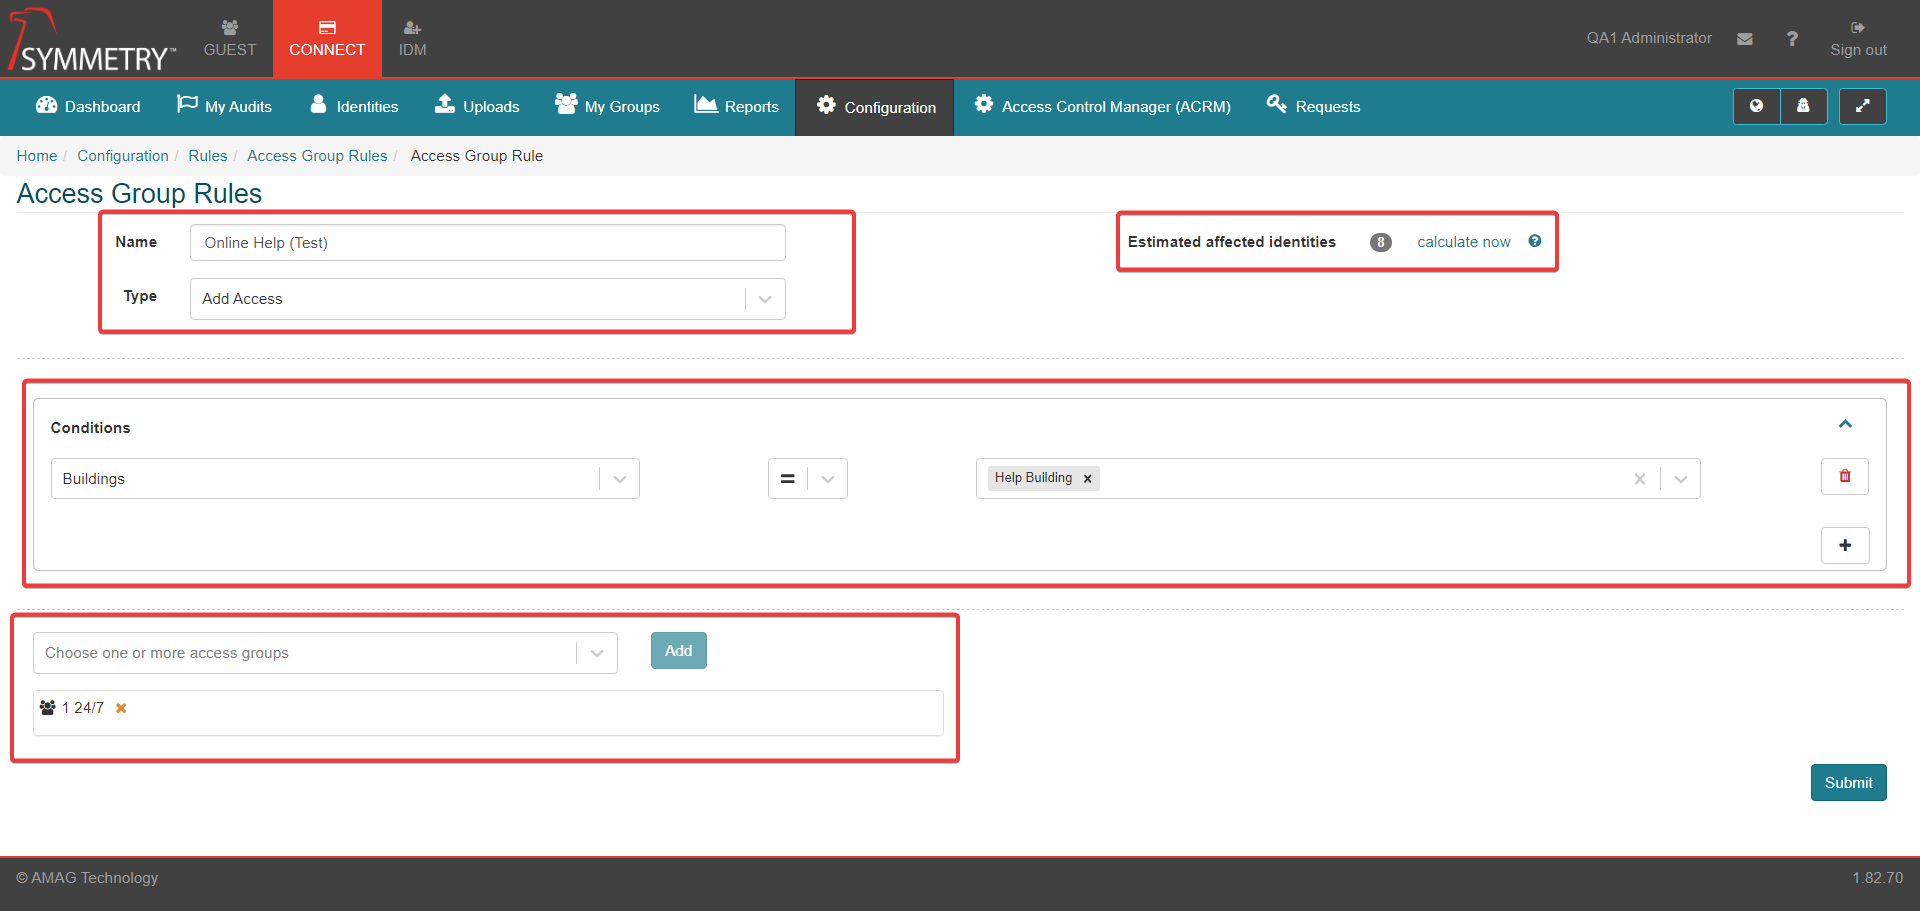
Select a Name.
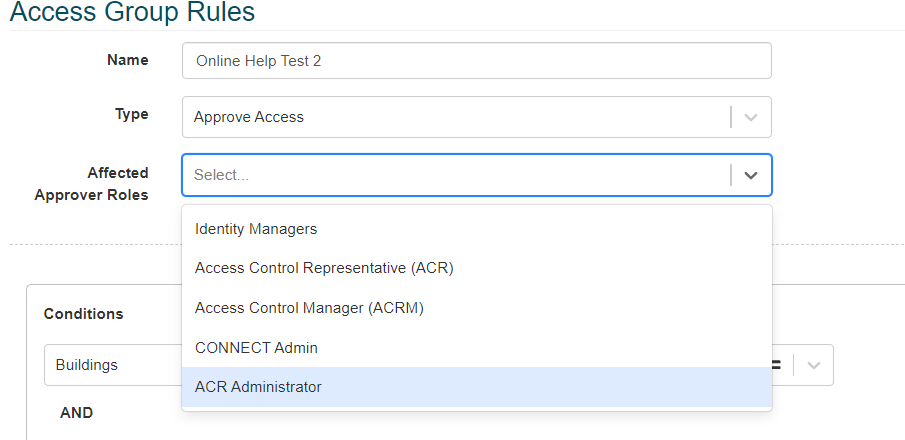
Select one or more options from the Affected Approver Roles dropdown list:
Identity Managers
Access Control Representative (ACR)
Access Control Manager (ACRM)
CONNECT Admin
ACR Administrator
Configure one or more Access Conditions for the rule. Clicking the Add icon button will allow multiple Access Conditions to be added, each condition must also have Equal to or Not equal to selected. Clicking the Delete icon button will delete the Access Condition it is associated with.
Note
All fields on the CONNECT Identities screen that have not been configured to Hide in IDM Screen Configuration (including User Defined Fields) will be available for selection in the Access Conditions list. Administrator can also select one or more Access Groups as Access Conditions if desired.
Note
Certain field types (e.g. Dates, Times, Numbers) will have, in addition to Equal To or Not Equal To, selectable parameters for Greater Than, Equal To or Greater Than, Less Than and Equal To or Less Than .
Note
Access conditions determine which Identities apply to the rule. For example, the image below shows Access Conditions for the "AMAG" and the "Help" Building and “24/7” Access Groups. Any Identity assigned to these specific Buildings and Access Groups will be assigned to this rule.

Select one or more Access Groups. Any Identities that are assigned to this rule, will have these Access Groups assigned to them automatically by the system. Click the Add button to apply the Access Group to the rule.

Note
To see more about Access Groups auto-assigned to Identities please review the Assigning an Access Group section of this guide.
Once all fields are completed, Click the Submit button to save and apply the Access Group rule.
Note
when creating a Add Access Rule, the field Estimated affected identities will appear and user can click 'calculate now' link to confirm the number on completion of the Rule.
Auto Approve
If enabled, auto-approval rules allow specific Access Groups to be configured for automatic approval (i.e. no approval from an ACR or other user is required). Auto-approval rules are intended to be used for lower security areas that don’t require approval, but are not assigned to Identities automatically. Specific use cases include:
Areas that are not high-risk, but are not typically assigned to most users.
Areas that are auto-assigned by an Access Group rule to local users, but are not assigned to users from a different region.
If an Identity requires access to this area, they simply need to place an access request and the group will be assigned to them automatically. For more information on access requests, please review Identities section of the guide.
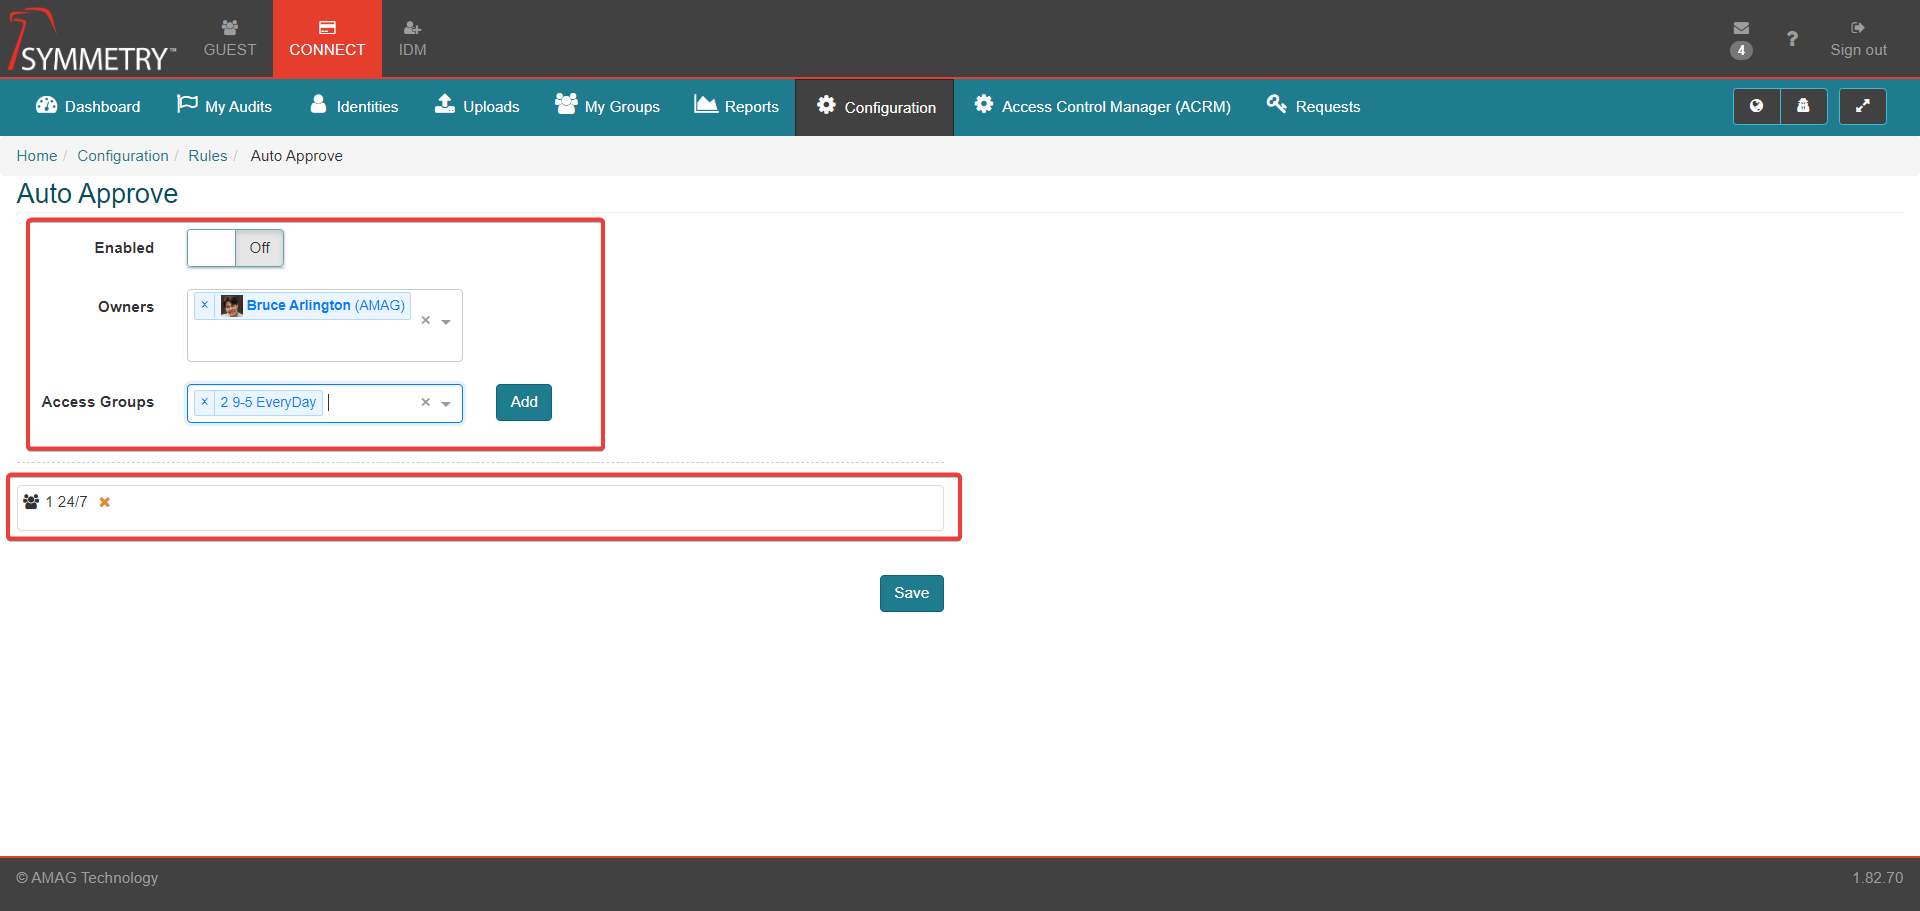
Select On to enable Auto Approve.
Select an Owner/Owners of the Auto Approve rule. Single or multiple identities can be selected.
Select an Access Group and click the Add button to apply the Access Groups to the rule. Multiple Access Groups can be applied.
Click the Save button to apply and save the Auto approve rule.
The image below shows an auto-approval rule configured in CONNECT.
Note
Multiple Access Groups can be assigned to the auto-approval rule.
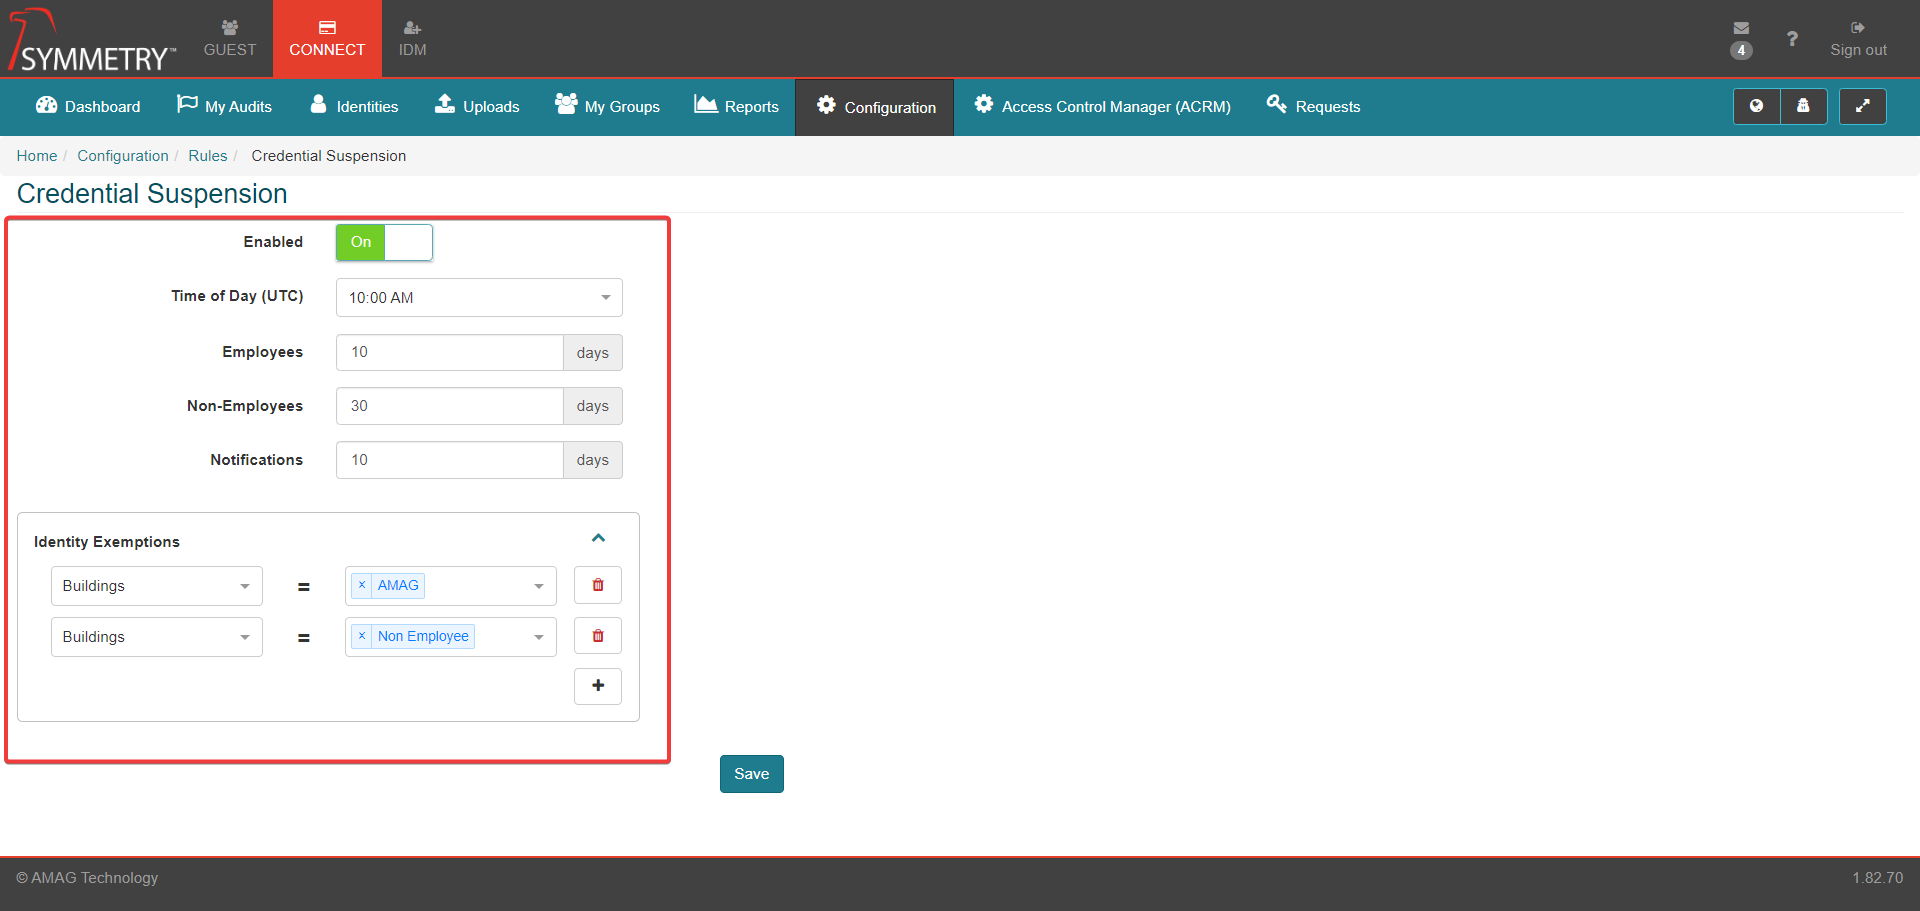
Credential Suspension
Enabling the Credential Suspension notification will allow a notification to be sent out at a specified time (in UTC) when specific credentials assigned to a Identity may expire as they meet the conditions of the Credential Suspension rule.
If set to On, an administrator is able to specify the number of inactive days before the Credential expires for both Employees and Non-Employees
The administrator is able to set the number of days in advance of an expiration that an email notification is sent out.
The administrator is able to configure Identity Exemptions. This allows the administrator to specify specific attributes that would exempt identities from having the rule apply to them based on one or more Buildings, one or more Companies, a Department, one or more Employee Types and/or a Identity Category.
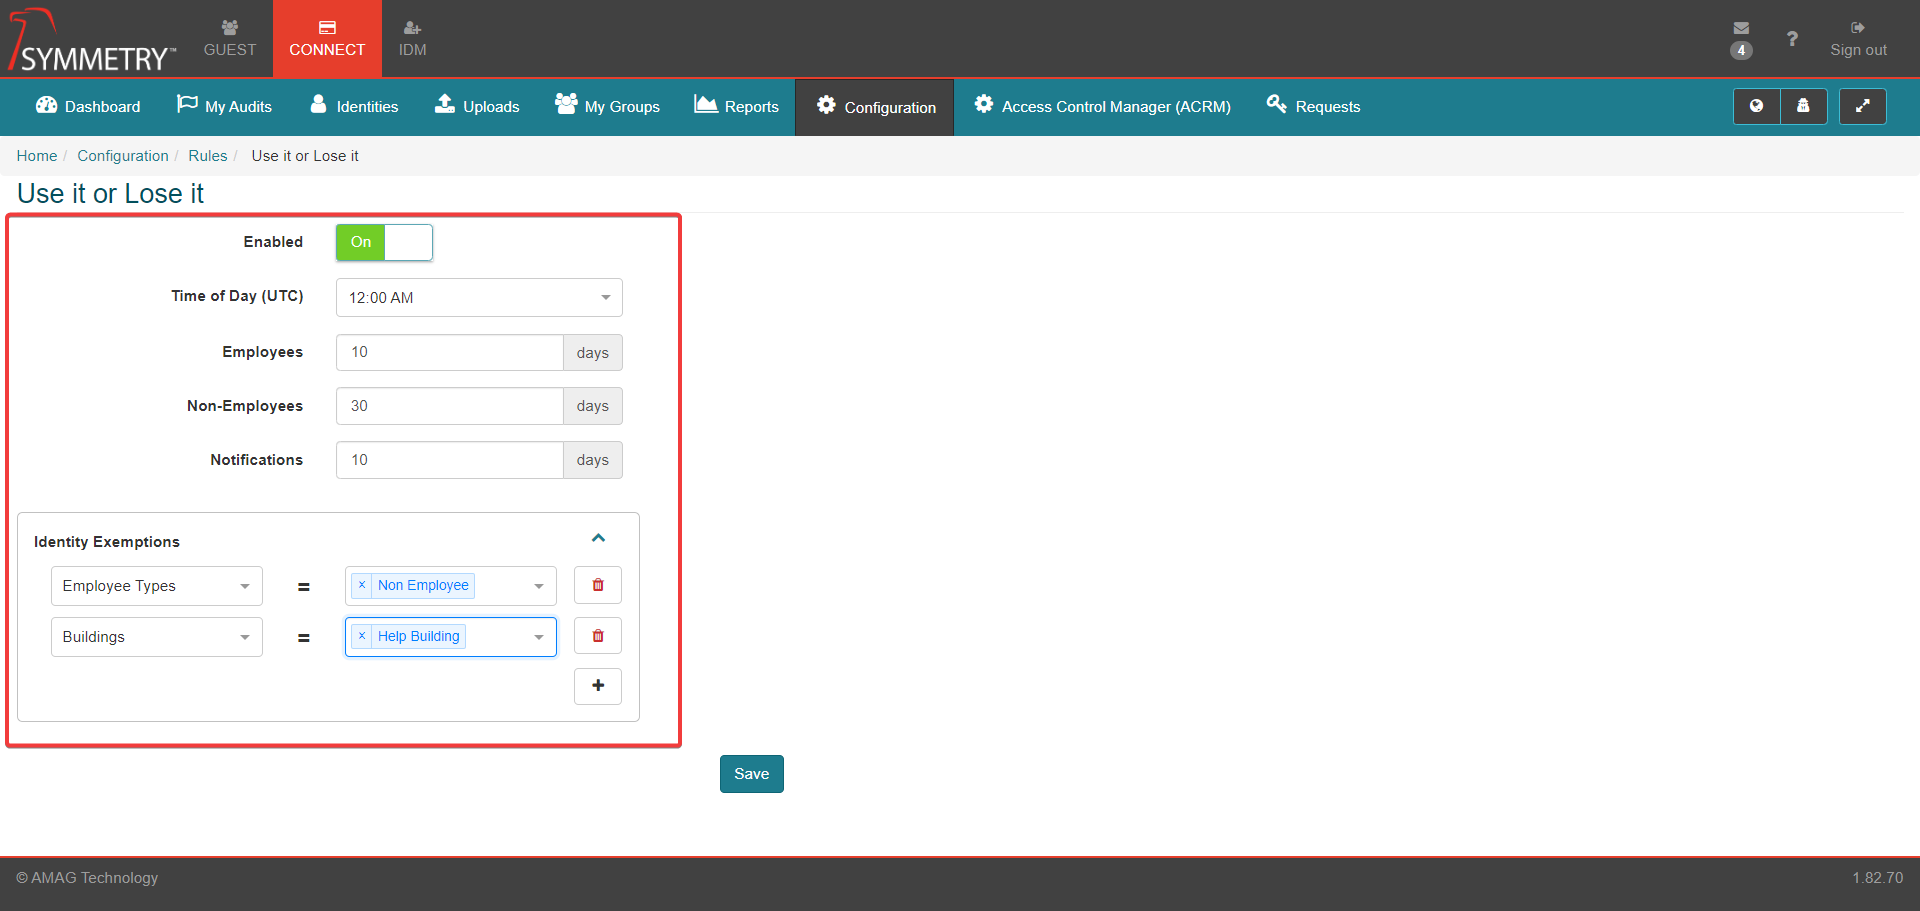
Use it or Lose it
Enabling the Use It or Lose It function allows a notification to be sent out at a specified time (in UTC) when specific access groups assigned to a Identity may expire as they meet the conditions of the Use it or Lose It rule.
If set to On, an administrator is able to specify the number of inactive days before the specific Access Group expires for both Employees and Non-Employees.
The administrator is able to set the number of days in advance of an expiration that an email notification is sent out.
The administrator is able to configure Identity Exemptions. This allows the administrator to specify specific attributes that would exempt identities from having the rule apply to them based on one or more Buildings, one or more Companies, a Department, one or more Employee Types and/or a Identity Category.